eHow may earn compensation through affiliate links in this article.
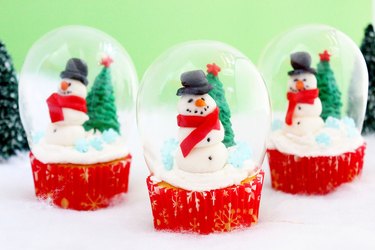
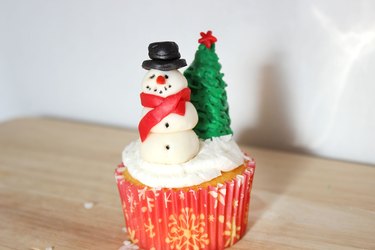
Snow globes are so magical — under that transparent sphere, a miniature wintry world stands still in suspended animation. And if you find wonder in snow globes, you'll love these snow globe cupcakes. Showcased under the edible globes are snowmen bundled up in comfy scarves and pine trees topped with stars. This is a treat that will make everyone believe in holiday miracles, even before they take a bite.
Video of the Day
Video of the Day
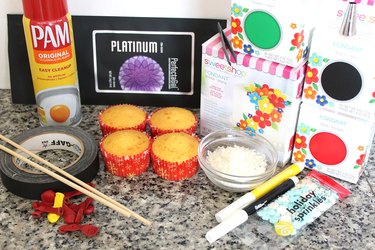
Things You'll Need
Skewers or chopsticks
Tape
Gelatin sheets
Cooking spray
Styrofoam
Fondant roller
Round piping tip
Orange fondant
Cupcakes
Frosting
Shredded coconut
Holiday sprinkles
Make the Globes
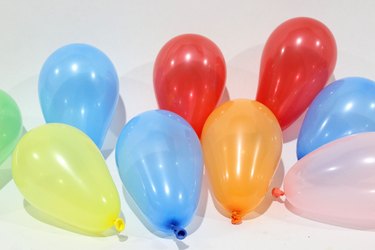
Step 1: Inflate the Balloons
To make the clear snow globes, we'll start by blowing some balloons. Water balloons, which are very small, are the right size for this project. Regular balloons are too big. Inflate the balloons until they are about three inches at their widest point.
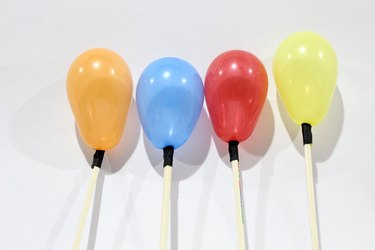
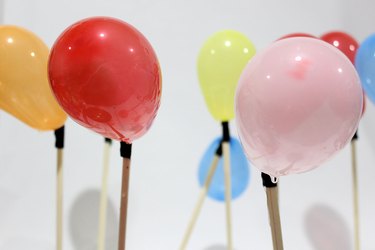
Step 2: Tape Balloons to Skewers
Tape the tied ends of the balloons to skewers or chopsticks. These will help keep the balloons standing up straight after they're dipped in gelatin.
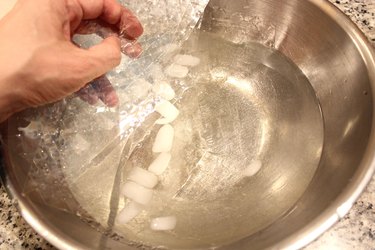
Step 3: Soak the Gelatin Sheets
Gelatin is the secret ingredient in making the clear globes. Gelatin comes in various forms and grades, but I recommend platinum grade gelatin sheets. They result in globes that are sturdy and clear, without a yellow tinge. Start by separating 12 sheets of gelatin and soaking them in ice water for about 10 minutes.
Step 4: Melt Gelatin
Remove the gelatin, which will now be limp and rubbery, from the ice water and place in a heat-safe bowl. Add three tablespoons of the cold water to the bowl.
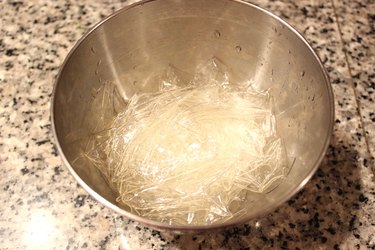
Heat a saucepan of water. Once it boils, turn off the heat and place the bowl containing the gelatin in the saucepan. The heat of the water under the bowl will melt the gelatin. Stir the gelatin until it is completely melted.
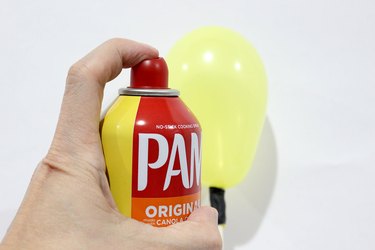
Step 5: Lightly Grease the Balloons
Apply some cooking spray onto your hands, and rub your hands together. Then wipe them on a paper towel to remove any excess oil. Your hands should look moisturized, not oily. Next, rub your hands over the surface of the balloons. This light coating of oil will prevent the balloons from sticking to the gelatin when it hardens. Reapply cooking spray to your hands after every three balloons.
Step 6: Dip the Balloons in Gelatin
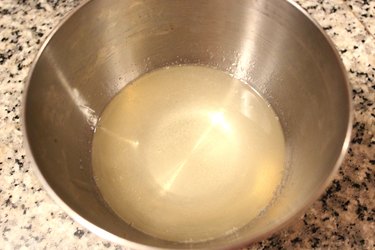
Let the gelatin cool to room temperature. Dip the balloons in the gelatin, turning the balloons in the bowl so all sides are covered. It also helps to tip the bowl so the gelatin can reach the sides of the balloon.
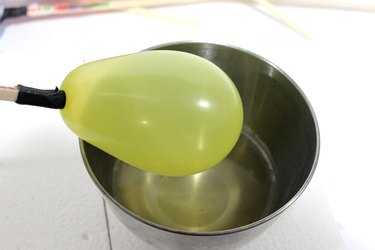
Stick the skewers or chopsticks in styrofoam to allow the balloons to stand and not make contact with adjacent balloons. After 10 minutes, dip the balloons one more time in the gelatin to help make the globes more sturdy. Let the balloons air dry for at least 24 hours to harden. When you tap them with your fingernail, they should feel and sound like plastic.
Step 7: Pop the Balloons
Pop each balloon with a pin. The balloon will immediately contract, and the gelatin sphere will probably contract with it. Don't worry, the sphere is actually very flexible and will pop back into shape. Remove any balloon residue and push out the globe with your fingers.
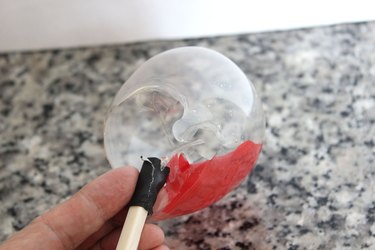
Step 8: Trim the Bottoms of the Globes
The spheres will be uneven at the bottom, so cut them in a straight line until they sit upright. I like to test them on an actual cupcake as well to make sure they sit properly. If the globes are still a little jagged at the bottom, that's okay, as the frosting will cover up any imperfections.

Make the Trees
Step 1: Shape the Fondant
Roll a piece of green fondant between your palms to create a cone shape of about two and a half inches high. Note that your final tree will be shorter than that — as you work with it, gravity will do its trick and the tree will end up around two inches.
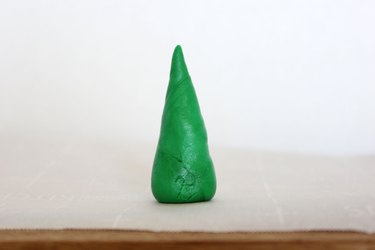
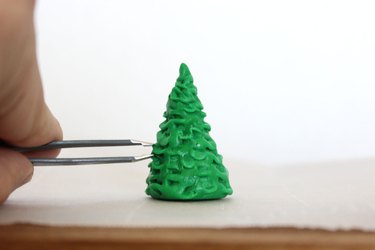
Step 2: Fluff the Tree
Take a pair of tweezers and pinch all around the sides of the tree to create the look of individual boughs.
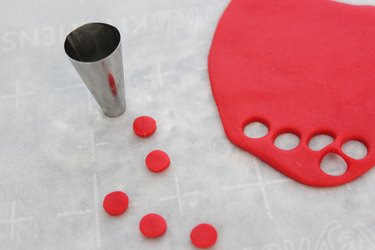
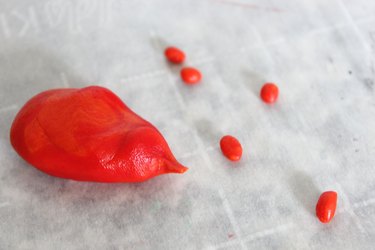
Step 3: Add a Star
Flatten a piece of red fondant to about an eighth of an inch using a fondant roller. Press the small end of a round piping tip into the red fondant to create little circles.
Use the tweezers to pinch five points in the circles to create star shapes.
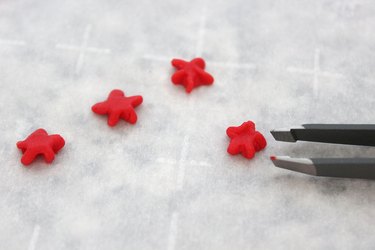
Attach the stars to the top of the trees. A dab of water on the back of each star will help it adhere to the tree.

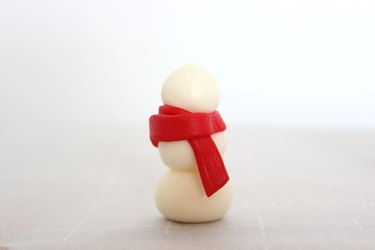
Make the Snowmen
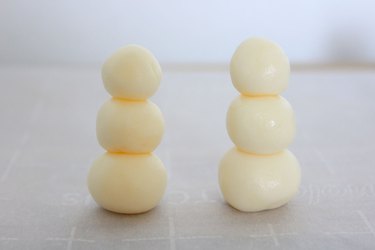
Step 1: Roll Snowballs
For each snowman, roll white fondant into three snowballs of ascending size, with the largest being no more than one half inch in diameter.
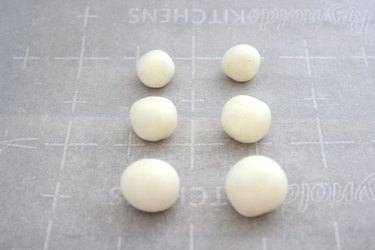
Step 2: Make the Body
Stack the three snowballs with the smallest one on top.
Step 3: Add a Scarf
From the flattened piece of red fondant (the one you used to make the stars), cut quarter-inch strips with a knife or pizza cutter. Each strip should be about two inches long.
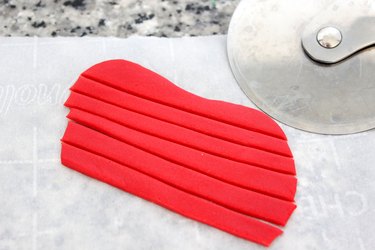
For the scarf, wrap a red strip of fondant around the neck of each snowman, overlapping any extra fondant.
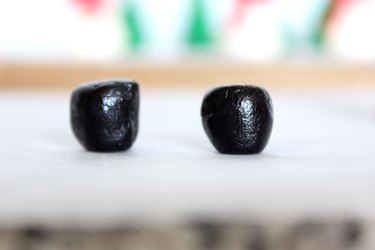
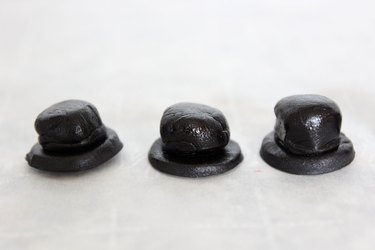
Step 4: Add a Hat
Flatten a piece of black fondant to about an eighth of an inch with a fondant roller. Using the larger end of a piping tip, cut out circles in the black fondant to create the brim of the hat.

Tip
If the fondant gets stuck in the piping tip, just use the blunt end of a skewer to push it out.
Roll a small piece of black fondant into a ball and then flatten the top and bottom, making sure this section is smaller than the brim of the hat.
Attach the top section to the hat brims. If the fondant has dried out and the two pieces don't attach automatically, just dab some water to one of the sections to make it sticky again.
Position a hat on each snowman. Again, if the pieces have dried out, dab a bit of water on top of the snowman's head to make it sticky.
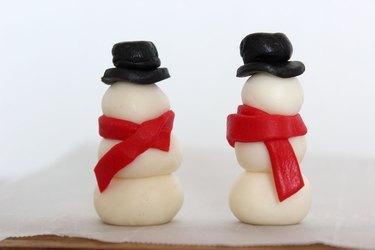
Step 5: Add the Facial Features
With a black candy decorating pen, mark two dots for the eyes and an arc of dots for the smile.

Using orange fondant, roll small dots for the nose, elongating them slightly. I actually did not have orange fondant, so I mixed red and yellow fondant. You can also use an orange or yellow candy decorating pen to just mark a dot for the nose.
Attach the nose to the face.
Assemble the Cupcakes
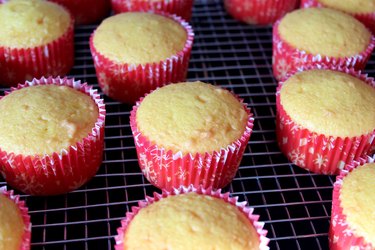
Step 1: Bake Cupcakes
Bake cupcakes from scratch or with a box mix. I used a yellow cake box mix to make my life simple.
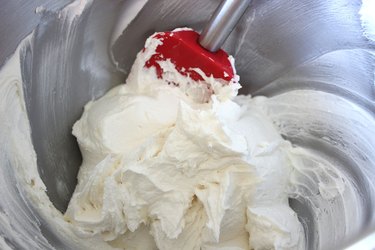
Step 2: Make Frosting
Make a batch of buttercream frosting. While I often buy pre-made frosting, I prefer homemade for this project because of the way it "crusts." When homemade frosting crusts, its edges harden so if you touch it, the frosting maintains its shape without getting on your fingers. Also, I wanted the frosting to be able to hold the tree and snowman in place. Frosting that crusts can do this; store-bought frosting cannot.
My basic recipe for buttercream frosting is to mix one stick of butter, a half cup of vegetable shortening, three cups of confectioner's sugar, one tablespoon of vanilla and one tablespoon of water.
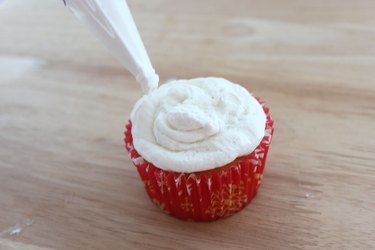
Spread the frosting on the cupcakes with a spatula, or use a piping bag. I prefer a piping bag as it gives me better control. No special piping tips are needed — just snip a hole at the end of the bag.
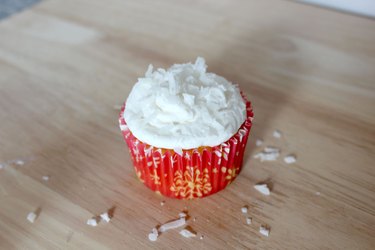
Step 3: Sprinkle Coconut
For more snowy texture, sprinkle some shredded coconut on the frosting. Shaved white chocolate would also work.
Step 4: Position the Snowman and Tree
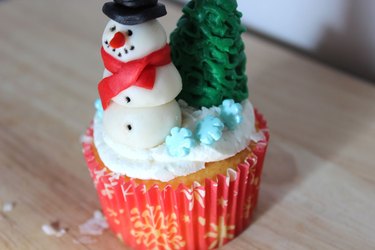
Place the snowman and tree on top of the cupcake. Let them sink into the frosting a little. When the frosting crusts, it will hold them firmly in place.
Step 5: Add Holiday Sprinkles
To accent the white snow with a little color, place some blue snowflake sprinkles on the frosting. Even if you can't find holiday-themed sprinkles, some light blue jimmies would look great under the globe.
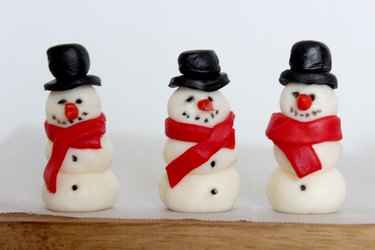
Step 6: Top With Snow Globe
Position the gelatin snow globe over the snowman and tree, and let it sit on top of the cupcake. Notice how you don't see any uneven edges on the bottom of the globe.
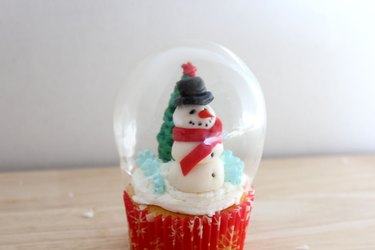
These festive cupcakes really capture the wonder of the season.
