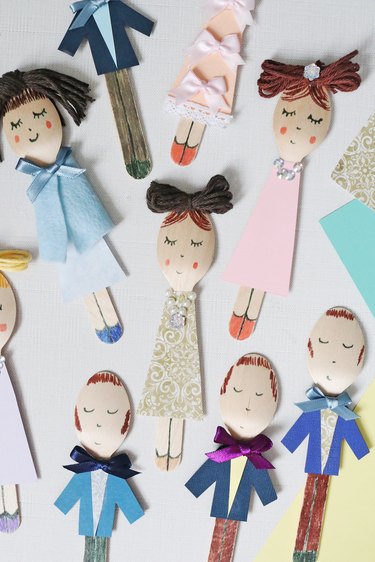
If you're obsessed with all things Regency Era and crafty nostalgia, you'll adore this easy tutorial for Bridgerton spoon dolls. It's inspired by classic doll crafts and paper toys, which have been around for hundreds of years. Each doll uses similar techniques used in paper art crafts, but it features a wooden spoon as the base instead of paper, ensuring a sturdier creation.
Fortunately, you don't need to be a paper craft pro to make these Bridgerton-inspired dolls. The clothing is made of basic shapes, while the yarn hair calls for simple DIY methods. In other words, even if you've never made your own paper dolls before, this charming craft is appropriate for beginners—kids and adults alike!
Video of the Day
Read on to learn how to make a regal set of Bridgerton spoon dolls, complete with tips for customizing each member of the beloved family.
Video: "Bridgerton"-Inspired Dolls Made From Wooden Spoons (Yes, Spoons!)
How to Make a Paper Dress Template
To speed up the doll-making process, create a dress template. Simply cut out a tall trapezoid; the top edge should be approximately the same width as the spoon’s handle. You can also use this to make a jacket for the men—just add arms! Consider making the template out of sturdy cardboard, especially if you plan to create more wooden or paper doll clothes.
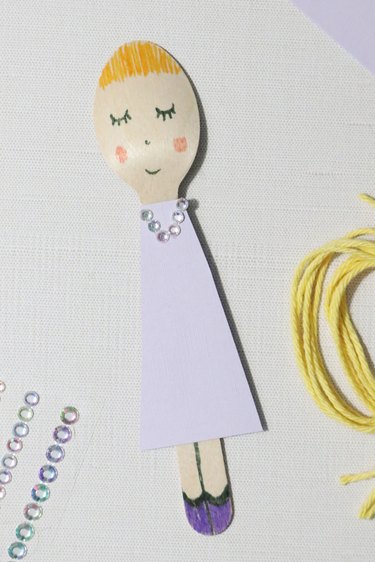
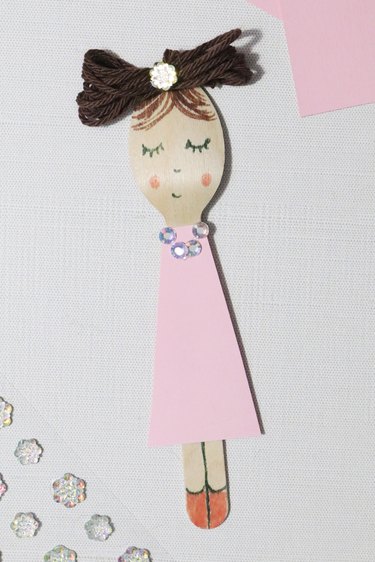
1. Lady Violet
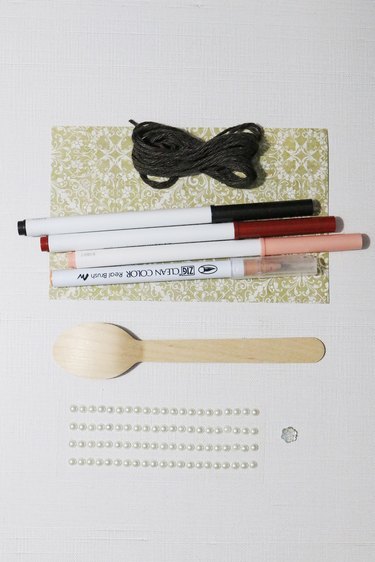
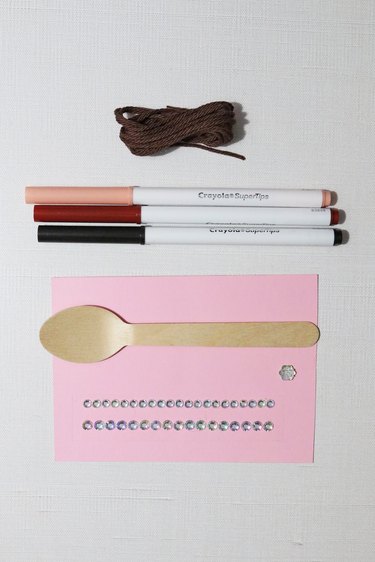
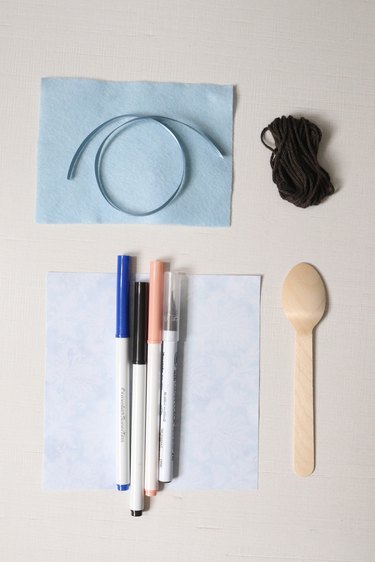
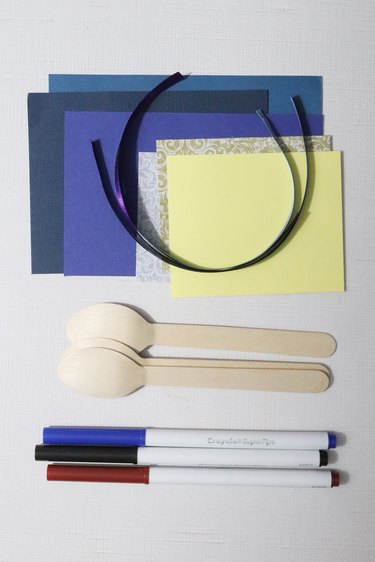
Things You'll Need
Decorative tan or gold paper
Crystal embellishment sticker
Self-adhesive pearls
Self-adhesive crystal embellishment
Brown yarn
Brown, tan, black and pink markers
Wooden spoon
Hot glue gun
Glue stick
Scissors
Warning
If you’re making this project with children, be sure to handle any steps that require paper cutting and hot gluing.
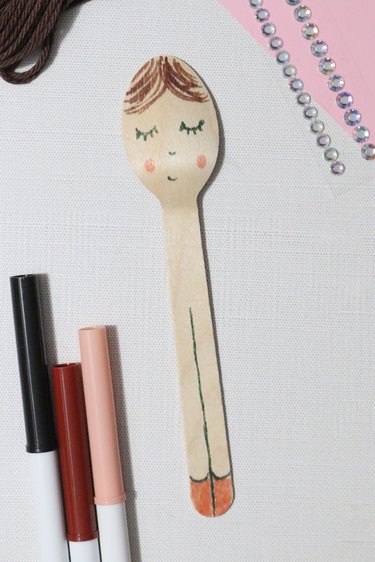
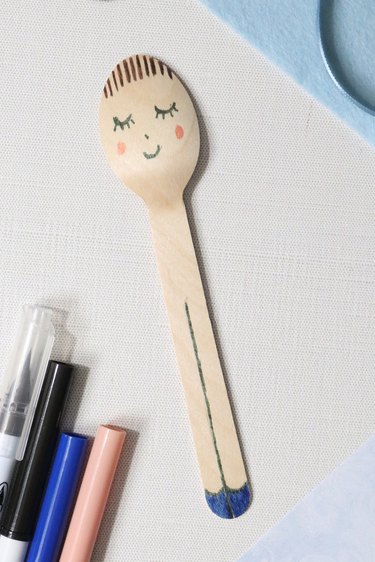
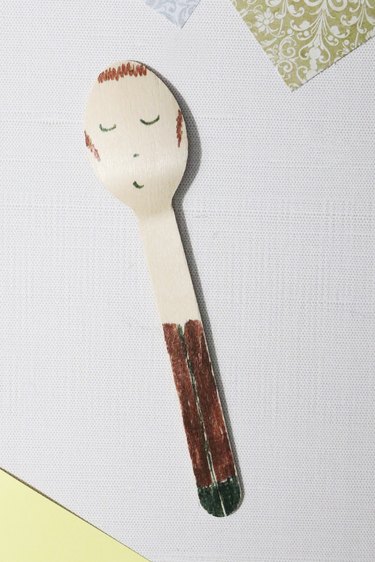
1. Draw hair, face and legs
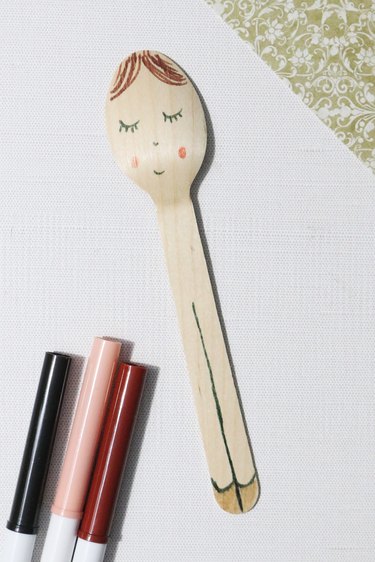
Using a brown marker, draw Lady Violet's hair along the top of the spoon. Add the face, legs and shoes.
Tip
Markers will show up best on wooden spoons, but you can also use colored pencils or crayons.
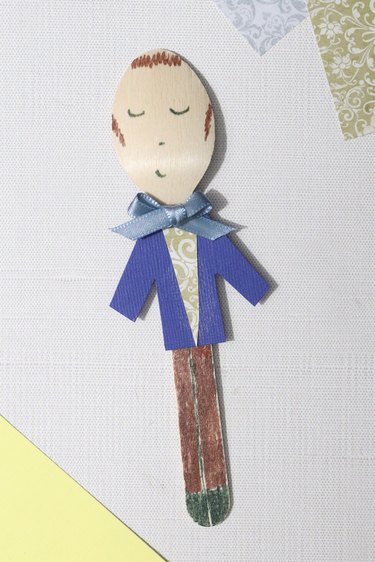
2. Add dress and jewels
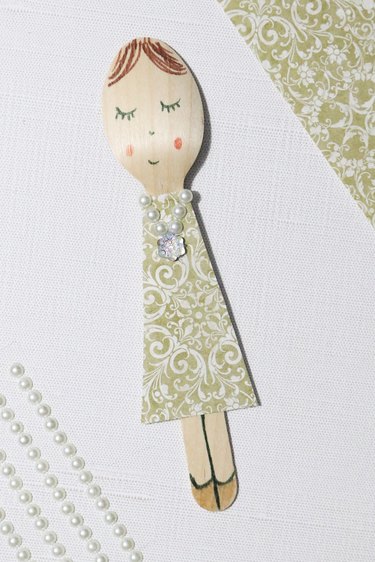
Cut out a dress from decorative tan or gold paper. Attach it to the spoon with a glue stick.
Add self-adhesive pearls (for the necklace) and a crystal embellishment (for the brooch).
Tip
You can find self-adhesive pearls and crystals in the scrapbook section of the craft store.
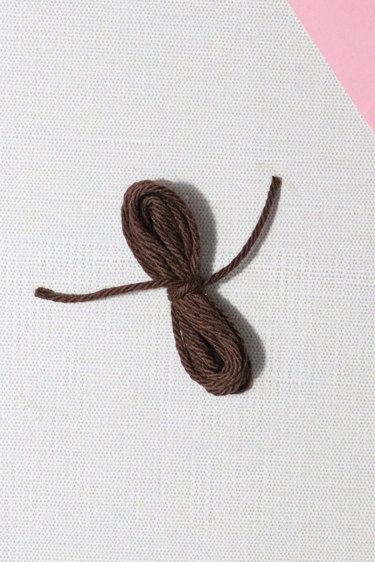
3. Make hair with brown yarn
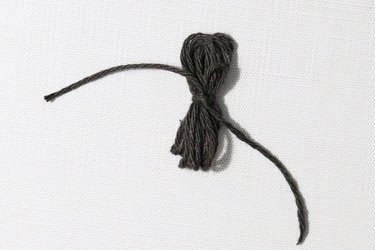
To make Lady Violet's bun, prepare a bundle of brown yarn. You can do this by wrapping yarn around three fingers about 10 times.
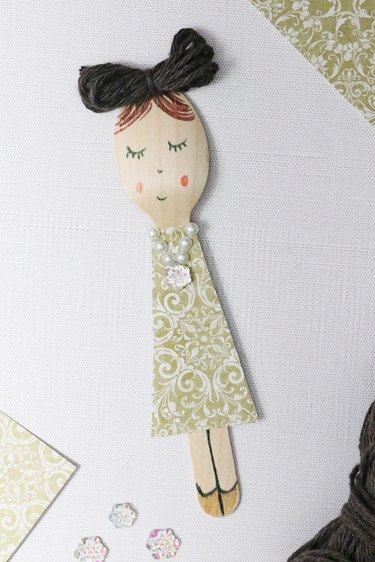
Next, tie a strand of yarn around the center of the bundle. Cut away the excess yarn, then hot-glue it to the top of the spoon.
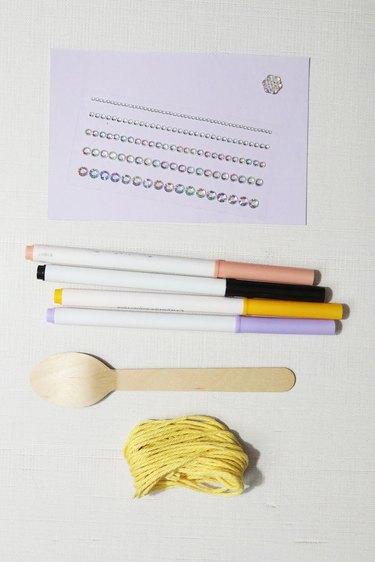
2. Daphne
Things You'll Need
Light purple paper
Crystal embellishment sticker
Self-adhesive rhinestones
Yellow yarn
Yellow, pink, black and light purple markers
Wooden spoon
Hot glue gun
Glue stick
Scissors
1. Draw hair, face and legs
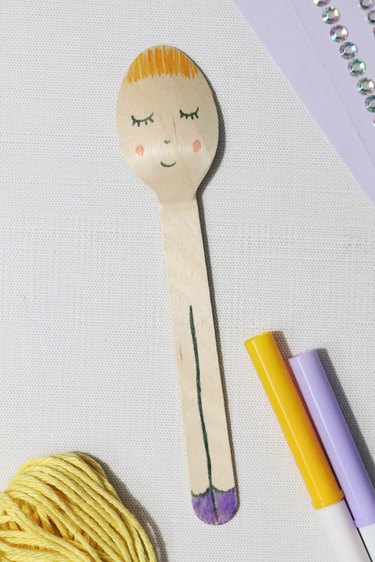
Draw bangs with a yellow marker. Add the face, legs and shoes in a light purple color.
2. Add dress and jewels
Cut out a dress from light purple card stock and glue it on the spoon. Add self-adhesive rhinestones for a necklace.
Tip
If you don’t have light purple paper, you can make your own! Simply coat a sheet of white paper with light purple paint. You can use watercolors or acrylic paint, depending on the look you’re going for. Let dry and cut as usual.
3. Make ponytail with yellow yarn
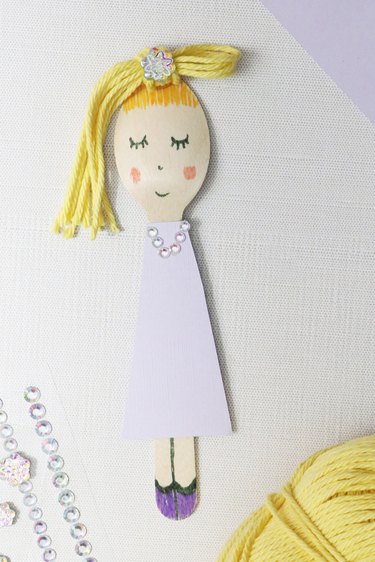
To make Daphne's ponytail, cut several strands of yellow yarn and place them side by side. Fold bundle in half and tie a strand of yarn around the top. Hot-glue ponytail onto the spoon, trim the excess yarn and add a crystal "barrette" to complete your doll art project.
Tip
When making hair for your Bridgerton dolls, make the strands of yarn longer than you think you’ll need. You can always cut away excess yarn, but you can’t add it back!
3. Francesca
Things You'll Need
Light pink paper
Self-adhesive rhinestones
Self-adhesive crystal embellishment
Red-brown yarn
Brown, black and pink markers
Wooden spoon
Hot glue gun
Glue stick
Scissors
1. Draw hair, face and legs
Draw bangs with brown marker. Add the face, legs and shoes.
2. Add dress and jewels

Cut out a dress from light pink card stock. Glue it on the spoon with the glue stick.
3. Make bun with red-brown yarn
Prepare a bundle of red-brown yarn by wrapping it around three fingers about 10 times. Tie a strand of yarn around the middle, then cut away the excess yarn.
Hot-glue the bun to the top of the spoon and add a crystal embellishment.
4. Eloise
Things You'll Need
Light blue paper
Light blue felt
Blue ribbon
Brown yarn
Brown, pink, black and blue markers
Wooden spoon
Hot glue gun
Glue stick
Scissors
Tip
Feel free to use different shades of blue-colored paper for Eloise’s outfit.
1. Draw hair, face and legs
Draw bangs with a brown marker. Add the face, legs and blue shoes.
2. Add dress and shawl
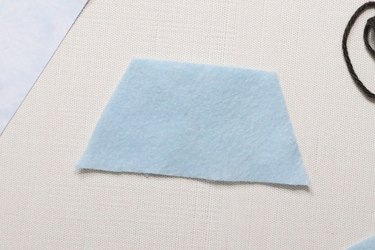
Cut out a trapezoid-shaped piece of light blue felt. This will be Eloise's shawl.
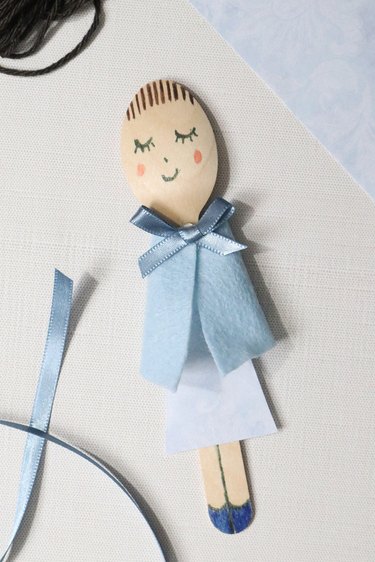
Next, cut out a dress from light blue card stock. Glue it on the wooden spoon with the glue stick.
Wrap the felt around the spoon and dress; hot-glue it in place. Tie a strand of blue ribbon into a bow, then hot-glue it onto the shawl.
Tip
You can get super crafty with Eloise’s shawl. Silk, cotton and even denim scraps work well in place of felt. If you don’t have fabric, blue paper will also do.
3. Add hair
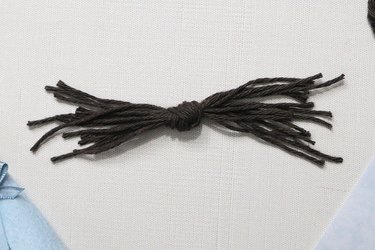
Cut several strands of brown yarn and place them side by side. Tie a knot in the center.
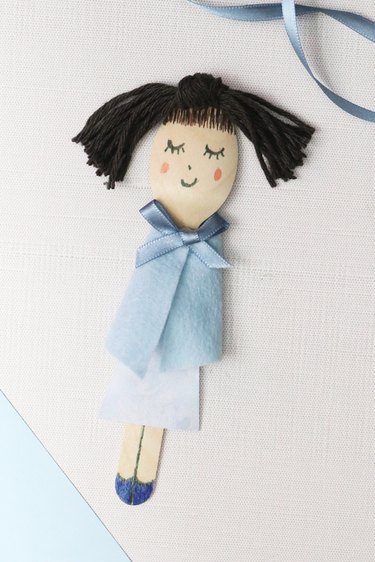
Hot-glue the hair to the top of the spoon. Finally, trim the hair as needed to finish your DIY doll of Eloise.
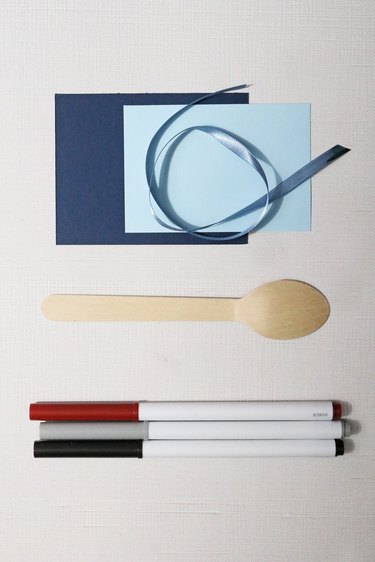
5. Colin, Benedict and Anthony
Things You'll Need
Navy or dark blue card stock (for the jackets)
Decorative and pastel paper (for the shirts)
Silk ribbon
Blue, black and brown markers
3 wooden spoons
Hot glue gun
Glue stick
Scissors
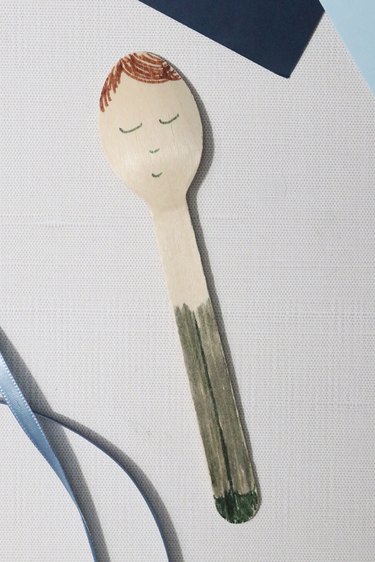
1. Draw hair, face and pants
Draw the hair and side burns with brown marker. Add the legs and shoes, making sure to color in the pants.
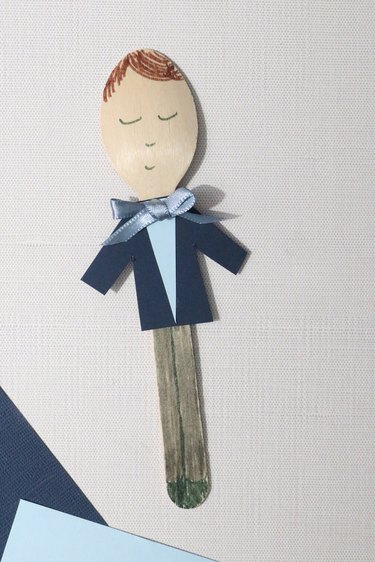
2. Add jacket and bow tie
To make a paper jacket, use the trapezoid dress template and add arms. Glue it to the spoon. Follow with a thin upside-down triangle for the shirt.
Tie the silk ribbon into a bow and hot-glue it just under the head.
3. Repeat for remaining brothers
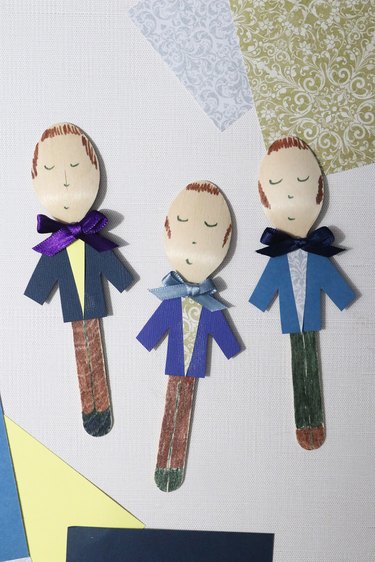
Repeat the process for the remaining brothers, using different colors for the shirt and bow tie each time. You can refer to scenes from the show (or simply create your own outfits).
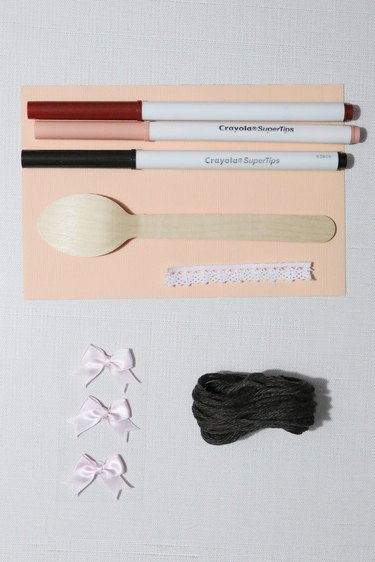
6. Hyacinth
Things You'll Need
Pastel orange paper
3 pink bows
White lace trim
Brown yarn
Brown, pink and black markers
Wooden spoon
Hot glue gun
Glue stick
Scissors
1. Draw hair, face and legs
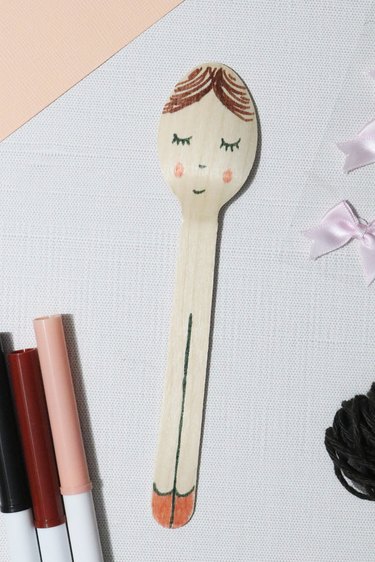
Draw bangs with a brown marker. Add the face, legs and light pink shoes.
2. Add dress and bows
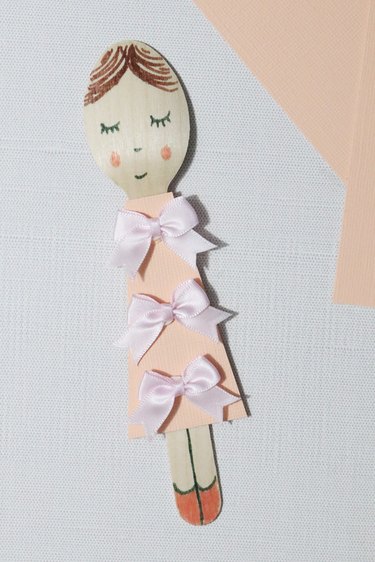
Cut out a dress from pastel orange paper. Attach it to the spoon using the glue stick.
Using hot glue, add three pink bows to the front of the dress. Add the lace trim along the bottom.
3. Add yarn hair
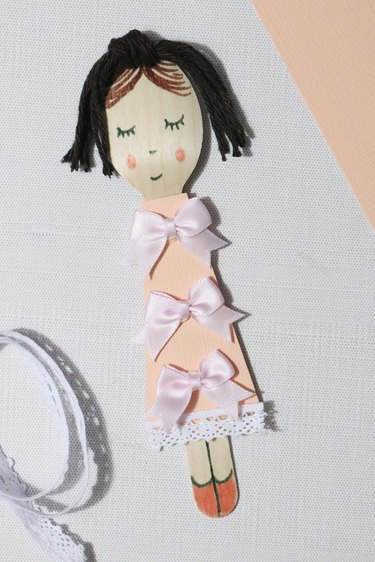
Cut strands of brown yarn and gather them into a bundle. Tie it into a knot.
Using hot glue, add the yarn to the top of the spoon, placing the knot in the middle. Trim the hair as necessary.
7. Gregory
Things You'll Need
Navy blue card stock
Light blue card stock
Light blue silk ribbon
Gray, black and brown markers
Wooden spoon
Hot glue gun
Glue stick
Scissors
1. Draw hair, face and legs
Draw hair with brown maker. Add pants and shoes in gray and black, respectively.
2. Add jacket and bow tie
Cut out a navy blue paper jacket and glue it to the spoon. Add a thin upside-down light blue triangle for the shirt.
Tie a strand of blue ribbon into a bow and attach it with hot glue.