
If you're all about functional holiday decor, you'll want to make these coasters inspired by Italian Christmas cookie recipes. Made with nothing but polymer clay and acrylic paint, they're simple and cute and look sweet enough to eat (but you shouldn't!).
The tutorial includes three iconic holiday cookie designs: almond cookies with cherries, ricotta cookies with sprinkles and seven-layer rainbow cookies, also known as Venetian cookies. Each coaster also requires basic painting skills, so you don't need to be a pro to make them—we promise!
Video of the Day
When styled together, the coasters will transform into a batch of adorable "baked cookie" table decor that even Nonna will appreciate. Read on to learn how to make coasters inspired by traditional Italian Christmas cookies—no flour or sugar needed!
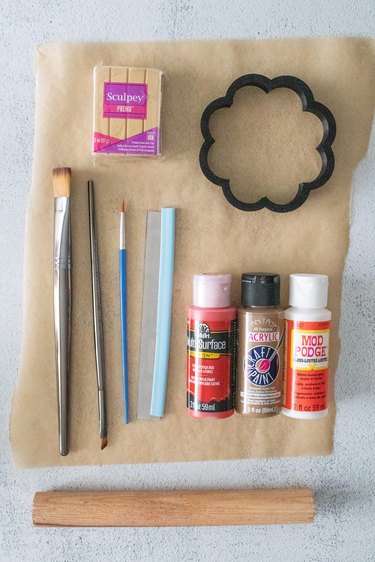
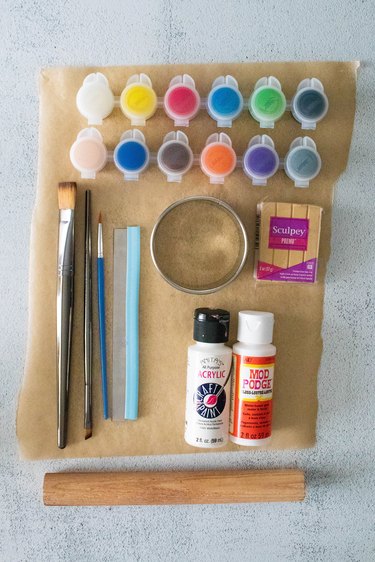
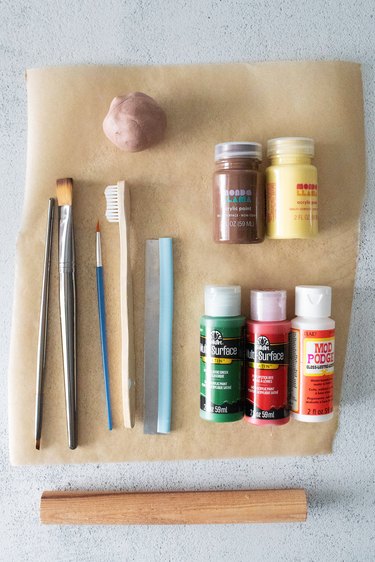
Things You'll Need
Tan polymer clay
Tan or light brown acrylic paint
Red acrylic paint
White acrylic paint (optional)
Decoupage glue (glossy or matte)
Paintbrushes
Clay rolling pin
Scalloped biscuit cookie cutter (3 to 4 in. wide)
Clay cutter
Parchment paper
Foam or cork adhesive circles (optional)
Baking sheet
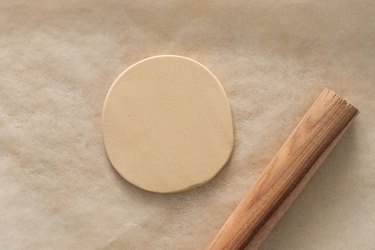
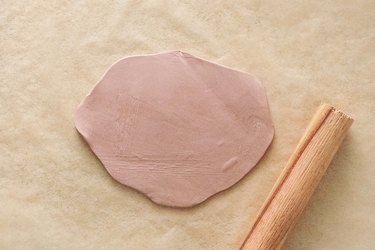
1. Roll clay
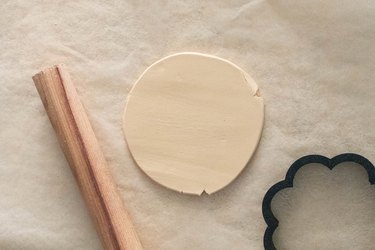
Preheat the oven to 275°F or the temperature listed on the clay's packaging.
Line your work space with parchment paper. Roll out the tan clay into a circle about 1/4 in. thick. It should be wide enough to fit your scalloped cookie cutter.
2. Cut and bake clay
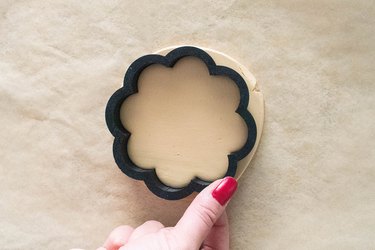
Cut the clay with the scalloped biscuit cookie cutter.
Trim the edges as needed using the clay cutter.
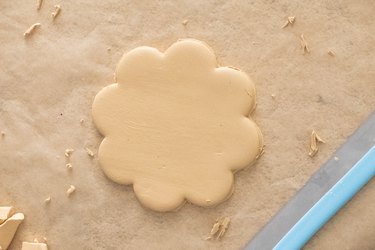
Bake for 15 minutes or according to the package's instructions. The total time it takes for the clay to bake will depend on the exact thickness. Let it cool completely.
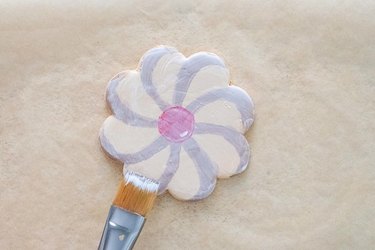
3. Paint details
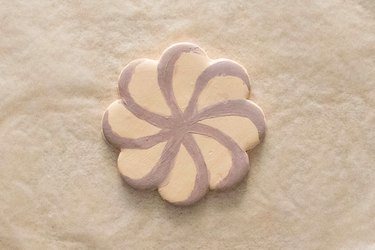
To transform the scalloped clay into a Christmas coaster, add curved lines with tan paint. Each line should run from the center of the "cookie" to the closest curve of the scalloped edge to create a spiral look.
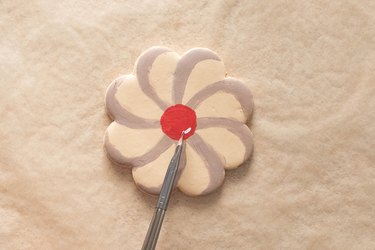
Paint a red circle in the center to create a "cherry." If you'd like, add a dash of white paint to give the cherry some dimension. Let it dry.
4. Seal coaster
Coat the coaster with a layer of decoupage glue. Let it dry completely.
To help the coaster stay put on a table, add foam or cork circles to the back.
Things You'll Need
Tan polymer clay
White acrylic or chalk paint
Assorted colors of acrylic paint (for sprinkles)
Circle cookie cutter (optional)
Decoupage glue (glossy or matte)
Paintbrushes
Clay rolling pin
Clay cutter
Parchment paper
Foam or cork adhesive circles (optional)
Baking sheet
1. Roll clay
Preheat the oven to 275°F.
Place a sheet of parchment paper on your work space. Roll out the tan clay into a circle about 1/4 in. thick.
Tip
If you want to make a perfect circle, use a circle cookie cutter measuring 3 or 4 in. wide.
2. Bake clay
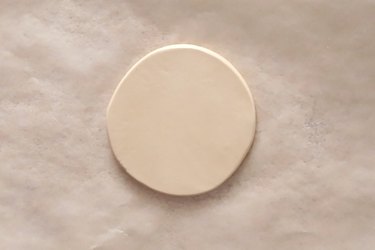
Transfer the parchment paper to a baking sheet. Bake the clay for 15 minutes or according to the package's instructions. Let it cool completely.
3. Paint frosting and sprinkles
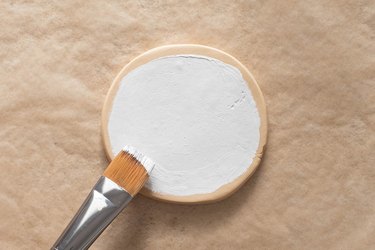
Apply a layer of white paint to the clay.
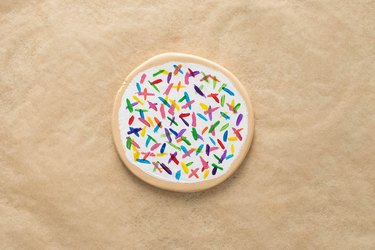
Paint dashes in assorted colors to create colorful sprinkles. Keep the placement random so they look realistic.
Tip
If you prefer nonpareil sprinkles, add dots of paint instead of lines.
4. Seal coaster
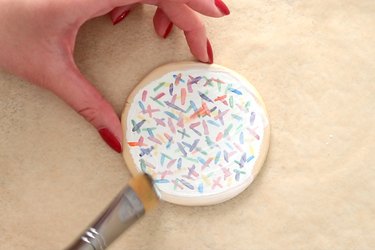
Brush the coaster with decoupage glue and then let it dry. Add foam or cork circles to the back of the coaster if needed.
Things You'll Need
Tan polymer clay
Brown acrylic paint
Light yellow acrylic paint
Green acrylic paint
Red acrylic paint
Decoupage glue (glossy or matte)
Paintbrushes
Clay rolling pin
Clay cutter
Parchment paper
Foam or cork adhesive circles (optional)
1. Roll clay
Preheat the oven to 275°F or the temperature listed on the clay's packaging.
Lay a sheet of parchment paper on your work space. Roll the clay into an oval about 1/4 in. thick and 3 or 4 in. wide.
2. Cut and bake clay
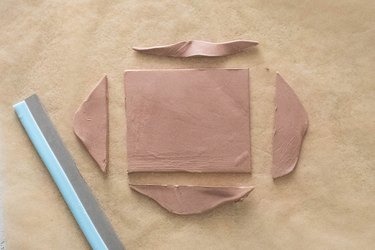
Cut the clay into a rectangle, making sure it's wide enough to accommodate a glass or mug.
Bake the clay for 15 minutes or as listed on the clay's instructions. Let it cool.
3. Paint
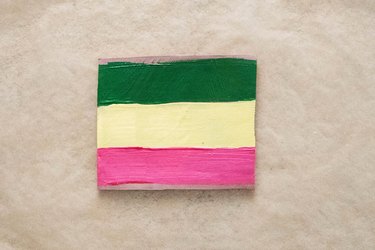
Paint a green, yellow and red stripe on the rectangle in that order.
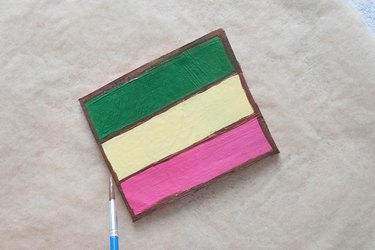
Using brown paint, create a thin border around the rectangle and between the stripes. Let it dry.
4. Seal coaster
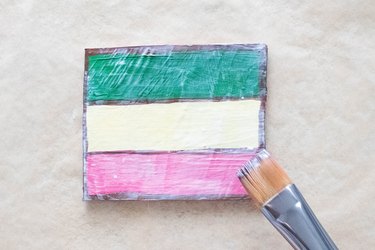
Coat it with decoupage glue and let it dry. Add foam or cork circles to the back if needed.
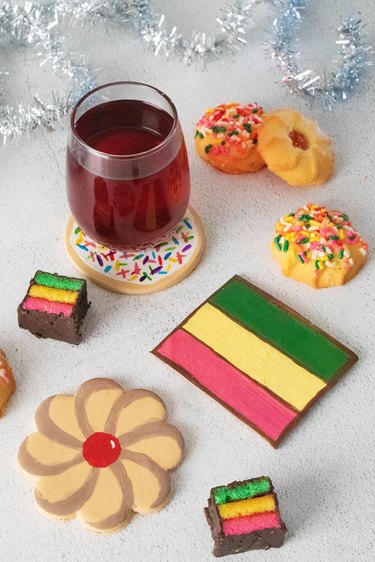
How sweet are these coasters? Happy holidays!