Things You'll Need
Work gloves
Popsicle sticks (28)
Tongue depressors (6)
Straight-edge knife
Measuring tape
Pencil
Orange acrylic paint
Paint brush
Permanent epoxy
Wire hanger
Wire snippers
Orange dental floss

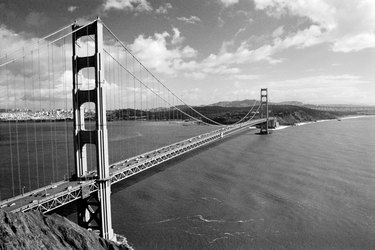
Making a model version of the Golden Gate Bridge out of Popsicle sticks is a way to express your passion for architecture. Fully constructed and open for business in 1937, California's actual Golden Gate Bridge conjoins San Francisco with Marin County. The bridge stretches approximately two miles and is fit with two tall towers stretching 746 feet into the air. Whether you are an architecture enthusiast, art student or California buff, building your own craft version of the bridge can wow your family and friends.
Build the Towers
Step 1
Slide on work gloves to protect your skin.
Video of the Day
Step 2
Cut off one of the rounded ends of a Popsicle stick with a straight-edge knife. Measure 4 inches up from the flat end of the stick. Cut off the remainder of the stick at the 4 inch mark. Repeat for 19 additional sticks.
Step 3
Sand and smooth the ends of each stick with fine 240-grit paper. Paint each stick, front and back, with orange acrylic paint. Allow two hours for the sticks to dry.
Step 4
Line a long edge of one stick with permanent epoxy. Fit the long edge of another stick, in perpendicular fashion, flush against the tacky side of the first stick. The sticks should form a letter "L" shape. Press and hold the sticks together for 30 seconds to secure the bond. Use a clean rag to wipe away any residual glue.
Step 5
Repeat the previous step with two additional sticks. Fit the two letter "L" shapes together to form one narrow, 4-inch long three-dimensional rectangle. Bond the pieces together with permanent epoxy.
Step 6
Repeat the previous two steps to create four 4-inch long three-dimensional rectangles. The rectangles will act as parts to your towers.
Step 7
Cut off one of the rounded ends of another Popsicle stick with a straight-edge knife. Measure up 1 1/2 inches from the flat end. Cut off the remainder of the stick at this point. Repeat for seven additional sticks. Sand the ends of each stick with 240-grit paper.
Step 8
Paint both sides of each 1 1/2-inch stick. Allow two hours for each piece to dry.
Step 9
Lay two towers side by side. Space the towers out by 1 1/2-inches. Measure up 1 inch from the bottom of the towers. Glue each end of one 1 1/2-inch stick and bond it between the two towers at the 1-nch mark. The three pieces should resemble a capital letter "H." Measure up another inch between the two towers and repeat. Continue until four 2-inch pieces are evenly spaced above one another and bonded between the two towers.
Step 10
Repeat the previous step for the remaining two towers. The two towers are now fully constructed.
Construct the Bridge
Step 1
Cut off one of the rounded ends of a tongue depressor stick with a straight-edge knife. Measure 4 inches up from the flat end of the stick. Cut off the remainder of the stick at the four-inch mark. Repeat for five additional sticks.
Step 2
Sand the ends of each stick with 240-grit paper. Paint both sides of each stick with orange acrylic paint. Allow two hours for the sticks to dry.
Step 3
Measure and cut two flat pieces of wire, from wire hangers, to each measure 12 inches in length. Align three 4-inch sticks from end to end on a flat surface. The sticks should form one 12-inch line. Coat the center of each stick with permanent epoxy. Place one wire at center on the sticks. Press the wire down into center and hold for 30 seconds to secure the bond. You have now completed one full side of the bridge road.
Step 4
Repeat the previous step with the three additional sticks and the one remaining wire. Place the two pieces of road side by side--with the wire side facing up. Glue the pieces together to form one 12-inch long road.
Step 5
Fit the road in between the two fully constructed towers a 1/2 inch below the first letter "H" rung. One tower should be at one end of the road. The second tower should be at the opposite end of the road. Glue the road into place between the two towers with permanent epoxy.
Drape the Bridge Wires
Step 1
Cut two 15-inch long pieces of orange dental floss. Glue one end of a piece of floss to the top of one tower with permanent epoxy. Glue the opposite end of the floss to the sister side of the tower at the opposite end.
Step 2
Repeat the previous step with the second piece of floss for the opposite side of the towers. Your two main wires are now connected.
Step 3
Measure 1 inch in on the left main wire from the top of the tower. Tie another piece of orange floss onto the wire at the 1-inch mark. Carefully thread the floss down and under the bridge. Bring the opposite end of the floss up under the opposite side of the bridge and tie it off at the one inch mark on the right main wire. Allow minor downward tension resulting from the two downward wires.
Step 4
Repeat the previous step until all downward wires are connected.
Video of the Day