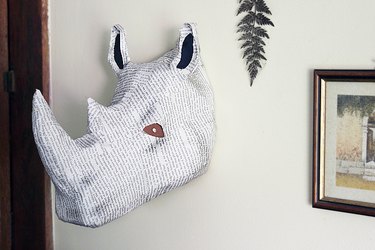
Spice up your wall art by adding some dimension with this book-page animal head. An affordable alternative to Anthropologie's Savannah Story Bust, this rhino bust uses a cardboard frame and papier-mache to create an elegant and unique statement piece for your home.
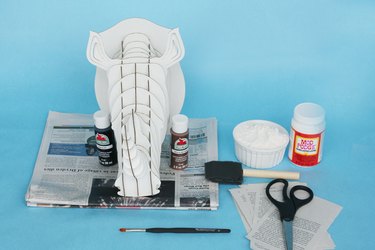
Things You'll Need
Newspapers, 2
Mixing bowl
Flour, 1 cup
Water, 1 cup
Spoon
Book pages, 30
Scissors
Foam brush
Decoupage glue
1/4-inch paintbrush
Acrylic paint, black and brown
Tip
- The amount of newspapers and book pages needed for this project will vary, depending on which size cardboard rhino frame you use. For this project, 2 newspapers and 30 book pages were used to cover a 10-by-7-by-11-inch rhino.
- If your cardboard rhino frame comes with a cardboard plaque, remove the plaque, as it is not needed for this project. The rhino bust will hang from the hole in the back of the frame rather than the plaque that comes with it.
Step 1: Prepare Papier-Mache Strips
Tear the pages of your newspapers into long, 2-inch wide strips. The size of the strips does not need to be exact.
Video of the Day

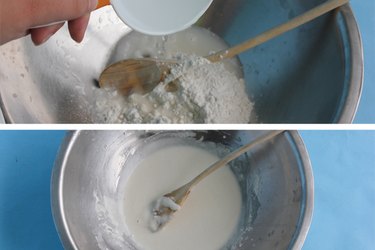
Step 2: Create a Papier-Mache Paste
In a mixing bowl, combine 1 cup of flour with 1 cup of water. Stir the mixture with a spoon until the paste is smooth and thick, ensuring there are no lumps of flour in the paste.
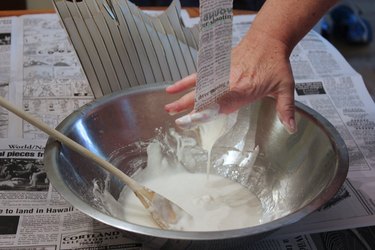
Step 3: Dip Strips Into the Paste
Dip one strip at a time into the paste and wipe off the excess paste by sliding two fingers down the sides of the strip. Use as little paste as possible to prevent over-saturation. Adding too much paste will extend the drying time and can cause mold growth.
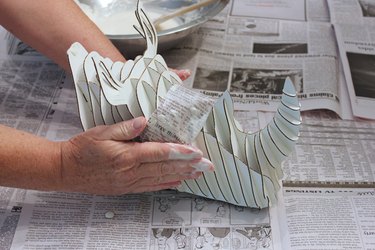
Step 4: Place Strips on the Rhino Frame
Place one strip at a time over the cardboard rhino frame. Continue dipping the strips into the paste and placing them on the frame until the entire frame is covered, tearing the strips to size as you go. The direction in which you place the strips does not matter as long as the entire frame gets covered.
Tip
If the paste starts to get thick as you place the strips on the cardboard frame, add 1 tablespoon of water to thin it out. You will probably need to add water every 10 to 15 minutes to keep the paste thin and lump-free.
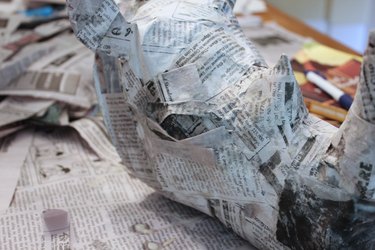
Step 5: Create Eyelids
After the entire frame is covered, add eyes on the sides of the head, between the ears and first horn, by bending small strips of newspaper to create upper and lower eyelids. Once you are happy with the shape of the head and eyes, let the papier-mache dry for at least 24 hours to ensure there is no moisture inside the rhino bust.
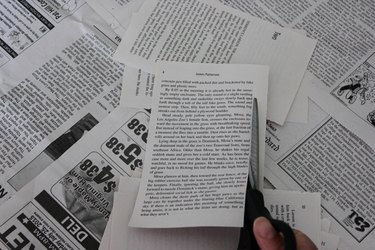
Step 6: Trim the Book Pages
Use scissors to trim the margins off of the book pages.
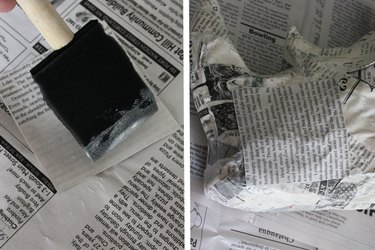
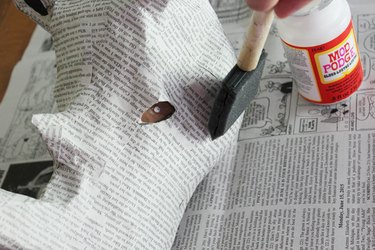
Step 7: Glue the Book Pages onto the Bust
Use the foam brush to apply a thin layer of decoupage glue to the back side of the book page. Gently place the book page onto the bust with the words running vertically up the bust. Once the book page is in place, press down along the edges of the page to ensure no corners or edges are sticking up. Continue gluing the book pages to the rest of the rhino bust. You will need to trim the book pages to size as you go. After the entire bust is covered, let it dry for at least 30 minutes.
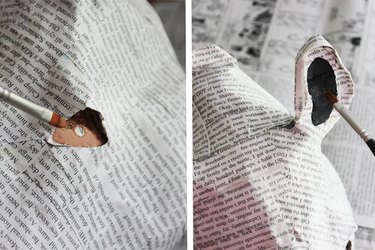
Step 8: Paint the Eyes and Ears
Using a 1/4-inch paintbrush, paint the eyes with brown acrylic paint, leaving a small unpainted circle in the center of the eye. Rinse your brush and paint the inside of the ears with black paint. Allow the paint to dry for 20 minutes.
Step 9: Add a Final Layer of Decoupage Glue
Use the foam brush to apply a thin layer of decoupage glue to the outside of the bust. After the final layer of glue has dried for at least 20 minutes, the rhino bust will be ready to display.
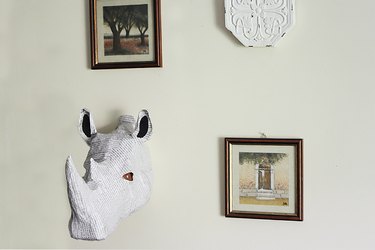
Step 10: Display your New Rhino Bust
Hang the bust by placing the hole in the back of the bust on a nail. If your bust did not come with a hole for hanging, you can use nail-free picture hanging strips or hooks to display your new rhino bust.
Video of the Day