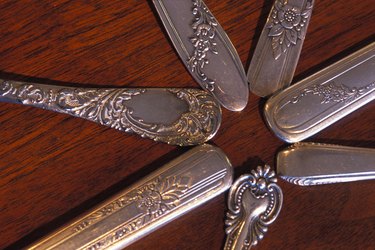
Creating your own rings, bracelets and pendants from upcycled antique silverware and flatware is an eco-friendly way to highlight your fashion sense. Making jewelry from old spoons requires just a few tools, most of which you can find around your house. Each spoon can produce two pieces of jewelry: a ring or bracelet made from the handle and a pendant from the bowl.
Materials and Tools
Video of the Day
- Old spoons: Two spoons make a bracelet. Use sterling silver or stainless steel instead of silver-plated flatware; the plated finish can wear off.
- Permanent marker
- Hand saw
- Metal file
- Mandrel or pipe: You need something cylindrical to help form your jewelry. A metal ring mandrel helps size rings, while a metal pipe can form a bracelet.
- Jump rings
- Lobster clasp
- Safety goggles: Optional, but always recommended.
- Rubber mallet or hammer to help form jewelry around the mandrel. If you use a hammer, wrap it in a heavy cloth secured with a rubber band to keep it from marring the metal.
- Pliers
- Drill and #55-drill bit
- Vice (optional)
- Beads and wire (optional)
- Metal stamps (optional)
Video of the Day
Make a Ring
Measure Measure your ring size with a string or a strip of paper, adding ¼ inch for the ends of the ring to overlap. Using the pen, mark the length needed, from the handle of the spoon down toward the bowl.
Bend Using the pliers, grasp the handle close to the bowl end of the spoon and start bending the handle so that it curves toward the back of the spoon. Use the mandrel to shape the curve. Don't close the curve completely just yet; leave room to cut off the bowl.
Cut and Smooth Cut the spoon at the measured mark. If you are strong enough and have the patience, bend the flatware back and forth until the bowl end breaks off, but using a saw ensures that you have enough metal to make two pieces of jewelry from one piece of cutlery. Use the file to smooth and round off the cut end of the handle.
Shape and Size Finish curving the handle around the mandrel. Allow the two ends to overlap, rather than meet. * Try the ring on and adjust the ends to get the perfect size.
Enjoy your new ring!
Make a Bracelet
Cut * Cut the bowls off of two spoons. Cutting with a hand saw is recommended, but you can also bend the handles back and forth until the bowls break off.
File * Use the file to smooth the cut end of the handle
Drill Drill a hole through each end of both handles. You can use the file to gently smooth the drill holes if necessary. Be careful not to mar the silver.
Bend * Using the mallet and pipe, tap the handles to shape them into curves. You may attach the pipe to a vice for better control while hammering the metal.
Connect * Connect the two decorative ends of the handles by attaching a large jump ring through the drilled holes to form the front of your bracelet. You can also connect the handles with a beaded wire loop instead of a jump ring if you like.
Clasp Connect a jump ring to each of the holes on the other ends of the handles. Attach a lobster clasp to one of the jump rings.
Try your bracelet on and enjoy your new creation!
Make a Pendant
Flatten * Use the rubber mallet to gently flatten the spoon.
File * File the cut end until it is smooth.
Bail If enough of the handle remains to create a bail, use the pliers to bend the handle backwards, until it touches the back of the spoon. If not enough of the handle is left, drill a small hole at the top of the spoon and attach a jump ring for a bail.
Attach * String a cord or chain through the jump ring.
Enjoy your new pendant!
Notes
You can remove the pen markings with a little rubbing alcohol. You can embellish your pendant by using metal stamps or attaching beads to the jump ring.