Things You'll Need
Ribbon
Floral wire
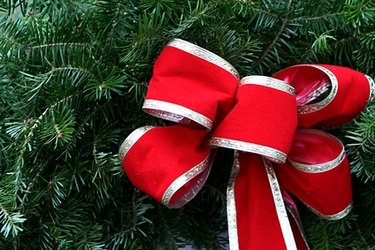
Christmas tree decorations are personal. Each tree is a representation of the decorator and her family. Decorations range from handmade ornaments made by the children to ornaments collected from travels. Some trees are decorated with a color theme in mind. One of the best ways to make a tree traditional is to tie beautiful bows on it. Unfortunately, the beautiful pre-made wire ribbon bows often come with a hefty price tag. For beautiful, traditional and cost-effective bows, tie them yourself.
Step 1: Pick the Colors for Your Christmas Tree Bows
Choose the color or theme for the premade wire ribbon bow. There are thousands of colored and printed ribbon patterns to choose from. The ribbon should be in a complementary or contrasting color to the surrounding decorations.
Video of the Day
Step 2: Select and Purchase the Ribbon
Purchase the ribbon. There are several types of ribbon, including satin, velvet, cotton and wired ribbon. The wired ribbon is the easiest ribbon to work with for bow tying. The wire hides in the seam of the fabric and is not seen. Wire ribbon is especially good for a new crafter. It holds its shape better, and it's easier to straighten and touch up. Ribbon can be found at any craft store. Most department stores that have a craft or sewing department also carry it.
Step 3: Unroll Some Ribbon
Roll off 5 or 6 yards of your ribbon. Do not cut the ribbon until the bow is complete. That's because more ribbon may be needed.
Step 4: Hold and Twist
Hold the length of ribbon in your hand. The length of ribbon should be 5 or 6 yards to make a nice sized bow with a tail. Hold the ribbon with the right side facing you. Twist the ribbon a half of a turn. This will result in the wrong side, or inside-out side, facing you. The ribbon should have the right side below the twist, and the inside-out side should be above the twist.
Step 5: Loop and Roll
Make a loop with the ribbon above the twist. Roll the loop toward you so that the right side is out. Complete the loop by bringing the ribbon back to the twist. Catch it in your hand at the original twist point.
Step 6: Create the Loops
Make another loop the same size as the first loop with the ribbon below the twist. The result should be two identical loops making a butterfly shape.
Step 7: Make More Loops
Repeat Step 6 until you have as many loops as you want for your bow. Four to six loops make a very nice-looking bow.
Step 8: Loop, Wrap, Twist
Make one last loop about half the size of the previous loops. Wrap it around your thumb at the twist. The ribbon should loop around to the back side of the bow.
Step 9: Wire and Attach to the Tree
Run a piece of floral wire through the center of the bow. Twist the wire to tightly cinch the bow. Use the end of the wire to attach the Christmas tree bow to your tree.
Tip
Use premade wired ribbon bows until you have mastered the art of bow tying. Wired ribbon is the easiest ribbon to straighten once the bow is completed.
Warning
Satin ribbon is the hardest ribbon to tie.
Video of the Day