Things You'll Need
Rectangular block, 4 inches or larger
Jigsaw or handsaw
Fine-grit sandpaper
Chopstick
Drill with 1/16- and 1/8-inch drill bits
Wood glue
Triangular block
Thin craft foam
Scissors
Hole punch
Waxed twine
Acrylic paint
Paint brushes
Polyurethane spray

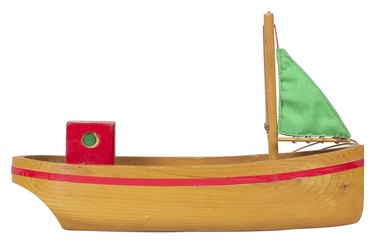
Making a wooden boat does not have to take hours of hand-carving a piece of wood into a nautical craft. You can transform children's play blocks into small wooden boats to use in the bathtub, a pond or just for decorative purposes. Chopsticks, craft foam and other easy-to-find items are used to build the vessel, so it will be seaworthy and ready to go before you can say "bon voyage."
Step 1
Cut the corners off of one end of a rectangular block with a jigsaw or handsaw. The block should have a point on the end look like an arrow. Sand the cut edges with fine-grit sandpaper.
Video of the Day
Step 2
Cut 1 inch off of the end of a chopstick. Sand the edge of the chopstick. Drill three holes through the chopstick using a 1/16-inch drill bit. Place the first hole 1/4 inch from the end of the chopstick. Space the next hole 2 inches down and the third 2 inches from the middle.
Step 3
Find the middle of the block and mark the center with a pencil. Drill a hole 1/4-inch deep with a 1/8-inch drill bit. Fill the hole with wood glue. Set the chopstick in the hole with the holes facing the bow and aft, or tail, of the boat. Hold the chopstick for 90 seconds to let the glue set. Let the glue dry for at least 1 hour.
Step 4
Glue the triangular block to the center of the bottom of the boat. Hold it in place for 90 seconds. Let the glue dry for at least 1 hour.
Step 5
Cut out a triangular sail from the craft foam that is the length of your mast. Punch three holes with the hole punch that line up with the holes in the chopstick mast. Tie the sail to the mast with waxed twine using double knots. Cut off any excess twine.
Step 6
Paint the boat with water-based acrylic paint. Let it dry for at least 1 hour. Add a second coat, if desired, and allow it to dry completely.
Step 7
Spray a coat of polyurethane to seal. Allow to dry per the instructions on the packaging.
Tip
Look for blocks at yard sales.
If you have a child helping you, a safe way for them to sand is to tape the sandpaper to your work surface and have your child run the blocks across the paper.
Use plastic bottle caps for dinghies. Attach the dinghy with waxed twine and float it behind your boat.
Use a waterproof envelope as an alternative to craft foam. You can often get them free from large shipping companies. Turn them inside out for a plain white sail if there is printing on the outside.
Warning
Use caution when using a saw around children.
Sand all edges to a smooth finish so children do not get splinters while playing with the boats.
Video of the Day