Things You'll Need
Sheet of card stock or lightweight cardboard
Construction paper
Ruler
Scissors
Sharpened black pencils
Sharpened red pencils
Colored markers or crayons
Water-based glue, paste or glue stick
Decorating supplies like glitter, sequins, pasta, cereal, foil
Old magazines

This is a great craft to do with your kids, and you probably already have all the materials you will need around the house. Although younger children may need your help putting the car together, it seems that they never tire of participating in the preparations. Let them amaze you over and over again with their creativity. If you've never made a 3-dimensional paper car before, you should probably begin with a very simple design using straight lines for everything except the tires.
Step 1
Create a pattern by sketching the side view of a car onto the card stock or lightweight cardboard. Sketch your illustration with the black pencil, and use a ruler or other straight edge while you are sketching for a clean, uniform appearance.
Video of the Day
Step 2
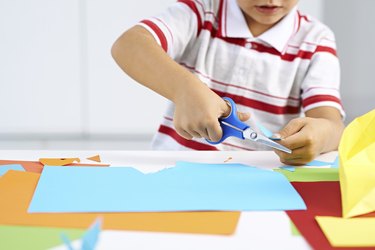
Cut out the shape of the car with scissors. This is the pattern that you will be using to create the other parts of the car.
Step 3
Choose the construction paper you would like to use for the body of the car. Transfer the outline of the pattern onto the construction paper by tracing around it with the black pencil.
Step 4
Draw the 3-dimensional aspects of the car with the red pencil, starting with the roof. Extend the existing lines that define the roof upward in red, making sure they are equal in length. Then join the two extended red lines with a straight line in between them, creating a red rectangle to form the roof of the car.
Step 5
Flip the pattern over, making sure it faces the same direction that your illustration faces. Abut the top edge of the pattern against the topmost rectangle of the drawing. Create the other side view of the car by tracing the pattern with black pencil.
Step 6
Tape more paper into place if your rendering outgrows the original piece of construction paper that you began tracing onto. If this is the case, choose more sheets of paper and tape them into place to extend your drawing surface.
Step 7
Draw a windshield and a rear window with two vertical trapezoids directly onto the construction paper illustration. Draw one connected to the left side of the rectangle that forms the roof. Draw the other facing in the opposite direction, connecting it to the right of the rectangle that forms the roof. The trapezoids look like triangles with their tops cut off, with their top sides angling inward toward the roof of the car.
Step 8
Sketch a square with your red pencil to create the hood of the car. Add a vertical rectangle to make the car's grille. The grille should be about half the width of the hood. Then, draw a vertical rectangle right up against the rear window to create the trunk. Add a rear bumper by drawing a vertical rectangle adjacent to the trunk, making it about half the width of the trunk.
Step 9
Draw little tabs, which are actually markers for folding, in the places where the sides of your car are to be matched up to be glued together. Situate the tabs on each side of the windshield and rear window, on each side of the grille and hood, and on each side of the bumper.
Step 10
Color and decorate the car before it is cut out. Add people clipped from magazines or photos of family and friends as passengers in the car. Bits of shiny foil make great bumpers and headlights, and decorative glitter adds flair.
Step 11
Cut out the shape of the car, following the black "cut" lines, including the tabs that you have drawn.
Step 12
Fold downward on the red lines. Then fold both the hood and the grille. Next fold the windshield and the back window. Finish the folding by completing the trunk and back bumper. Fold the tabs toward the underside of your car where they will not be seen. Dab a little glue onto the tabs and secure the pieces into place.
Tip
You can advance to drawing a more complicated picture with more curves for your pattern once you've gotten the hang of making very simple paper cars outlines. For more in-depth projects, many free models can be downloaded from the Internet. Then it's just a matter of printing them out and putting them together.
Video of the Day