You can create a cute panda costume in a few hours. Although the instructions given are for a child's costume, you can adapt the pattern to fit an adult.
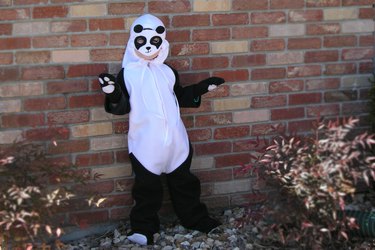
Things You'll Need
Fusible Web
16-Inch Zipper
1 Yard White Fleece
Sewing Machine
Ribbon
1 Package Non-Skid Material
Small Piece Of Elastic
Fabric Measuring Tape
Pattern Tracing Paper
1 Yard Black Fleece
Step 1
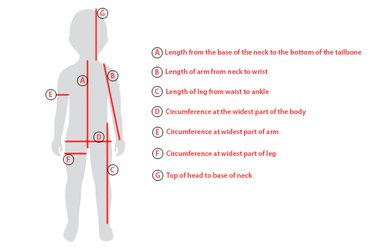
Take the following measurements: A. Length from the base of the neck to the bottom of the tailbone B. Length of the arm from the neck to the wrist C. Length of the leg from the waist to the ankle D. Circumference at the widest part of the body E. Circumference at the widest part of the arm F. Circumference at the widest part of the leg G. Top of the head to the base of the neck
Video of the Day
On pattern tracing paper, trace the child's footprint while wearing shoes as well as a handprint with the fingers together, as if wearing a mitten. Add a 1-inch allowance around the perimeter of each.
Step 2
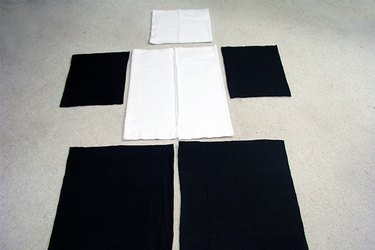
From the white fleece cut: Body: a rectangle, 1 1/2 times the measurement for D x 1 1/2 times the measurement for A Hood: rectangle, the measurement for G x 1 1/4 times the measurement for G
From the black fleece cut: Arms: 2 rectangles, 1 1/2 times the measurement for E x the measurement for B + 2 inches Legs: 2 rectangles, 1 1/2 times the measurement for F x the measurement for C + 2 inches
Note: Unless otherwise noted, please use a 5/8 inch seam throughout construction.
With the fabric folded, cut out shoe covers (4) and mitten pieces (4).
Note: folding the fabric with wrong sides together produces right and left versions of the shoe covers and mittens.
Step 3
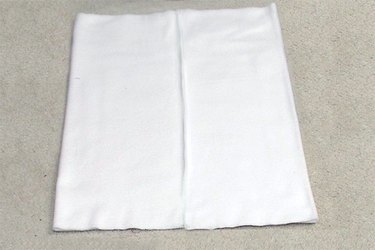
Shape the body. Fold the white body rectangle with the edges in the center front, overlapping at the center by 5/8-inch on each side. Cut the sides along the folds.
Step 4
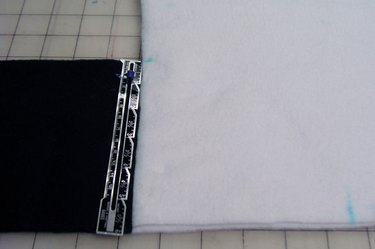
Mark the shoulder seams. Fold one arm piece in half lengthwise and use it as a guide to mark the width across the top of the body. Repeat to mark the arm's width on the side of the body.
Step 5
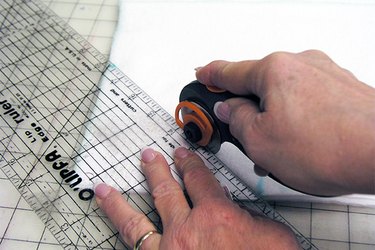
Cut the shoulder angles. Lay a straightedge between the marks and cut. Repeat on the other side of the body.
Step 6
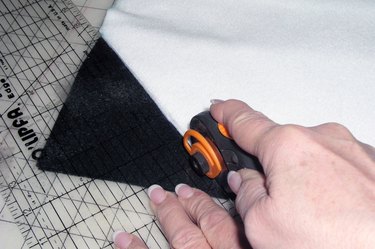
Shape the arm. Place the folded arm piece under the body. Align the edges and place the fold of the arm in the center. Place a straightedge along the cut line of the body and cut through both thicknesses of the arm, giving it the same angle as the body. Repeat for the opposite arm.
Step 7
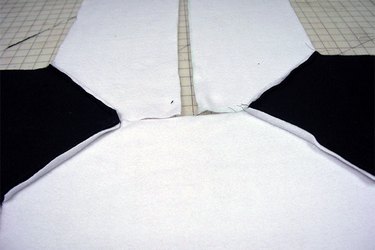
Sew the right front body to the right arm, the right arm to the back body, the back body to the left arm, and finally the left arm to the left front body.
Step 8
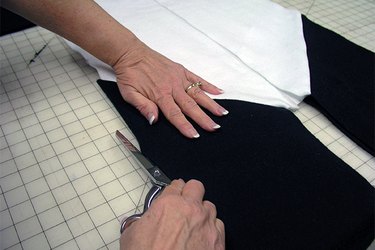
Shape the legs. Repeat the angle cutting process used for the arms, this time to shape the legs.
Cut the legs along the fold to reduce the bulk in the seams. Sew the legs to the front and back body pieces.
Step 9
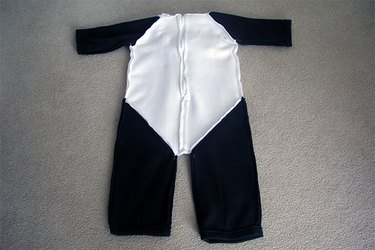
Assemble the body. With right sides together, stitch starting at the wrist, continuing down the arm, body and leg on each side.
Along the front center seam of the body, measure down 16 inches from the top edge, and starting at this point, sew a 5/8-inch seam. Sew the inside leg seam up one leg, across the crotch and down the other leg.
Install the zipper in the front center seam.
Fold under and stitch a 1/2-inch hem in the legs and arms.
Step 10
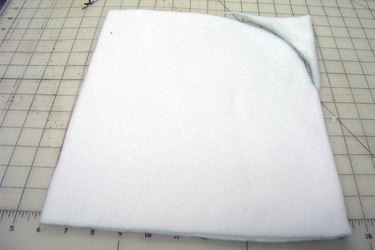
Add the hood. Stack the hood pieces with the longest side of the rectangle vertically. Starting at a point about half the width across, draw a curve and down the side the same distance. Cut along the curve. With right sides together, sew these two pieces together along the curved line. Fold under a 1-inch hem along the front edge, and stitch in place. Cut a slit in each side of the hemmed edge, and thread a piece of ribbon to cinch the hood around the face.
Step 11
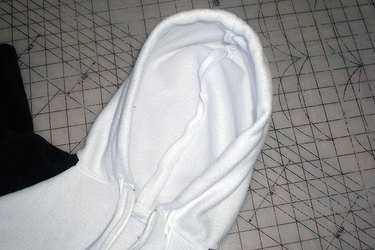
Attach the hood to the body. Mark the center back of the body with a pin. With right sides together, match the center seam of the hood to the center back of the body and the hemmed edges of the hood to each side of the zipper. Match and pin the rest of the neck edge to the hood edge. Stitch in place. Fold the seam toward the body and topstitch.
Step 12
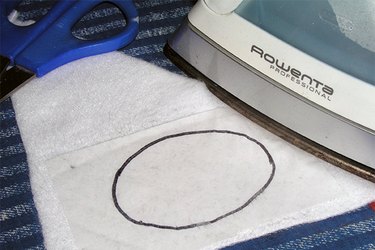
Cut out the panda mask. Download the template. Use the template as a pattern to cut the main face piece. Trace the remaining pieces on fusible web, press to scraps of the appropriate color fleece and cut out the shapes.
Step 13
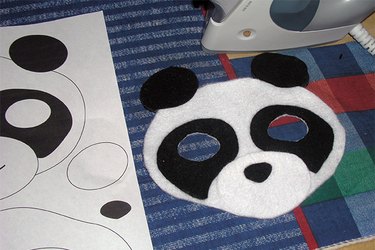
Add details to the mask. Using the face piece as a base, remove the paper backing from each additional piece and bond in place with an iron. The eye patches should be first, then the muzzle, the nose and ears. Stitch around the perimeter of each piece for durability. Hand embroider or zigzag stitch a smile, if you like. Attach a piece of elastic to each side of the mask to hold it in place.
Step 14
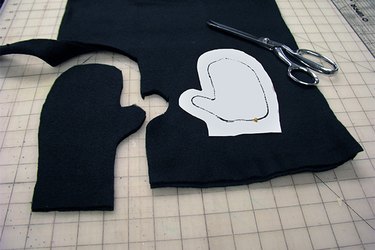
Make the mittens. Cut out mitten hands, adding about 3 inches in length to the wrist. Use fusible web in the same method as the mask to add the paw patches to the mitten hands. Sew the mittens together around the perimeter with a narrow seam, right sides together and a zigzag stitch. Sew a 1/2-inch hem and turn right-side out.
Step 15
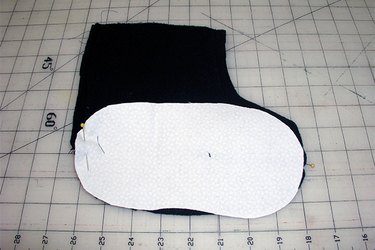
Make the shoe covers. Use the footprint pattern to cut two boot bottoms from the nonskid material. Draw and cut four boot-shaped pieces, making the bottom edge of the boot the same size as the shoe cover pattern.
Step 16
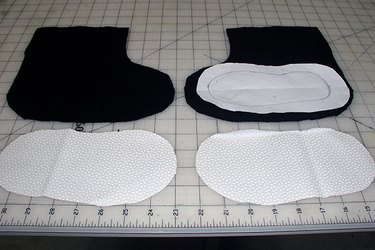
Sew two boot pieces together from the cuff to the toe and from the cuff to the heel, leaving the bottom open. With right sides together, match the center front of the nonskid footprint to the front center seam of the boot and the center heel to the heel seam. Stitch around the perimeter with a narrow seam and a zigzag stitch. Turn down a 1/2-inch hem, stitch in place and turn right-side out.
Step 17
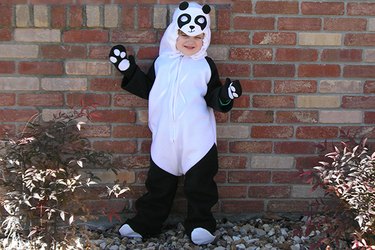
Small children don't always like things covering their eyes. Try setting the mask on the forehead if this is a problem, or just use makeup to create a panda face.
Tip
Cutting the mittens and shoe covers on folded fabric is the easiest way to make sure you have both right- and left-facing mittens.
Video of the Day