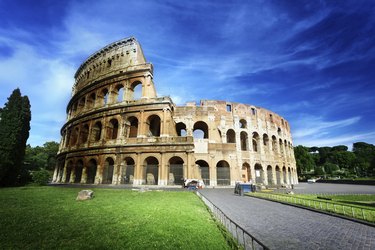
Built on the site of Nero's Gold House in Rome stands the iconic Roman Colosseum. Originally the four-story walls stood at 157 feet, but due to earthquakes, weathering and looting, two-thirds of the original structure is gone. Construction started on this one-of-a-kind amphitheater in 70 AD by Emperor Vespasian of the Flavian dynasty for the people to have a venue to watch gladiator battles, plays, debates and animal hunts. The original exterior structure held approximately 50,000 people and was constructed from travertine stone. You can recreate the Colosseum with Styrofoam for a school or rainy day project. Time and attention to detail are required, but the results will be very rewarding.

Video of the Day
Things You'll Need
Plywood Sheet, 3 Feet By 3 Feet
Toothpicks
Acrylic Paint
Paint Brushes
Tan Spray Paint
Glue
Utility Knife
3 Boxes Rectangular Foam Project Bricks, Approximately 300 Pieces Per Box
Primer Spray Paint
Bowl
Step 1
Take the wooden board outdoors and spray with a coat of primer. This will prevent the knots and any printing on the board from bleeding through. Let dry. Spray with a coat of the tan spray paint. Let dry completely.
Video of the Day
Step 2
Set your board on a work surface. Open the bag or box of project bricks. Pour into a bowl so they are easy to access.
Step 3
Lay three rectangles in a row horizontally flat on the board. Place a rectangle in the center of the right brick oriented vertically. Stack another brick vertically on top of the first. Do the same for the left side. You will have a U-shaped arrangement of bricks.
Step 4
Cut a trapezoid shape out of a brick. The top of the trapezoid should be the width of the short end of the rectangular brick. Place the trapezoid upside down so that the top is sitting on the right vertical rectangles. Do the same for the left side.
Step 5
Glue the pieces together with white craft glue. Stand up the arch when the pieces are dry.
Step 6
Place a toothpick in the side of the left base rectangle. Leave half of it sticking out. Squirt glue on the end of a brick and impale it on the toothpick to join the pieces together. Add another rectangle to the one you just attached using the same technique.
Step 7
Build the side of the next column over the rectangle by stacking two rectangles vertically above it as you did earlier. Use toothpicks and glue to secure. Cut and add a trapezoid.
Step 8
Repeat until you have 20 arches that form a circle. Let the glue dry for 30 minutes.
Step 9
Link the rectangular bricks with glue and toothpicks to form a ring of blocks to set on top of the columns. Stick toothpicks through the blocks and into the columns to secure.
Step 10
Build another level of arches and secure it on top of the first level.
Step 11
Construct a third level the same way but only build it halfway around the circle as the rest has been destroyed.
Step 12
Place a layer of rectangles on top of the semicircular third level. Build a fourth level over the third by stacking, impaling and gluing bricks to form a solid wall. This will also be a semicircle. Let dry.
Step 13
Use a utility knife to cut small windows in the fourth level.
Step 14
Paint the Colosseum with acrylic paint.
Tip
Add sand inside the Colosseum and faux grass on the outside for a realistic effect.
Warning
Use caution when using a utility knife. Do not leave children unattended.