With a few supplies from the fabric store, a sewing machine, and some pre-made curtain panels, you can easily sew custom-looking pinch pleat curtains.

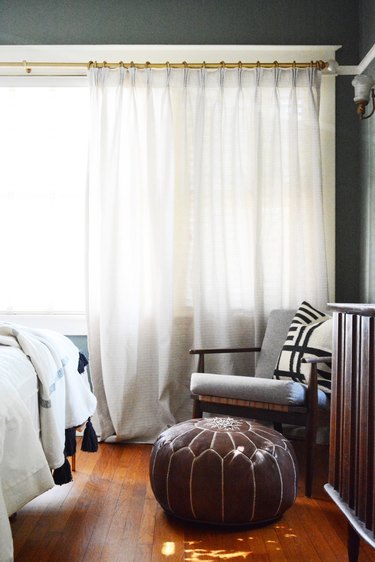
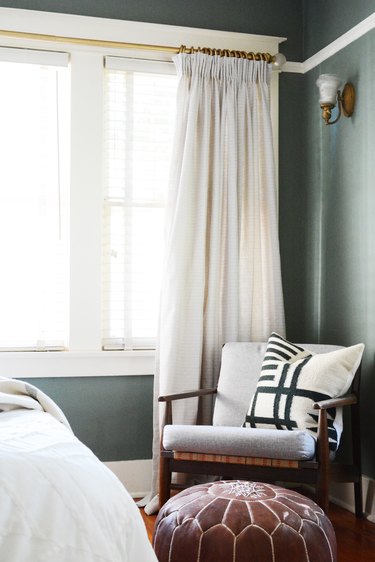
I believe good design is all about the details and finishes. And while I like to decorate my home on a budget and shop for accessories at big box stores, I still think you can achieve a custom look. Our old home has very wide, big windows. So, when I priced out custom drapes for our bedroom, I almost had a heart attack. To save some money, I picked up some inexpensive curtain panels at one of the big box stores and hung them on the rods that were already in the room. I was sadly disappointed. They looked cheap, and opening and shutting them with just the rod pocket was a nightmare. There was a lot of tugging and pulling.
Video of the Day
Video of the Day
So, I decided that pinch pleats and large curtain rings were the way to go. And since I can sew straight lines, I realized that this project was totally doable. And the best part, they open and shut with ease!
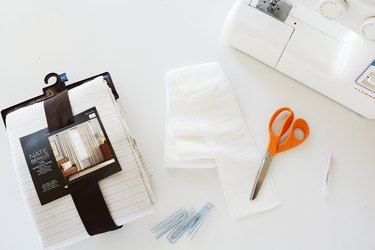
Things You'll Need
Curtain Panels
Scissors
Sewing Machine
Thread
Curtain Rod and Curtain Rings
Step 1: Measure Your Windows
The first step is to determine how many curtain panels you will need for your windows. I pleated my curtains quite tight, so I used two panels for each side of the window. As a rule, twice the width of the window will give you a nice gather or pleat.
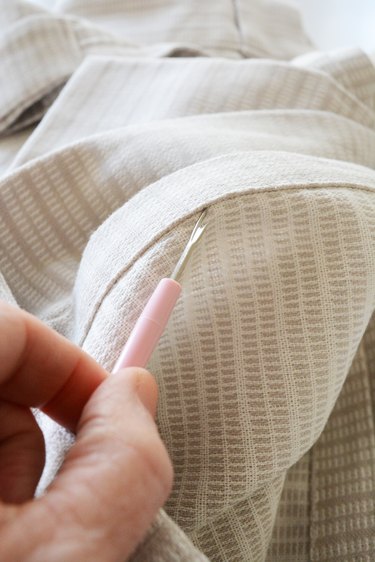
Step 2: Rip the Side Seams
I order to create the look of one wide panel, I joined my two curtain panels together. Start by ripping out the left hem of one panel and the right hem of the other. If you sew, a seam ripper is a must-have tool. Use the seam ripper to neatly rip out the seam of the hem.
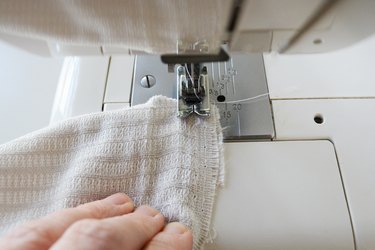
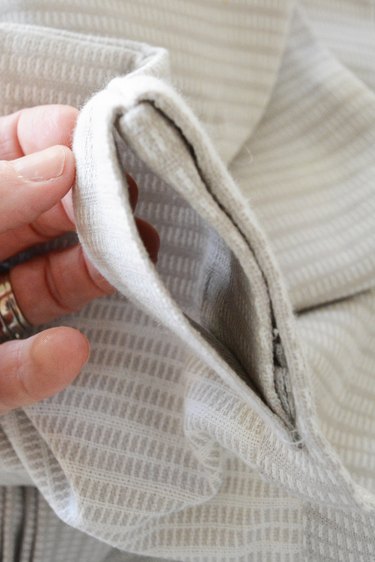
Step 3: Sew the Raw Edges Together
To made sure these curtains look good from the inside and outside of the window. I joined the two panels with a neat and tidy French hem. With this type of hem, both sides of the fabric have no raw edges. Place the wrong sides of the fabric together and stitch 1/4-inch seam allowance the length of the curtain.
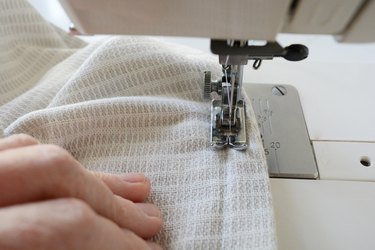
Step 4: Now Stitch the Other Side
Fold the seam back on itself and press the seam flat. Now stitch 1/2-inch seam allowance down the length of the window panel. This will encase the raw edges of the fabric and make for a neat and tidy join of the two panels.
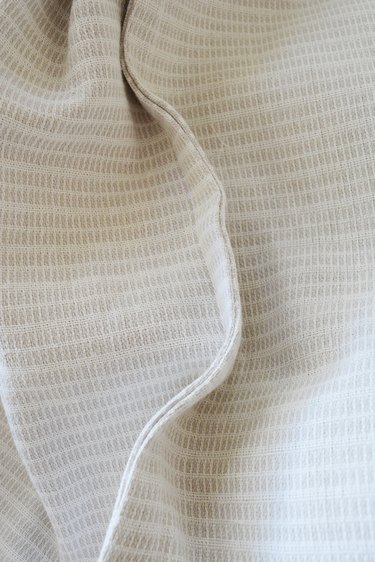
This is what the inside of the joined curtain panels will look like.
Step 5: Remove the Rod Tabs
The curtain panels I bought had a rod pocket and tabs. To ensure that the pleats are tight and fold neatly, I removed all the tabs because they were thick and bulky. Use your seam ripper to remove these.
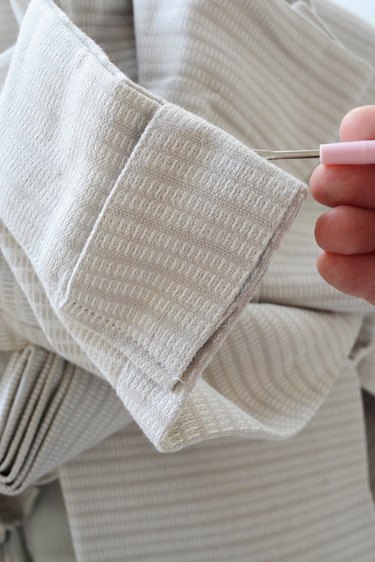
Do not worry about any raw edges or seams that you have ripped out at the top of the curtain panel. You will be sewing on the pleater tape, and it will encase all of those edges and hold everything in place.

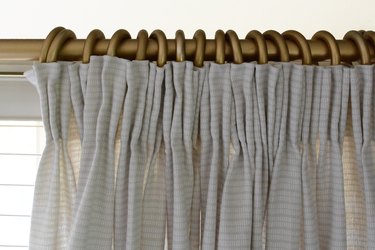
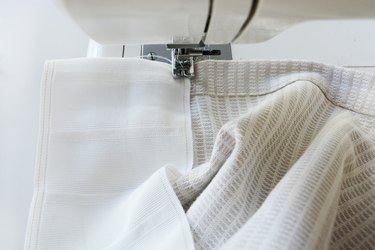
Step 6: Sew on the Pleater Tape
Be sure to attach the pleater tape the correct way. On the tape there are little slots for the pleater hooks to slide into. Make sure the closed end to those slots is right along the top of the curtain panel.
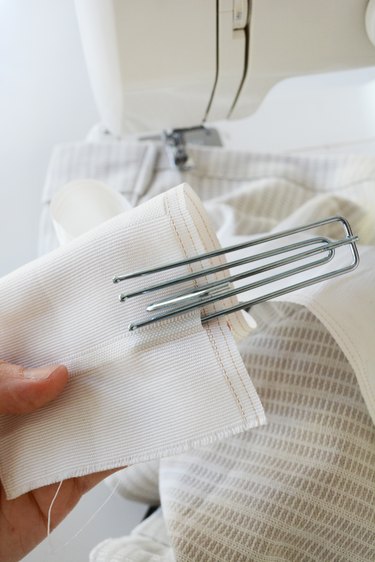
Stitch down the pleater tape along the bottom and top of the tape.
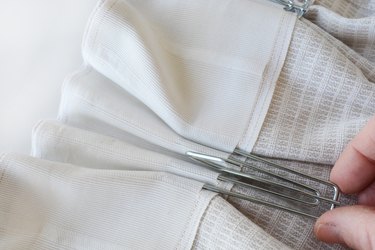
Step 7: Thread the Pleater Hooks Into the Tape
Determine how tight you want your pleats. I chose to skip on slot in between each pleat. Start in the middle of the curtain and work your way to the edges. In the package of pleater hooks, there will be a couple single-pronged hooks; those are for each end of the curtain.


Step 8: Attach the Curtain Rings
Attach a curtain ring to each hook and thread the hooks onto the rod.


There really is no better feeling that saving money, is there? I love when I can make something for my home to give it a custom, finished look and feel. Curtains are like a great coat, they help make a room feel polished and put together.