Things You'll Need
PVC fittings
Pipe wrenches--2
PVC cement
Hacksaw
Shovel
PVC threaded reducer
Teflon tape

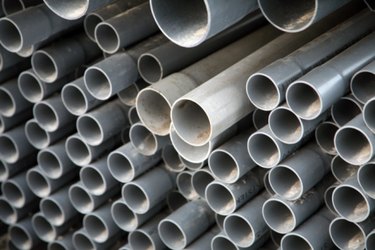
Many older homes still have galvanized piping throughout the house. The galvanized metal pipes will begin to rust and cause a metallic taste to the water. Additionally, when the rust becomes bad enough, it will leach into the water and discolor it. To solve this problem, replace the galvanized pipes in the house with PVC pipe. If the pipes are accessible in a basement or crawl space, this job may be easier and faster than you would have imagined.
Step 1
Turn off the water that feeds into the house. If you are lucky, this will be a valve just inside the house. If not, go to the meter and shut it off. This may require a request to the water company to do this for you. Open a faucet inside the house to relieve the pressure from the water line.
Video of the Day
Step 2
Go to the place where the water lines enter your house. There should be a coupling either just inside the house or near the wall on the outside of the basement or foundation. If it is inside, make sure that the coupling is installed after the shut off valve if there is one. For an outside coupling, you will need to dig down to the water line with a shovel to expose the coupling in order to work on it.
Step 3
Loosen the coupling with a pipe wrench. You may need two wrenches. One to stabilize the pipe and the other to loosen the coupling. Place a bucket under the pipe as you open the coupling to catch the water draining from the water lines inside the house. Follow the section of galvanized pipe to the next connection. Use the pipe wrenches to unscrew the sections of pipe apart.
Step 4
Return to the original coupling point. There will be half of the coupling still screwed onto the incoming water line. Unscrew this from the pipe with the pipe wrenches. Use a PVC threaded reducer to screw onto the incoming water line that will have an end without threads -- you will be able to insert and glue the first section of the new PVC line into this. Wrap the threads on the incoming water line with Teflon tape before screwing the PVC reducer onto it. This will prevent leaks between the two different types of materials being screwed together.
Step 5
Swab the inside of the reducer and outside of the end of the new pipe with PVC cement and insert the end of the pipe into the reducer. Make sure the pipe is supported while the cement is drying so that it does not pull loose. Glue a PVC connector onto the other end of the section of pipe with the PVC cement.
Step 6
Go to the next galvanized pipe joint and remove the next section of pipe. Apply PVC cement to the inside of the connector on the first section of pipe and the outside of the end of the next section of PVC. Insert the end of the pipe into the connector. Support the pipe as you did the first one. Continue this pattern of removing a section of galvanized pipe and replacing it with a section of PVC until all of the galvanized pipe has been replaced.
Step 7
Install "T" fittings and elbows as needed in place of connectors when turns and other types of connections are needed. Cut the sections of PVC with a hacksaw when shorter pieces are needed. Allow the entire system to sit for 12 hours before allowing the water pressure into the lines so that the cement will be hardened. Check carefully for leaks when the water pressure is restored.
Tip
Having someone assist you in the PVC installation will make handling the long pieces of pipe much easier.
Warning
Keep the area well ventilated because inhaling concentrated fumes from the PVC cement can be harmful.
Video of the Day