Isn't it amazing how everyday items from your kitchen can transform into something extraordinary? Imagine crafting a vibrant, fizzy bath bomb bursting with your favorite colors and scents, made by your own hands. Buying bath bombs might be easy and cheap, but making your own with this bath bomb recipe is more fun and personal. You choose the scents, colors, and shapes, making each one a special expression of your creativity.
Perfect for a Mother's Day gift or a personal treat when a spa day isn't an option, this guide will show you how to create DIY bath bombs for a relaxing experience at home. Ready to become a bath-bomb-making pro? Let's dive into the fun and fizzy world of making bath bombs!
Video of the Day
Video: Mom's the Bomb! Bath Bombs
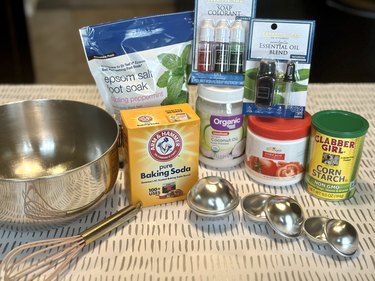
Things You'll Need
1 cup baking soda
1/2 cup citric acid
1/2 cup Epsom salts
1/2 cup cornstarch
3 tablespoons oil (coconut or almond)
1 teaspoon water
Essential oils (lavender, rose, or your choice)
Colorant (food coloring or soap dye)
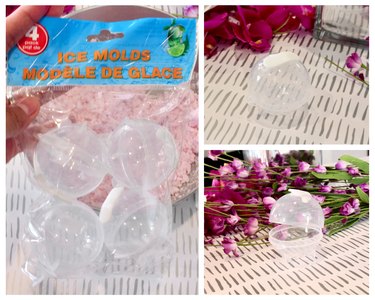
Molds (silicone molds or plastic baubles)
Dried flowers or glitter (optional, for decoration)
Whisk
Bowl
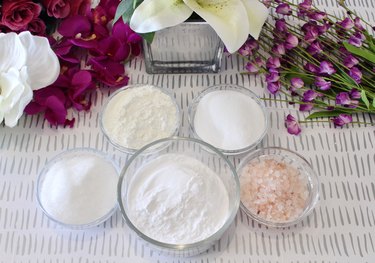
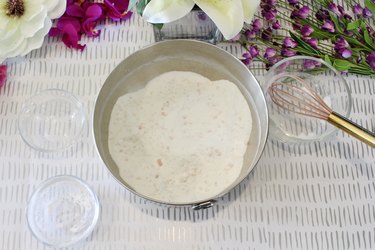
1. Mix the dry ingredients
In a large bowl, whisk together the baking soda, citric acid, Epsom salts, and cornstarch. This blend forms the base of your bath bombs, ensuring they fizz wonderfully in the bath.
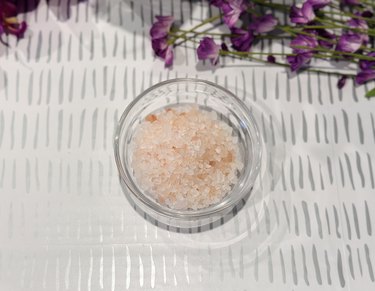

Tip
Consider adding 1/3 cup of pink Himalayan salt to your bath bomb mix. It contains beneficial minerals like magnesium, potassium, and calcium, all of which are essential for maintaining healthy skin.
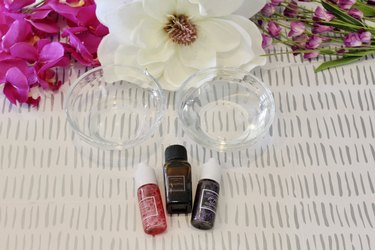
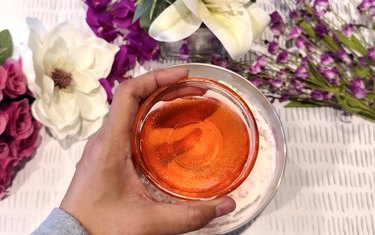
2. Blend the wet ingredients
In a separate container, mix the oil, water, a few drops of essential oils, and your choice of colorant. Go slow with the color; a little goes a long way!
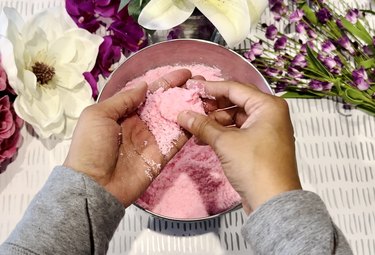
3. Combine and whisk
Very slowly, drizzle the wet ingredients into the dry ones while continuously whisking. If you see it fizzing, you're going too fast!
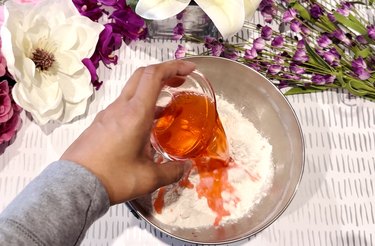

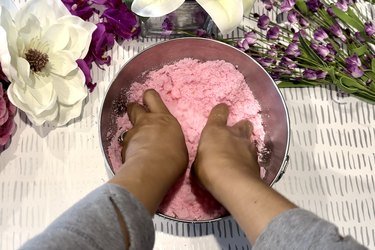
You're aiming for a consistency that clumps together when squeezed.
Tip
For richer, more vibrant colors in your bath bombs, choose cosmetic-grade mica powder over regular soap colorants. Mica provides a stunning shimmer and comes in a wide array of intense colors, ensuring your creations stand out beautifully. Just make sure to choose ethically sourced or synthetic mica to ensure both safety and sustainability in your crafting projects.
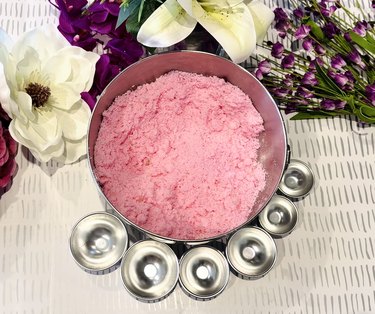
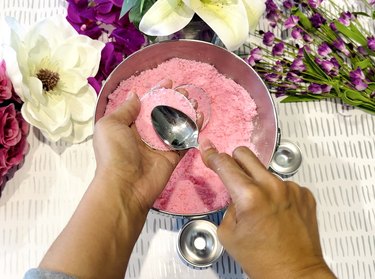
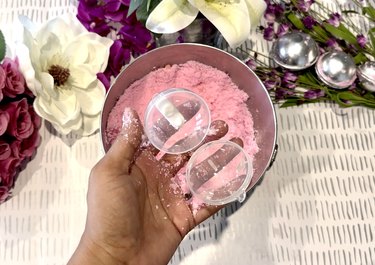
4. Pack the molds
Fill each half of your molds with the mixture, pressing down firmly. Add a sprinkle of dried flowers or glitter in the middle for an extra touch of pizzazz.
Tip
For a budget-friendly alternative to traditional steel molds, consider using round ice molds from Dollar Tree. These plastic molds are budget-friendly and work just as well for crafting your bath bombs.
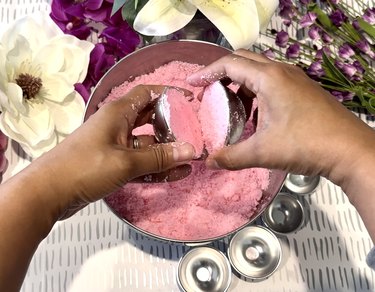
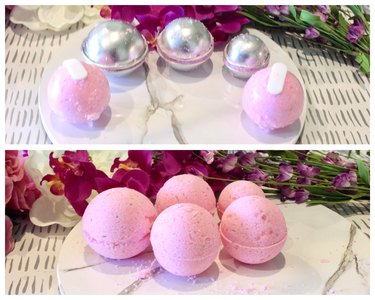
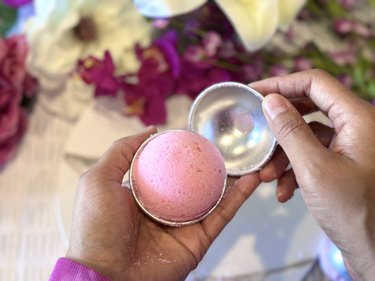
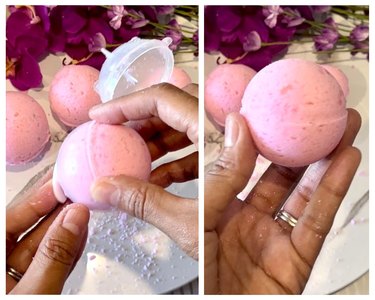
5. Press together and unmold
Tightly press the two halves of the molds together. Let them sit for a few minutes and then gently remove one side of the mold. Let the bath bomb dry out of the mold for at least 24 hours.
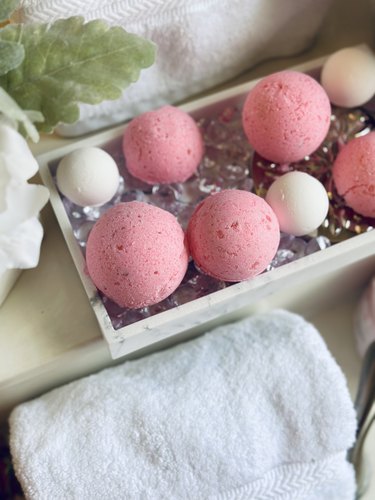
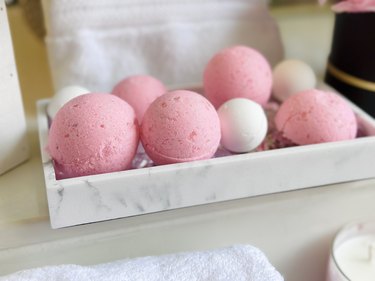
6. Wrap and gift
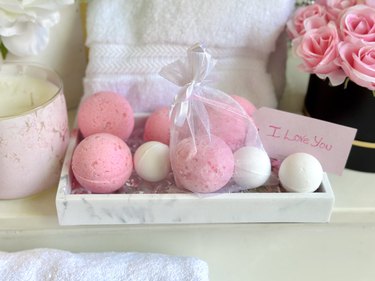
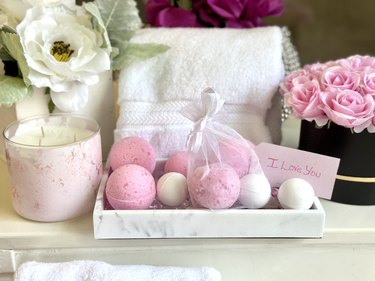
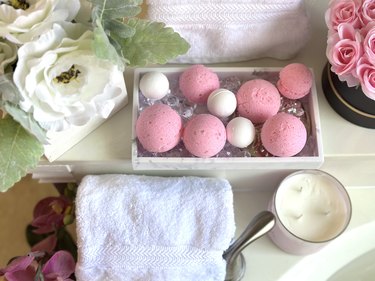
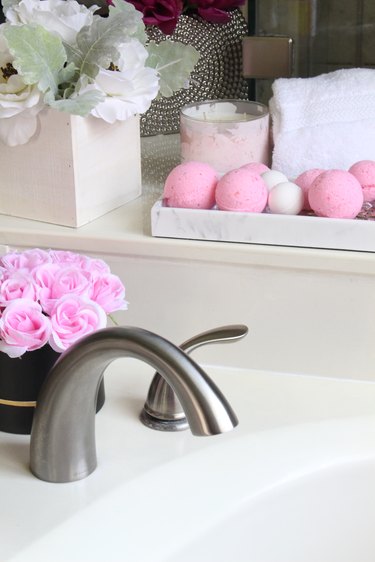
Once they are dry, wrap your bath bombs in tissue paper or place them in a pretty box for gifting. If they're just for you, place them on a pretty bath tray or in an organza bag for stylish storage. Either way, they're bound to be a hit!
There you have it! A simple, enjoyable way to create a heartfelt gift that bubbles with your personal touch. Whether it's for Mother's Day or just a cozy night in, DIY bath bombs are a fabulous way to show you care. So, why buy when you can DIY? Dive into this project and let your crafty spirit sparkle!
Why DIY Bath Bombs Are the Bomb!
- Personalized touch: Each bath bomb is a testament to your creativity and thoughtfulness. From selecting the scents to choosing the colors, each choice makes your gift uniquely personal. Try mixing two different colors and pairing them together!
- Thrifty crafting: Making your own bath bombs is cost-effective, especially when you consider the premium prices at spas and stores.
- A fun experience: Crafting these can be a cool way to spend an afternoon. It’s messy, it’s fun, and it's incredibly satisfying to see your creations come to life.
Keep fizzing! Don't just go with the flow—make something spectacular. Happy crafting, and here's to bath times that bubble with joy and sweet aromas!