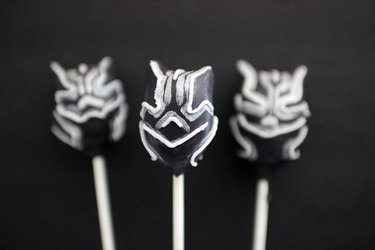
With the release of Marvel's highly anticipated Black Panther movie, I wanted to dive into creating some sweets to celebrate Check out this easy to follow tutorial to make your very own Black Panther themed cake pops and cupcakes. They're the perfect addition to a comic book themed birthday party, baby shower and more.
Video of the Day
Black Panther Cake Pops
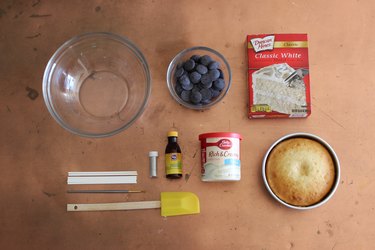
Things You'll Need
Cake mix
Chocolate melts
Lollipop sticks
Frosting
Large bowl
Skinny tip paint brush
Spatula
Silver luster dust
Pure lemon extract
Step 1: Make & Mold Cake Balls
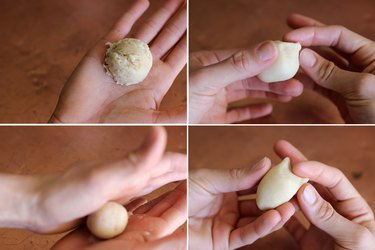
Bake your cake and crumble the cake into a large bowl. Then mix a spatula full of frosting in and roll it into balls.
Video of the Day
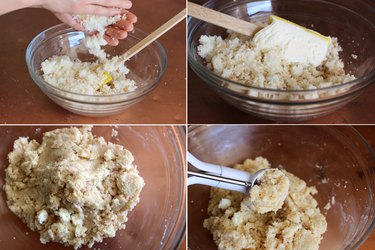
Once those are rolled, mold them into the Black Panther mask shape. Grab the corners up top and twist with your fingers to create the ears.
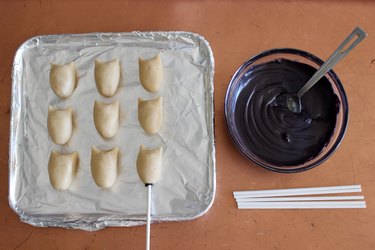
After you've molded them, dip the tip of each lollipop stick in the melted chocolate and then stick them into the bottom of each cake pop. Place them in the fridge to chill.
Step 2: Cover Pops In Melted Chocolate
Once the pops have chilled, dip them into the melted chocolate to provide a smooth coat around each. Tap your wrists with your free hand to tap off as much excess chocolate as possible.
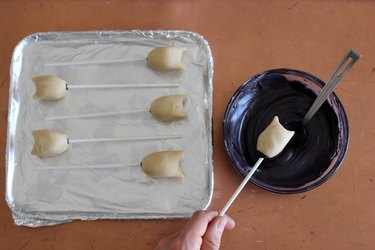
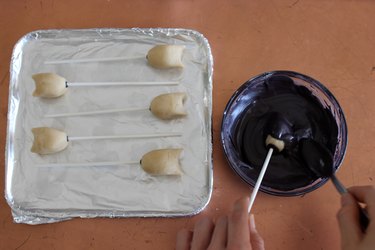
Then put them in the fridge to chill once again.
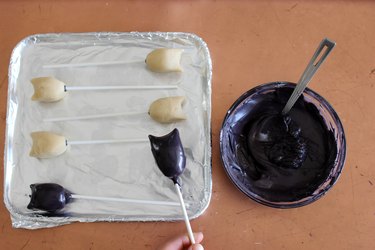
Step 3: Add Mask Details
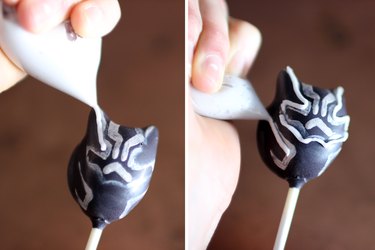
To give the mask some shine, mix equal parts silver luster dust and pure lemon extract to create this metallic effect. Paint the lines of the mask on with a thin brush.
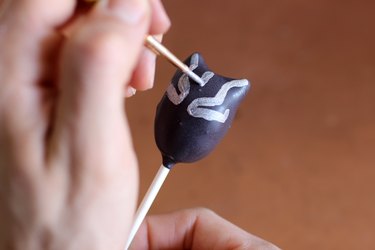
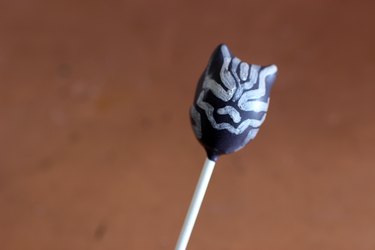
Tip
If your initial lines come out a little bit too thick, simply use some water and a q tip to thin them out.
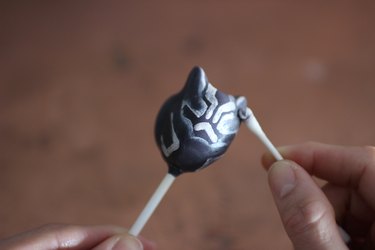
Step 4: Emphasize Details with Piping
Cut the corner off a reclosable bag, fill it with frosting and use it to pipe a little extra detail along the mask lines.

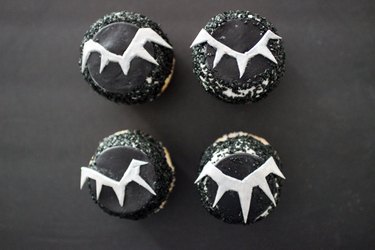
Black Panther Cupcakes
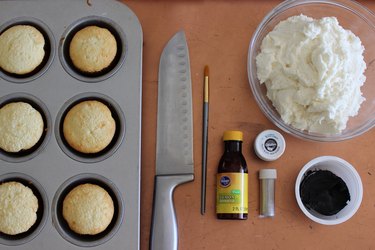
Things You'll Need
Cupcakes (homemade or boxed)
Frosting
Black molding chocolate
Black sprinkles
Silver luster dust
Pure lemon extract
Paint brush
Knife
Step 1: Bake Your Cupcakes
Bake the cupcakes of your choice, either homemade or boxed!
Step 2: Prep Molding Chocolate
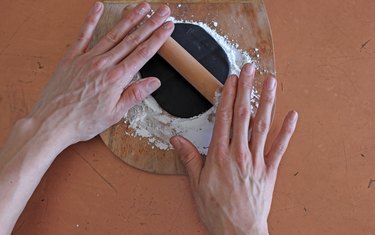
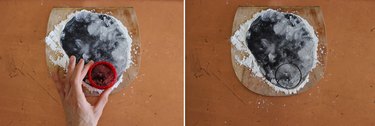
Roll out some molding chocolate and cut out small circles that will fit atop each cupcake once frosted.
Step 3: Assemble the Cupcake
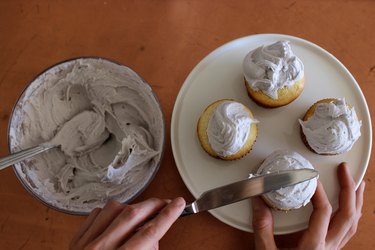
Frost your cupcakes to be fairly even at the top. Then add the molding chocolate circles on top.
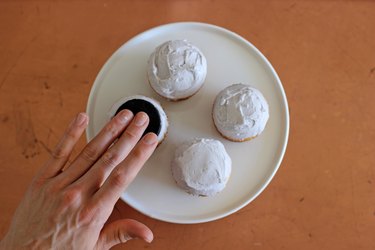
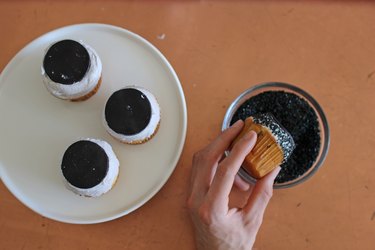
Dip the cupcakes immediately into the black sprinkles, covering the exposed frosting around the sides.
Step 4: Create the Neck Piece
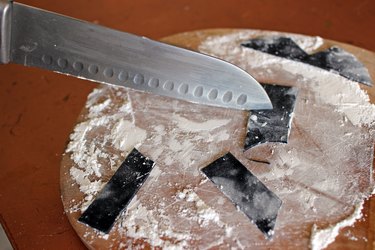
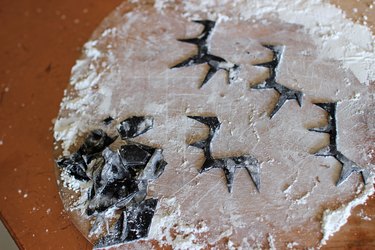
With the excess rolled out black molding chocolate, cut out the shape of the spiked necklace outline with a knife.
Step 5: Add Silver Luster Dust
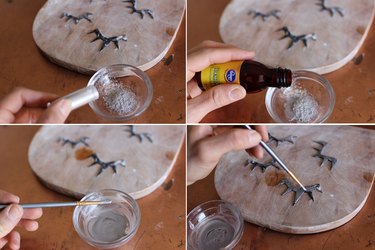
Grab some luster dust and mix it with equal parts of pure lemon extract. Paint the mixture onto the fondant to give it the perfect metallic glow!
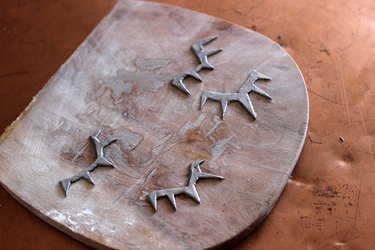
Step 6: Add Necklaces to Cupcakes
Place those spiked necklaces right on top of the cupcakes and you are done! You now have the perfect sweet treats that your guests will love at your next Black Panther get together.
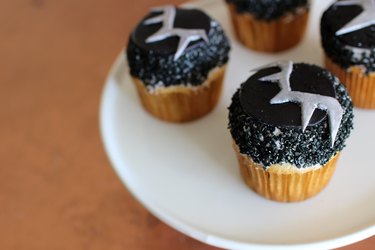
I love these because they are easy for any level of baker and are not super time consuming. Happy baking!