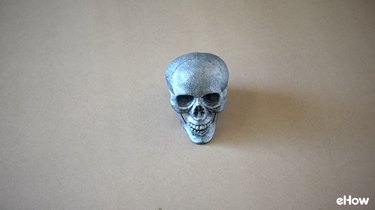
Ready to bling your A game this Halloween? With this simple DIY upgrade, you can take a cheap plastic skull and turn it into a spooky, sparkly showstopper. This faux gemstone studded skull was inspired by artist Damien Hirst's infamous 100-million-dollar-diamond-encrusted-real-human-skull (eek!) masterpiece. Except that ours is super affordable, easy to make, and only looks like a million bucks. Are you in? We thought so. Now let's get sparkly!
Video of the Day
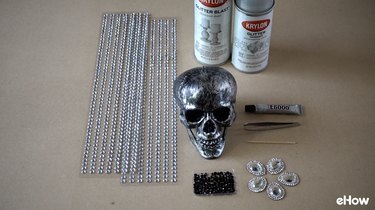
Things You'll Need
Plastic skull
Adhesive round clear gemstone strips
Glitter spray paint to match your gemstone color (we suggest Krylon Glitter Blast or Krylon Glitter Shimmer)
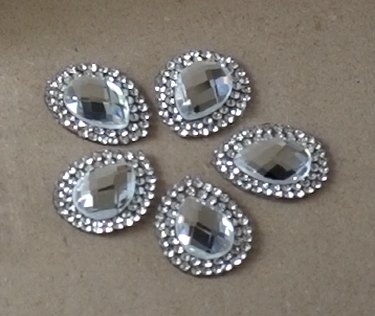
Larger pear-cut gemstone iron-on applique with smaller surrounding stones (we used this flower-shaped applique comprised of several pear-cut gems and cut out the portion needed. See step 2.)
Small black or dark gray loose gemstones
Strong craft glue (we like E6000)
Tweezers
Toothpick
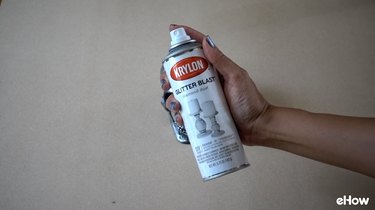
1. Paint Skull with Glitter Spray Paint
Even though the skull will be covered in gemstone strips, some of the skull's plastic surface will show through the gaps between the strips. For this reason, it's a good idea to paint your skull a color matching the gemstones. We used Krylon Glitter Blast in Diamond Dust.
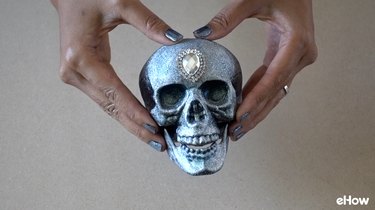
2. Glue Large Gemstone Applique to Forehead
To mimic Damien Hirst's original artwork, we wanted an applique with a pear-shaped gem surrounded by smaller stones. Since we didn't find a single applique that had the exact design we were looking for, we found this larger flower-shaped iron-on applique composed of several pear-cut stones encircled by smaller stones as its petals.
To make it work for us, we simply cut out the portion we needed. What's more, this single applique yielded several smaller appliques when cut up (see image below). Use the extra appliques to make more skulls or for other DIY projects. If you can't obtain this particular applique, you can, of course, use one similar.
Apply a strong glue to the back of the applique and position it onto the forehead of the skull.
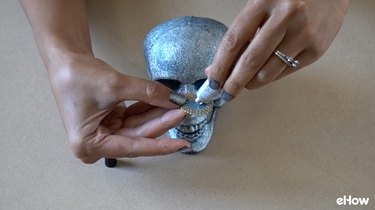
Hold in place until set.
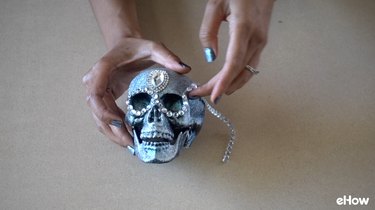
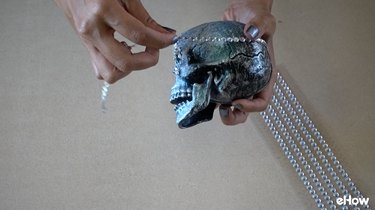
3. Apply Gemstone Strip Around Eyes
Remove a strip of self-adhesive gemstones from the backing.

Apply the strip in a figure-8 pattern around the eye-holes as shown below.
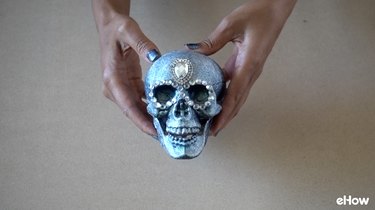
4. Cover Top of Skull with Gemstone Strips
Now you'll cover the top half of the skull with gemstones. To start, apply a strip starting at the inner corner of one eye (directly above the row of gems above the eye), then adhere it all the way around the midsection of the skull, ending at the inner corner of the opposite eye.
Apply an additional row above the one you just laid down.
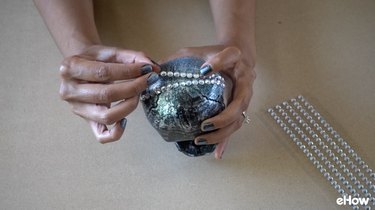
Continue applying rows, one above the other, starting from one side of the large gem applique to the other side. Once you reach the very top of the skull, the rows will become concentric circles.
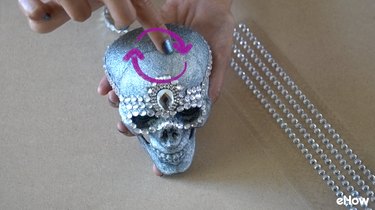
Continue laying down the strips in circles until the top is completely covered with gemstones.

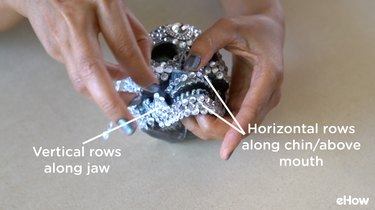
5. Cover Bottom Half of Skull with Gemstone Strips
Apply more rows from one side of the head to the other, from the midsection to the bottom.
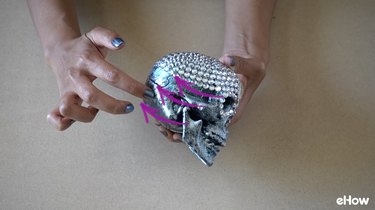
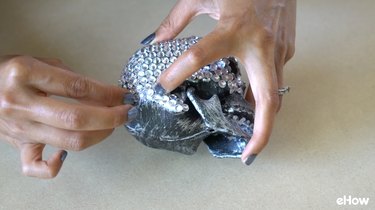
Finally, apply strips in rows vertically along the jaw and horizontally along the chin and above the mouth.
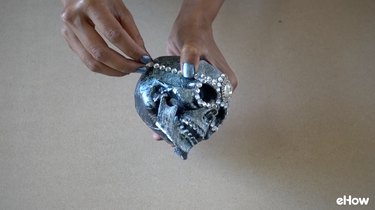
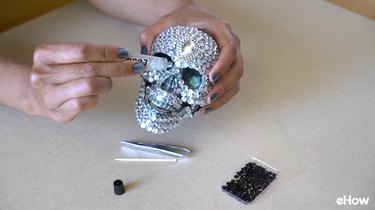
6. Cover Gaps with Individual Stones
To cover gaps, tear individual stones from the strip, and place them in the exposed areas. You may need to apply a dab of glue onto the individual stones to help them adhere.
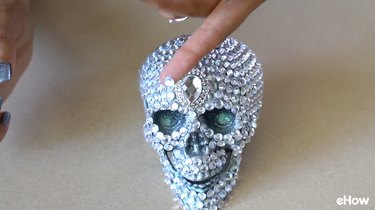
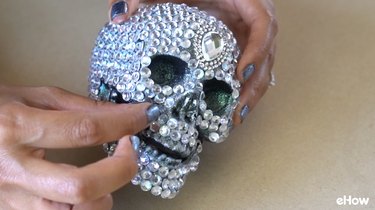
7. Encrust Eye Holes and Nose Hole with Darker Gemstones
To give the eye holes and nose hole a shadowy effect, we encrusted them with dark gemstones. To do so, first dab a bit of glue to the spot where you'd like to place the stone.
Pick up a single gemstone with tweezers and place it onto the dab of glue.
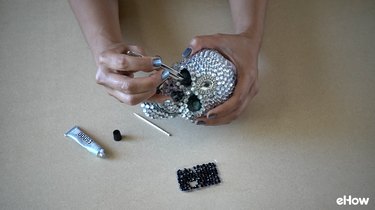
While the glue is still tacky, use a toothpick to push the gemstone down onto the glue and hold it in place until the glue sets.
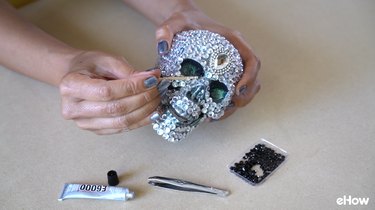
Repeat until the eye hole is fully encrusted, then do the same for the other eye and nose to finish it up.
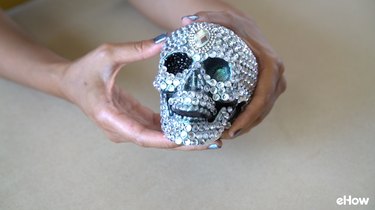
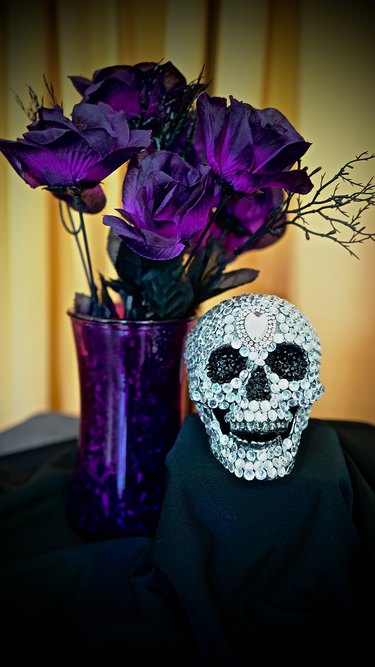
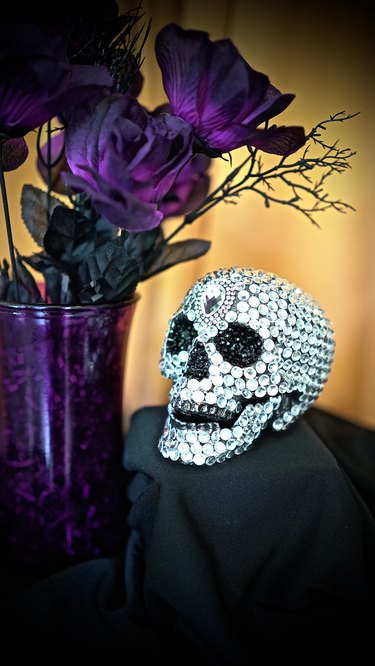
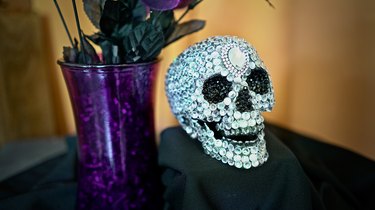
All done! Behold your glammed up ghoul.
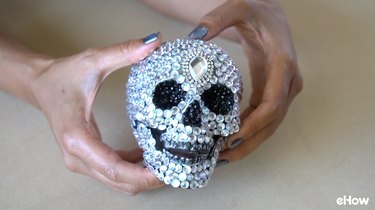
This shimmery skull is perfect for gracing a shelf or as part of a centerpiece for a captivatingly creepy Halloween tablescape.