Dusting is one of those never-ending household chores. No matter how often and how diligently you dust, it always seems to come back in a hurry. That's irritating, not just because it's unsightly, but also because dust is a significant allergen for a lot of people. There are plenty of creative ways to make dusting less of a chore, and save your back in the process. Here are a few of our favorites.

Video of the Day
1. Use a Lint Roller
Textured surfaces seem to have a real knack for accumulating dust, and an ordinary duster doesn't work very well for cleaning things like lampshades and fabric-covered speaker grilles. You could use the brush attachment on your vacuum cleaner, but the hose and wand can be awkward to work with in tight spaces. An inexpensive lint roller (the kind sold at department stores and dollar stores) is a better option. Just roll it methodically across the surface from top to bottom, and it will trap and hold even a heavy accumulation of dust.
Video of the Day

2. Use Brushes for Hard-to-Reach Spaces
Some of the most difficult spaces to clean effectively are the smallest ones. Narrow crevices in your appliances and electronics, lamps and decorations can be frustratingly difficult to free from dust buildup. Rather than trying to get your regular duster into those tiny spaces, pick up a few inexpensive paintbrushes and makeup brushes from the dollar store. Whenever you do a deep clean, use the brushes to sweep out those hard-to-reach places in your decor and electronics, from your keyboard to those difficult spots at the corner of your TV screen.

3. Use a Dry Mop
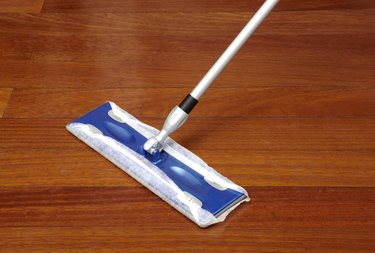
A dry mop with an electrostatic pad is a super-handy tool for dusting solid flooring surfaces including tile, hardwoods and vinyl. Their only drawback is that the cost of those disposable pads quickly adds up, and they're a source of unnecessary waste. If you appreciate the convenience but want a more sustainable option, just ditch the disposables. A microfiber cloth is equally effective at collecting dust from the floor, and once it's dirty you can simply throw it in the wash. Depending on the size and shape of your mop, a stretchy sock can also do the trick.

4. Clean Your Houseplants
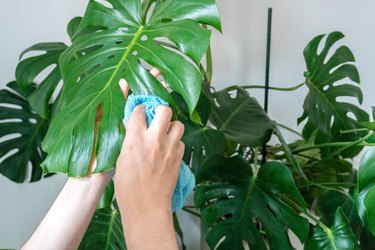
House plants help give your home a natural look and feeling, and create a peaceful ambiance in a room. Unfortunately, they're also dust magnets, so cleaning them regularly should be part of your dust-reduction regimen. Smaller plants that like to be well watered can simply go into the shower and get washed down, though you'll have some soil to rinse out of the tub afterwards. Use a damp cloth for larger plants, or plants that don't like too much water. Use a paintbrush to reach in between the thorns of spiny succulents and cacti, evicting the dust from the surfaces between the spikes.

5. Clean Venetians with Kitchen Tongs
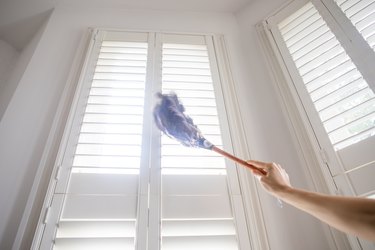
Venetian blinds are a remarkably versatile window covering. By trapping air at the window they help keep your home warm in winter and cool in summer, and their slatted design lets light in while keeping prying eyes out. Unfortunately, all of those flat surfaces trap dust in a big way. The most effective way to clean them is to take them down and wash them in the tub, but that's a major undertaking. For a quicker, simpler cleaning option, wrap microfiber cloths around both sides of a pair of kitchen tongs and hold them in place with elastic bands. To clean the blind, simply grip each slat with the tongs, and slide them the width of the blind.

6. Clean Ceiling Fans With a Pillowcase
One of the most powerful "pro tips" for housecleaning is to start at the top and work your way down, so the dust you dislodge from near the ceiling doesn't mess up already-cleaned surfaces. Ceiling fans are among the worst offenders, because they accumulate dust on both the tops and bottoms of their blades. One clever hack to minimize the amount of dust they shed is to use a pillowcase as your cleaning tool. Slide the pillowcase over each blade of the fan in turn, and gently press it against the blade with the flat of your hands. Slide the pillowcase the length of the blade, removing dust and trapping it in the pillowcase. When you're done, just toss the pillowcase in your laundry.

7. Use Dryer Sheets to Repel Dust
In any home, there are some areas that are a pain to dust, either because of their creases and crevices or because they're awkward to reach. Decorative moldings are a prime example, since you have to stretch to reach elevated moldings and move furniture to get at baseboards. The next time you go to the trouble of dusting them, keep an antistatic dryer sheet in your pocket. As you finish cleaning each section, wipe it down with the dryer sheet. The sheet's antistatic properties will help repel dust from the surface, so it will stay cleaner for longer.

8. Prevent Buildup on Vents
Ceiling vents are an especially difficult cleaning-day project. Not only are they full of angles and crevices, the steady flow of air through the vent actively encourages dust and dirt to settle on them. You can give them a quick clean with a damp sponge or microfiber cloth, or take them down and scrub them in the sink for a deeper clean. To keep them clean for longer, next time, take a detour to your garage once they're washed and dried. Wipe them down with your favorite brand of car wax, then let it dry and buff them to a sheen. The wax will help repel dust, and make it easier to clean away accumulated dirt and grease the next time.

9. Use the Vacuum
Two of the handiest tools you can have on cleaning day are a good vacuum cleaner and an electrostatic duster with a handle that extends for hard-to-reach places. Each is useful in its own right, but have you thought about using them together? Instead of swapping out your vacuum's normal head for crevice and brush attachments, use the duster's reach to pull dust bunnies and pet hair out of difficult spots under furniture, in corners and between appliances. Once they're out, you can easily vacuum them up. You'll save a lot of time, and a lot of bending and stretching.

10. Run Your HVAC Fan While You Clean
One common complaint on cleaning day is that the dust simply gets stirred up, then settles back down onto every available surface again once you're finished cleaning. To keep that from happening, draw on your home's HVAC system. Your central heat and air contains an effective dust filter, so turn on the fan before you start. The dust-laden air gets sucked through the system and filtered before it's released back into the room, removing your dust. If you don't have a central system, pick up an inexpensive portable air-filtration unit and move it from room to room as you work.
