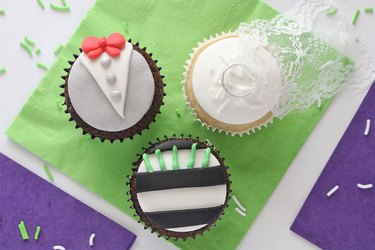
As a classic Halloween movie, Tim Burton's Beetlejuice is an excellent source of inspiration for costumes; parties; and, of course, food! This is especially true when it comes to cupcakes, which double as party decor. Inspired by the original Beetlejuice movie poster, these three DIY Beetlejuice-themed cupcakes are the perfect choice for Halloween parties, and they'll most definitely get everyone pumped up for the premiere of the sequel, Beetlejuice Beetlejuice!
Not only are these cupcakes fun to create (and even more fun to eat!), they're totally Lydia Deetz and sandworm approved. Ready to make them yourself? It's showtime!
Video of the Day
Video of the Day
Beetlejuice Cupcake
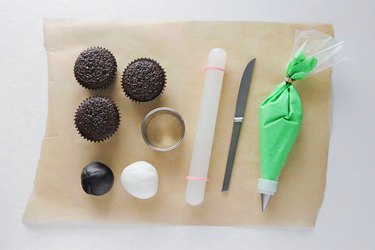
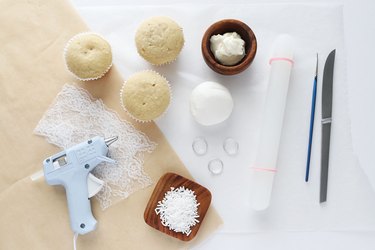
Things You'll Need
Chocolate cupcakes in black-and-white striped liners
White fondant
Black fondant
Bright green icing
2-in. circle cookie cutter
Fondant roller
Butter knife or pizza cutter
Piping bag with a thin decorating tip
Parchment paper or silicone mat
Frosting
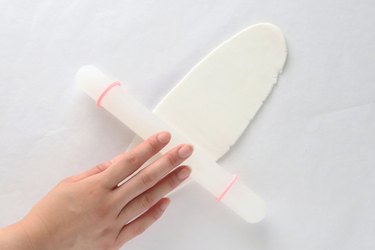
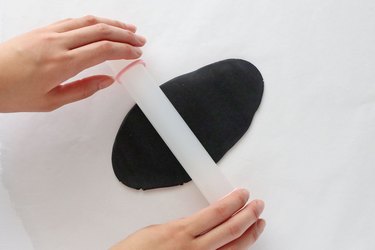
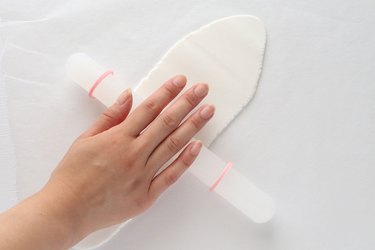
1. Roll out the white fondant
On parchment paper or a silicone mat, roll the white fondant into a thin layer. Set it aside.
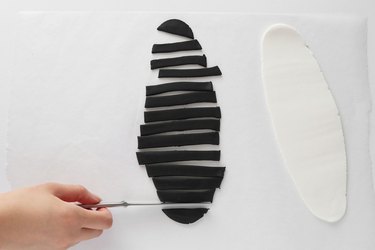
2. Roll out the black fondant
Roll out the black fondant in a thin, even layer.
3. Slice the black fondant
With a butter knife or pizza cutter, slice the black fondant into half-inch strips.
4. Place the black strips on the white fondant
Place the black strips on top of the white fondant, spacing them out evenly.
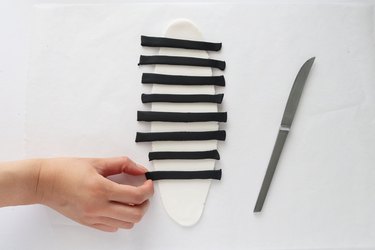
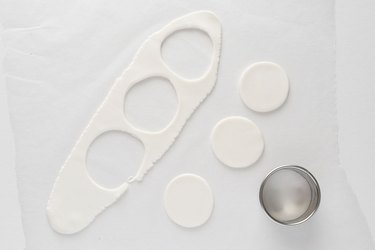
5. Cut out the circles
Press a 2-inch circle cookie cutter into the fondant. Cut out as many circles as you can.
Tip
Combine and reroll the excess fondant to make gray fondant to use for the groom cupcakes.

6. Frost the cupcakes
Spread a bit of frosting onto the cupcake. This will help "glue" the fondant onto the cupcake.
Tip
Depending on the moisture of your cupcakes, you might not need to use the frosting and can skip this step.
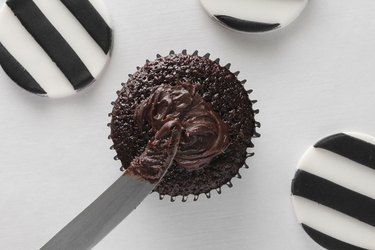
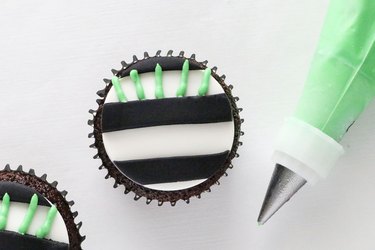
7. Pipe the green hair
Place a striped circle onto each cupcake and then pipe rows of bright green frosting for the "hair."
Tip
For crisp lines, chill the green frosting before piping it onto the cupcakes.
Bride Cupcake
Things You'll Need
Vanilla cupcakes in white liners
White fondant
White sprinkles
Fondant roller
Butter knife or pizza cutter
Thin paintbrush
Scissors
4- or 5-in. strips of lace or tulle
Hot glue gun
Faux wedding rings
Parchment paper or silicone mat
Frosting
Tip
You can find faux wedding rings in the wedding section of craft or party supply stores.
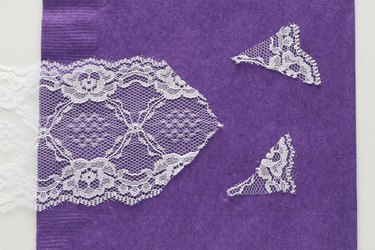
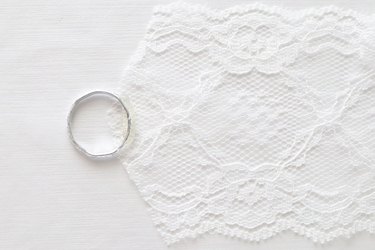
1. Make the veil
To make the veil, fold a strip of lace in half lengthwise. Cut the end at a diagonal.
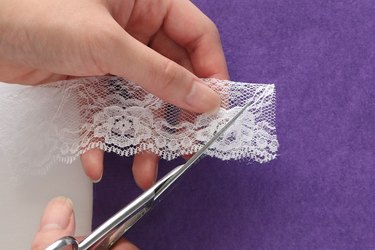
This will create a pointed end.
2. Glue the ring
Apply hot glue to the edge of a faux wedding ring.
Warning
Do this slowly and carefully, as the glue will be very hot.
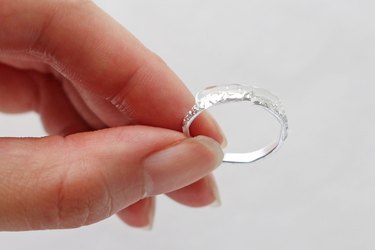
3. Secure the ring to the lace
Add the ring to the pointed end of the lace, pressing gently to secure. Set it aside to dry.
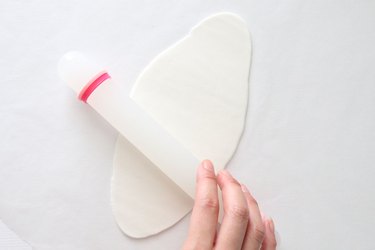
4. Roll out the white fondant
On parchment paper or a silicone mat, roll the white fondant into a thin layer.
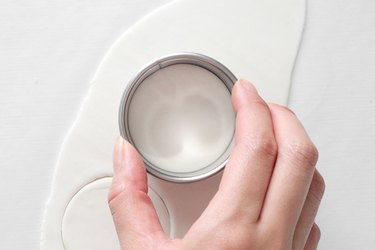
5. Cut out the fondant circles
Using a 2-inch circle cookie cutter, cut out circles. Reroll the excess fondant to be used again.
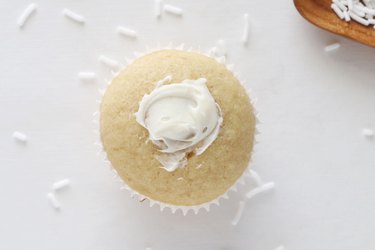
6. Frost the cupcake
Spread a small amount of frosting on top of the cupcake.
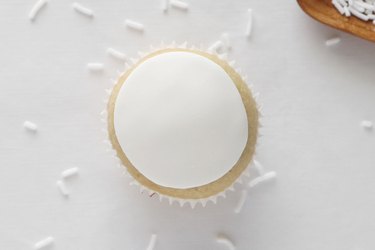
7. Add a white fondant circle
Add a circle of white fondant on top.
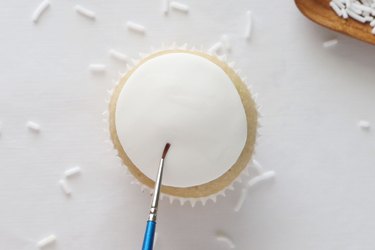
8. Dampen the fondant
Using a paintbrush, apply water to the fondant. This will help the sprinkles stick.
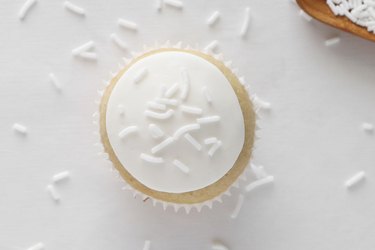
9. Add the white sprinkles
Add the white sprinkles. You might need to gently press the sprinkles into the fondant.
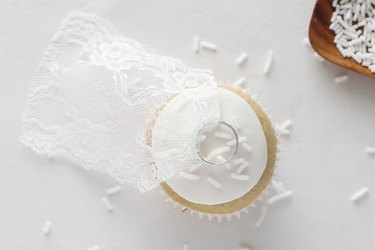
10. Put the veil on the cupcake
Place the veil on top of the cupcake.
Warning
If you'll be serving these cupcakes to children, be sure to remove the ring first.
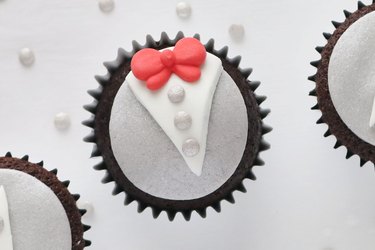
Groom Cupcake
Things You'll Need
Chocolate cupcakes in silver liners
Silver or gray fondant
White fondant
Red bow icing decorations
Silver sequin sprinkles
2-in. circle cookie cutter
Fondant roller
Butter knife or pizza cutter
Thin paintbrush
Parchment paper or silicone mat
Frosting
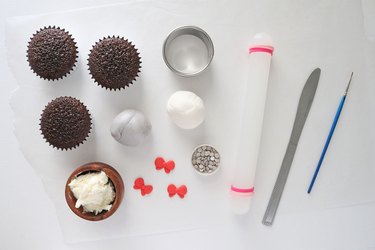
Tip
If you can't find red bow icing decorations, you can make your own using red fondant and a bow mold.
1. Roll out the silver fondant
On parchment paper or a silicone mat, roll the silver fondant into a thin layer.
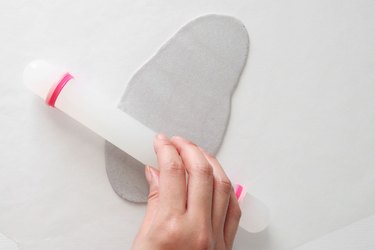
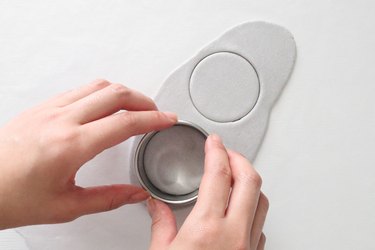
2. Cut out the fondant circles
Using a 2-inch circle cookie cutter, cut out circles. Set them aside.
3. Roll out the white fondant
Roll the white fondant into a thin layer.
4. Cut out the white fondant circles
Cut out circles of white fondant.
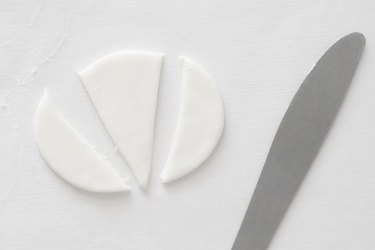
5. Cut the circle
Using a butter knife or pizza cutter, cut each side of the circle at an angle. This will create a triangle.
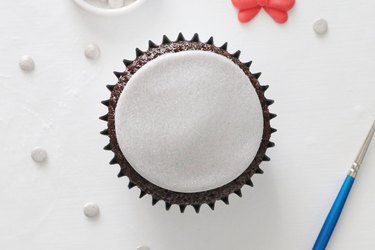
6. Frost the cupcake
Spread a small amount of frosting onto the cupcake.

7. Cover the cupcake with a fondant circle
Add a silver or gray fondant circle on top of the cupcake.
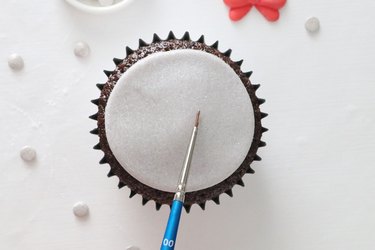
8. Dampen the center
Using a paintbrush, apply a small amount of water to the center.
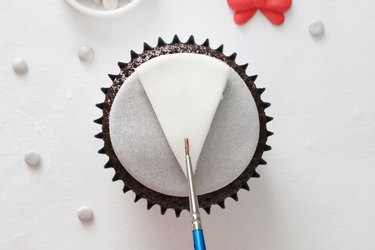
9. Add the white triangle
Add the white triangle to the center, lining up the curved edges of the circles. Then, brush some water onto the center of the triangle.
Add three silver sequin sprinkles for the "buttons" and a red bow icing decoration.