On a top shelf in my mother's kitchen sits a well-worn and much-used cookbook titled Sharing Our Best. The lamination on the yellow cover is peeling off at the corners, and the white lettering rubbed off the red, plastic spiral binding years ago. But every holiday season, someone in my family inevitably grabs it from the shelf, thumbing through the stained and dog-eared pages to find a beloved recipe inside. The recipes are of the unique nature of 1970s cuisine, made with seemingly odd combinations of flavors, shaped into shapes you wouldn't think to mold food into, often calling for a package (or two) of Jell-O.
With the weather growing colder and the holiday season approaching, now is the perfect time to revisit some tasty 1970s appetizers. The following three recipes are inspired by those found in my family's 1970s cookbook, and these retro-inspired apps are definitely conversation starters. They're also delicious—we promise!
Video of the Day
Video of the Day
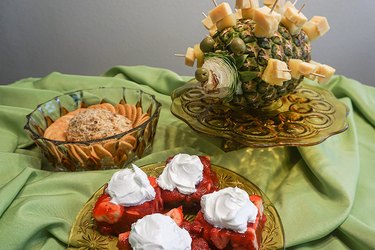
While the focus of a 1970s recipe was often on making a dish look good, we took the liberty of tweaking these popular dishes so they'll taste good too. Maybe you'll even be inspired to throw a '70s party! Whatever the occasion, these party appetizers are sure to satisfy.
Tip
Other Famous 1970s Appetizers:
• Cocktail meatballs
• "Watergate salad" (made from pistachio pudding!)
• Cheese fondue
• Quiche
Recipe 1: Jell-O Fruit Salad
While Jell-O molds topped the list of party foods in the 1920s through the 1950s, the 1970s was a major decade for the Jell-O salad, aka some combination of chopped fruit suspended in any flavor of gelatin. Common recipes called for all types of fruit mixtures, but for our twist, we're sticking with flavors that pair perfectly: strawberry, banana and—that seventies darling—pineapple.
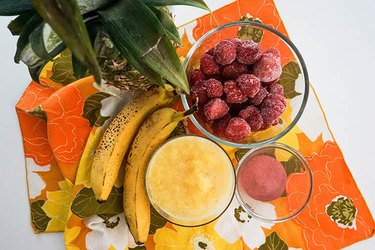
Things You'll Need
6 oz. box strawberry Jell-O
16 oz. package frozen strawberries
16 oz. can crushed pineapple
2 large ripe bananas
container Cool Whip
How to make Jell-O Fruit Salad:
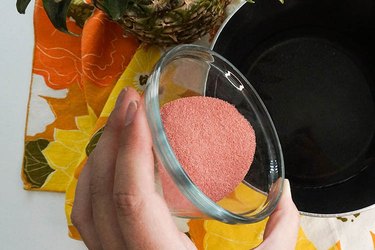
1. Add the Jell-O
Pour strawberry gelatin into a pot of hot water, and leave your burner on low. Be sure to stir the mixture until the granules are completely dissolved.
2. Add the strawberries
Add frozen strawberries to the hot Jell-O mixture. Stir the strawberries slowly until thawed.
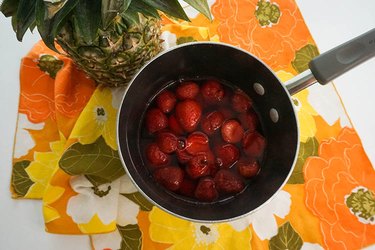
3. Add the pineapple
Add crushed pineapple. You can now turn off your burner, but leave the pot on the stove.
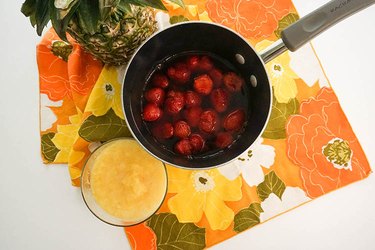
4. Add the banana
Slice ripe bananas into thin rounds and add them to the pot. You can now remove the pot from the stove altogether.
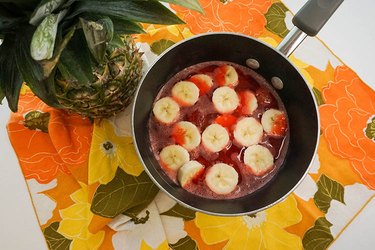
5. Add the Jell-O salad mixture to your dish
Pour the Jell-O mixture into an 8x8-inch dish. The dish should be at least 2 in. tall.
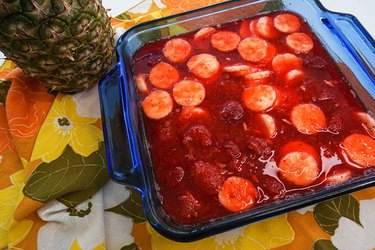
6. Let the Jell-O set
Add your dish to the refrigerator so the Jell-O can harden. This process takes between two and six hours. If you have the time, make the dish the day before so your appetizer has plenty of time to firm up!
Jell-O Salad Pairings
Add some flavor to your Jell-O fruit salad with these fun combos:
• Orange Jell-O with sliced mandarin orange and banana
• Lemon Jell-O with whole strawberries and blueberries
• Raspberry Jell-O with whole raspberries and crushed pineapple
• Strawberry Jell-O with diced apples and pears
7. Serve!
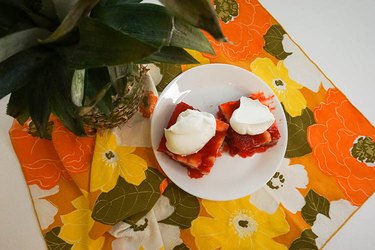
To serve your Jell-O salad appetizer, cut the dish into nine identical squares. When plating, add a dollop of Cool Whip on top of each square.
Recipe 2: Cheese Balls
In our yellow family cookbook, there are not one, not two, but three cheese ball appetizer recipes. A retro cheese ball recipe spoke to the idea of taking simple and easy-to-use ingredients and making them look fun and, well, appetizing. Some old cheese ball pairings are just plain curious: pineapple and bell pepper? Cream cheese and Worcestershire sauce?
But have no fear—our take on the cheese ball appetizer packs a nostalgic punch while ensuring that they'll be a crowd-pleaser. You can also make these into one large cheese log if you prefer.
Things You'll Need
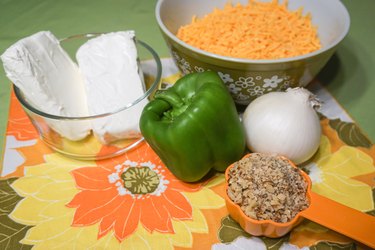
2 cups shredded cheddar cheese
2 (8 oz.) packages cream cheese
1/4 cup finely chopped white onion
1/4 cup finely chopped green bell pepper
1/2 tsp. garlic salt
1/2 cup walnuts
1. Soften cheese
Let your shredded cheddar cheese and cream cheese soften for about an hour (but no longer than two hours). When the cream cheese feels blendable, put the two cheeses in a food processor and blend until creamy. Place the mixture in a large bowl.
2. Chop ingredients
A fine chop is key for these cheese balls. Start by dicing white onion into small pieces. (Best to get the hard part out of the way first, right?) Then finely dice green bell pepper. Finally, chop your walnuts into very small pieces.
3. Add the rest of the ingredients
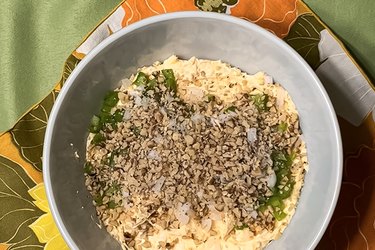
Add the onion, bell pepper, garlic salt and 1/4 cup of your walnuts to the cheese mixture. Fold in all the ingredients until completely blended.
Tip
Be sure to make your cheese balls or cheese log the night before your gathering. Chilling overnight ensures that the balls maintain their shape when you put them out at your dinner party.
4. Shape the cheese balls
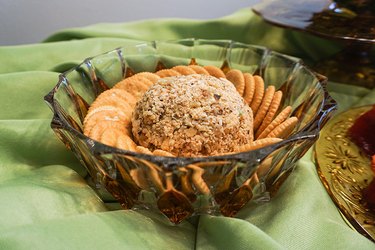
Once your ingredients are blended together, make two spheres out of the mixture. Next, roll the balls in the remaining 1/4 cup of chopped walnuts. Add them to the refrigerator to set, preferably overnight.
5. Work on your presentation and serve
Cheese balls are traditionally paired with crackers. You can have fun with displaying a variety of different crackers beside your cheese balls, or go rogue and serve with a variety of fruits and vegetables. Whatever you think guests will enjoy with your cheese ball, go for it!
Recipe 3: Pineapple & Cheese Hedgehog
If anything spoke to the desire for an intriguingly shaped appetizer, it was the pineapple and cheese hedgehog. This appetizer gained popularity in the 1970s and 1980s in the United States. As you can imagine, this appetizer consisted mainly of cheese and pineapple, which were speared through with toothpicks that were then stuck into a vaguely hedgehog-shaped ball of foil.
For our updated recipe, we've nailed down the cheese and pineapple pairing and opted for a body made of a whole pineapple. The caramel notes of Gouda cheese combined with the sweet tang of pineapple creates the ultimate pineapple hedgehog appetizer!
Things You'll Need
1 wedge Gouda cheese, cut into 1/2 in. chunks
16 oz. can pineapple chunks
1 whole pineapple
3 whole green olives
15–20 toothpicks
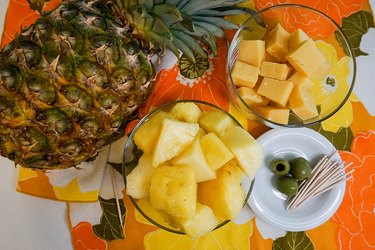
1. Cut the leaves off your pineapple
When you cut the leaves off your pineapple, do so in a way that leaves a pointed nose for your hedgehog. Do this by holding the pineapple with the pineapple body closest to your chest and the leaves behind the pineapple. Cut into the leaves downward at a 45-degree angle toward the top of the leaves and stop midway through. Repeat five times so you create a pentagon-like shape.
Warning
Use caution when cutting off the leaves of your pineapple, creating the pointed end.
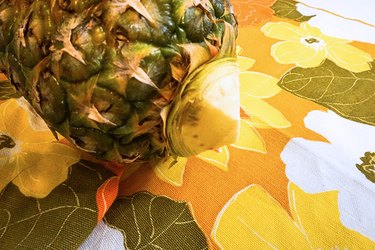
Tip
We used a bread knife to cut off our pineapple leaves because the serrated edge cuts through the leaves nicely. As always when cutting with a large knife, be careful!
2. Add the eyes and nose
Add the eyes and nose of the hedgehog with three whole green olives. Break your three toothpicks in half, insert them pointy-side down into the pineapple where you want the eyes and nose, and add the three olives. Be sure to place the eyes above where the pineapple body and pineapple top meet, and place the nose at the peak of the point where you cut the leaves off.
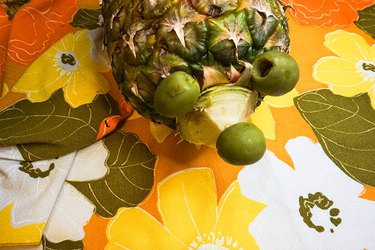
3. Add your spears
Next, spear a squared piece of Gouda (about 1/2 inch in size) and then a piece of pineapple underneath. Repeat this process 15 times or more. Be sure to insert the toothpicks far enough into the pineapple body to secure them. Serve and enjoy!
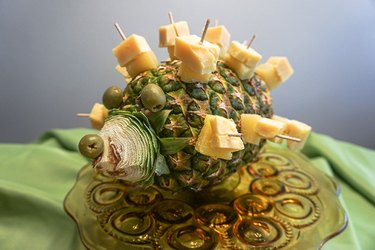
Whichever '70s appetizer you choose to serve, we hope you and your party guests have a groovy time!