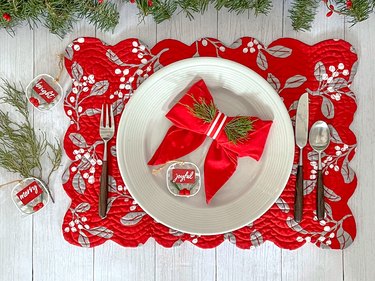
A beautiful holiday meal with all the fixings needs a table worthy of all that deliciousness. One super easy way to set a table fit for the feast? Table napkins that are out of the ordinary to set the scene and let your guests know they're in for a treat!
With that mission in mind, we've concocted three napkin-folding ideas to take your holiday table to the next level: a poinsettia, a Christmas tree and a holiday bow. Try one or all and make it all your own by folding different types of napkins in patterns galore.
Video of the Day
So, grab a few cloth napkins! Our step-by-step tutorial will help you master these three easy napkin-folding ideas.
What Kind of Napkins to Use for Napkin Folding
We used cotton cloth napkins for each of our ideas below. But the type of napkin is really up to you! Here are a few things to consider when choosing a napkin.
Polyester and cotton napkins: Great for simple folds and more intricate designs, like flowers, pinwheels, crowns, trees and leaves
Satin, sequin and taffeta napkins: Best for loose folds since the fabrics aren't as easy to work with
Paper napkins: These work great for origami napkin folds and all of the ideas below
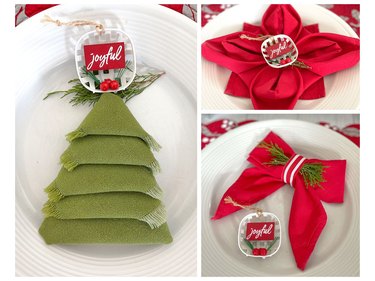
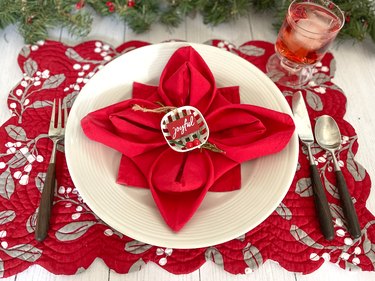
Idea 1: Poinsettia Napkins
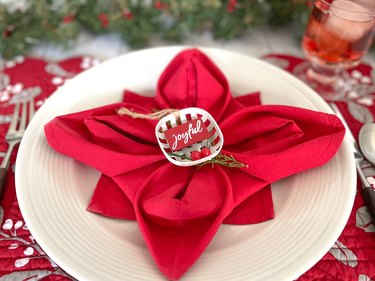
How to make a poinsettia napkin:
1. Fold a cloth napkin
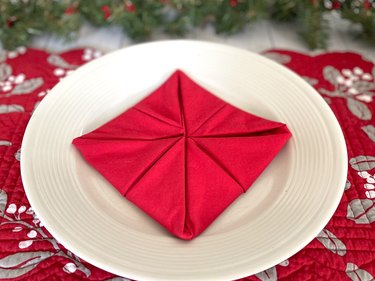
Open a red square cloth napkin and fold each corner into the center. Make sure the folds are flat with no wrinkles.
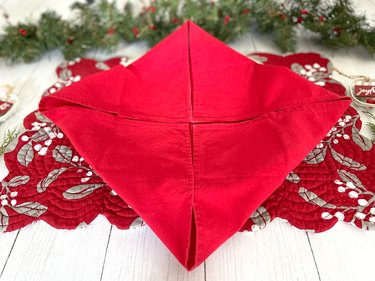
Fold the newly formed corners into the center of the napkin.

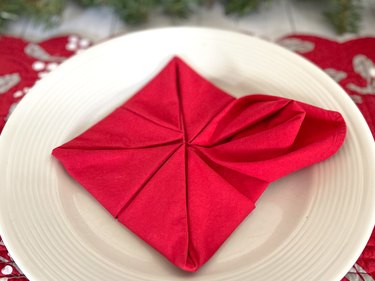
Sandwich the napkin between your hands and carefully turn over the napkin. Fold the newly formed corners into the center of the other side of the napkin.
Reach under each corner and carefully pull the loose fabric out and up to form the petals.
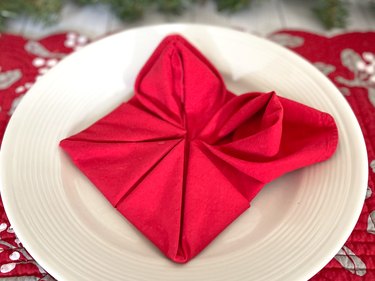
Reach under each side and pull out the small, loose fabric.
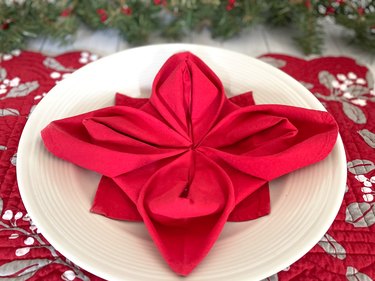
2. Embellish and display
Place some greenery (faux or real) and an ornament in the center of each napkin. Set your holiday table and place each poinsettia napkin on top of a plate.

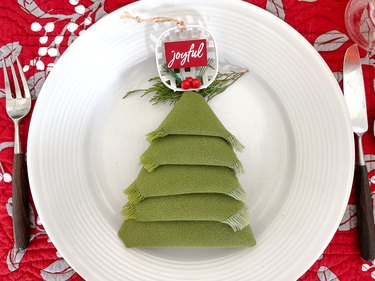
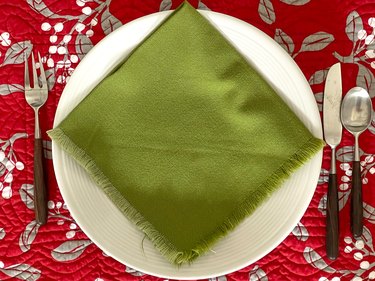
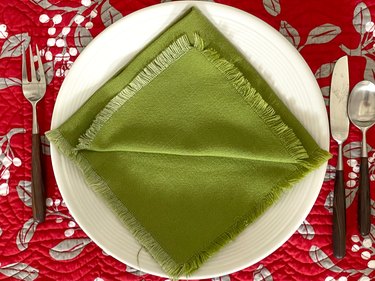
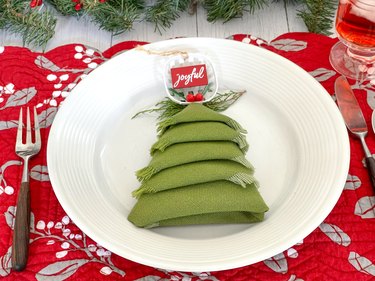
Idea 2: Christmas Tree Napkins
Video: Christmas Tree Napkins
How to make a Christmas tree napkin:
1. Fold a cloth napkin
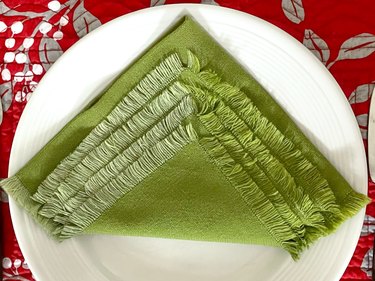
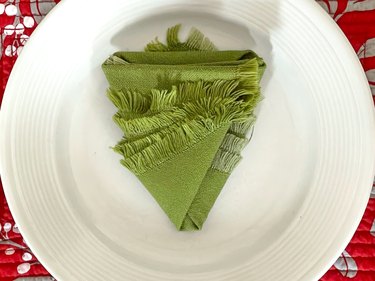
Open a green square cloth napkin and fold it in half to form a rectangle, making sure to match the edges. Fold it in half again to form a smaller square.
Flip the napkin around so the open corners are at the bottom of the square. Fold the top layer up to a half an inch or so from the top edges. Press it flat with your hands. Fold the next layer up to a half inch or so away from the previous folded layer. Repeat with the third and the fourth layers.
Gently slide your hand under the napkin and sandwich the napkin between your hands to carefully flip it over.
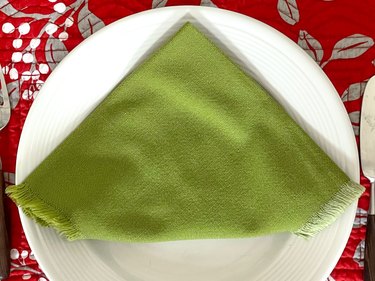
Fold the right upper corner over to the opposite side so the top edge is about a third of the way down the napkin and parallel to you. Fold the left upper corner to the opposite side. This will form a diamond shape.
Tuck the top corner underneath the top of the folds you just made.
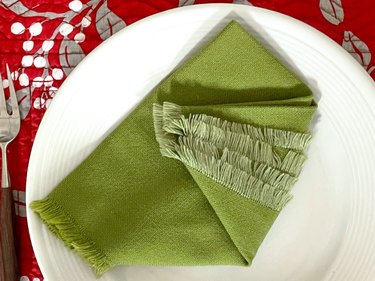
Carefully flip the napkin over again by sandwiching it between your hands to keep the folds from falling apart.
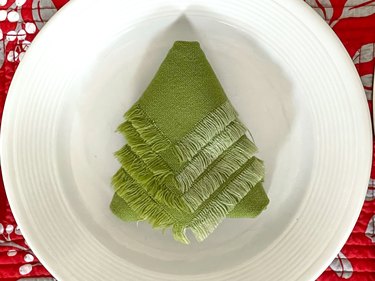
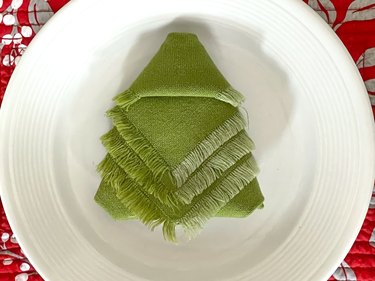
Starting at the top, fold each flap up and under itself to hide the pointed corner.

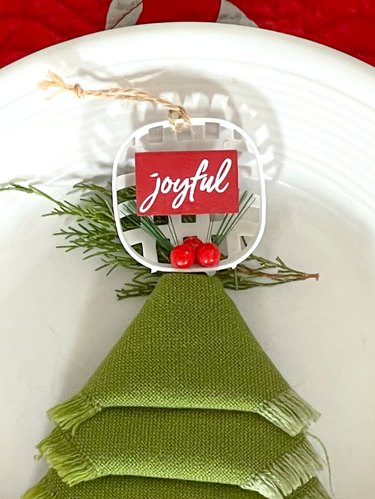
2. Embellish and display
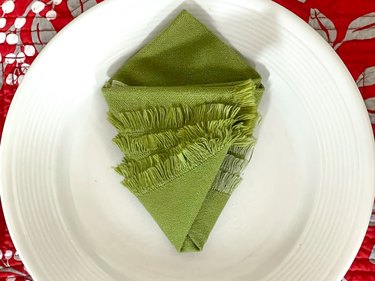
Top the napkin with some greenery and an ornament, small bow or bell to finish off the tree. Place the Christmas tree napkin on a plate and arrange your silverware for a holiday table setting that will wow your guests.
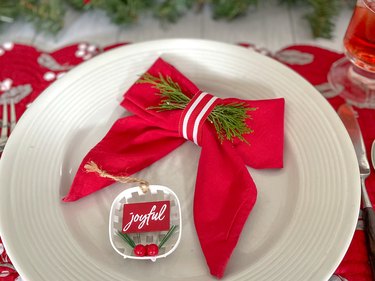
Idea 3: Christmas Bow Napkins
Video: Christmas Bow Napkins
How to make a Christmas bow napkin:
1. Fold a cloth napkin
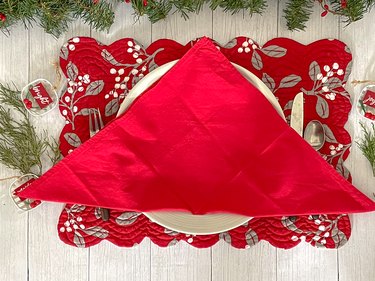
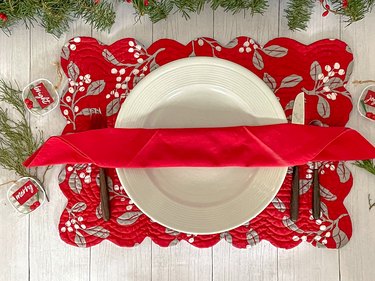
Open a square napkin (in any color that goes with your tablescape) so the underside of the napkin is facing up. Fold the linen napkin in half diagonally to form a triangle. Make sure to line up all the edges and smooth the fold with your hands.
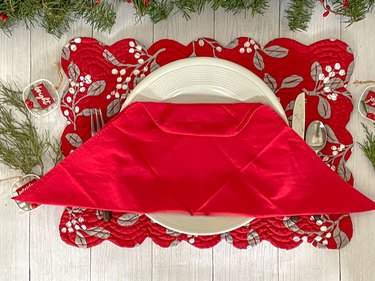
Fold the top corner of the napkin down about a quarter of the way to the bottom. Continue folding down until it's all folded.
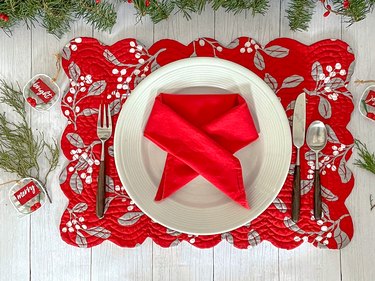
Fold the right side over a third of the way at a 45-degree angle. Fold the left side over the right a third of the way at a 45-degree angle.
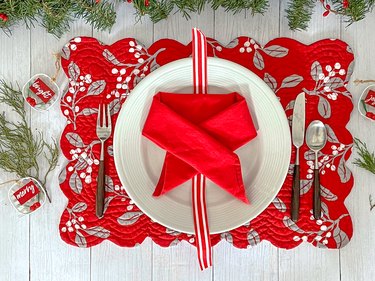
Place a ribbon under the center of the bow and tie a knot in the center to pinch the bow together in the center. Trim the ribbon and turn the bow over so the knot is under the bow.
Tip
Feel free to use a pretty napkin ring instead of a ribbon to hold the bow napkin together. Just feed one edge of the bow into the napkin ring and pull it through until the napkin ring is in the center.
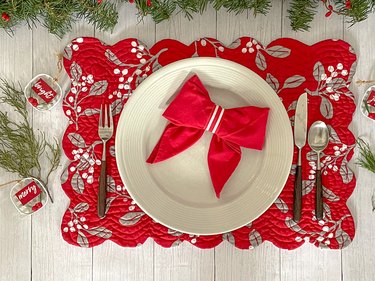
2. Embellish and display
Adjust the bow to make it lie flat. Add some greenery and an ornament for a festive place setting this holiday season.