
Calling all sentimental craft enthusiasts! If you're looking for a unique way to showcase your family's culinary heritage, this DIY project is a must. Say goodbye to traditional recipe books and hello to a charming family recipe keepsake wreath that will add originality to your kitchen decor while helping you preserve and display treasured traditions.
Video of the Day
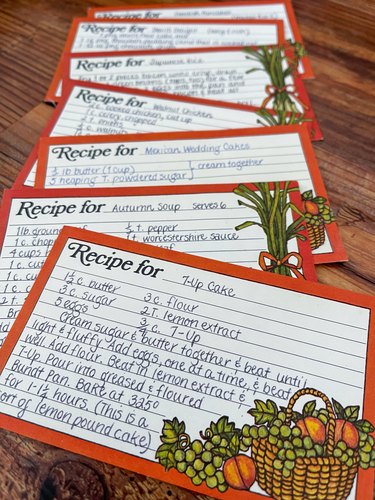
With just a few supplies, a stack of cherished family recipe cards (think: Grandma's handwritten recipe for apple pie) and our step-by-step tutorial, you can craft an eye-catching wreath that just might become a family heirloom. Pull that dusty recipe box out of the cupboard, choose a few favorites, round up your supplies and get cooking—er, crafting!
Video: A Keepsake Wreath Made with Family Recipe Cards
Things You'll Need
Recipe cards (original or printed recipe)
Wooden or bamboo skewers
Clear tape or hot glue gun
Faux flowers
Wire cutters
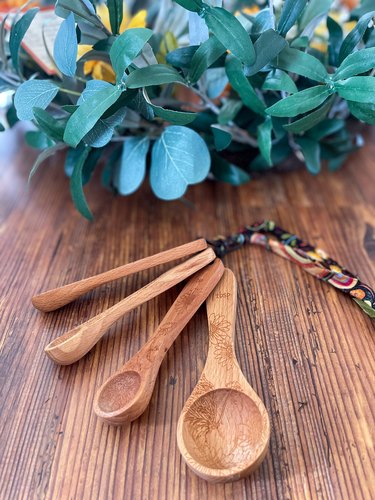
Wooden measuring spoons
Cloth strips
DIY dried oranges

Part 1: Prepare Recipe Cards
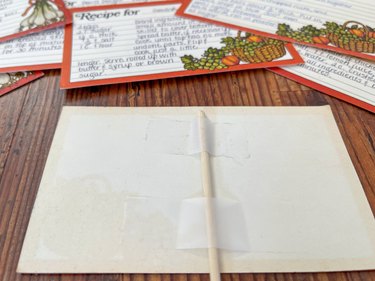
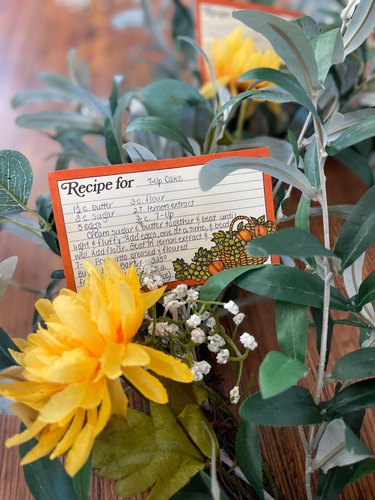
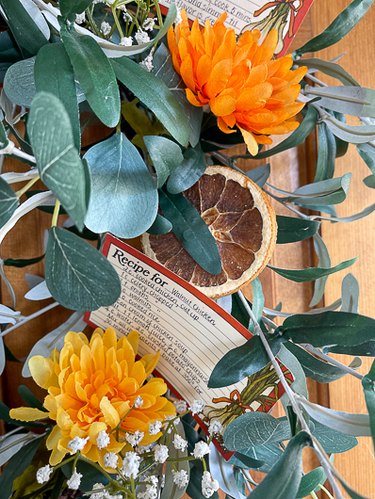
1. Attach wooden skewers to recipe cards
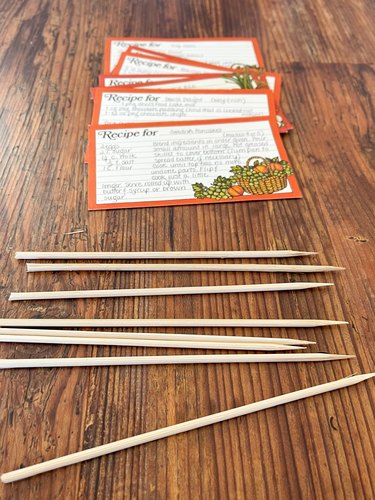
Attach each card to a 6- or 7-in. wooden skewer with tape or a hot glue gun. This way, you can easily remove cards from the wreath for reference whenever you need to whip up something delicious.
Tip
If you don't want to damage original handwritten recipe cards from loved ones, no worries. Simply print copies onto thick card stock using a printer. Alternatively, if you'd prefer to make your own recipe cards from printable templates, check out Etsy! It has loads of adorable recipe cards to match any kitchen decor.

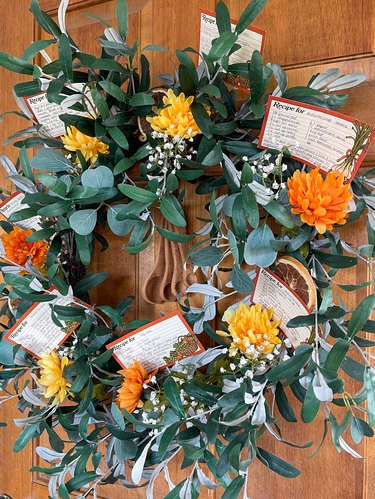
Part 2: Add Wreath Embellishments
1. Clip faux flowers

Pick fake flowers that match the colors on the recipe cards. Use wire cutters to chop stems down to the right size for your wreath. Next, scatter flowers all over the wreath and jam the stems into wreath form.
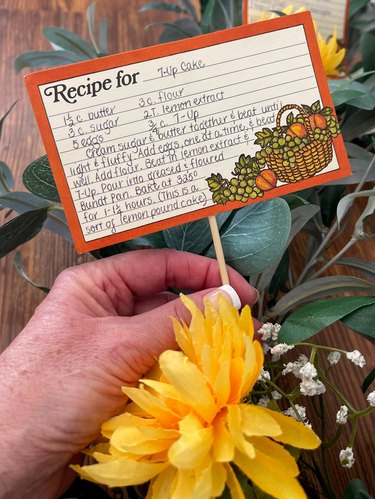
Finally, stick those recipe card skewers into the wreath!
To keep the cooking vibes going strong, round up kitchen-related decor and embellishments for your wreath.
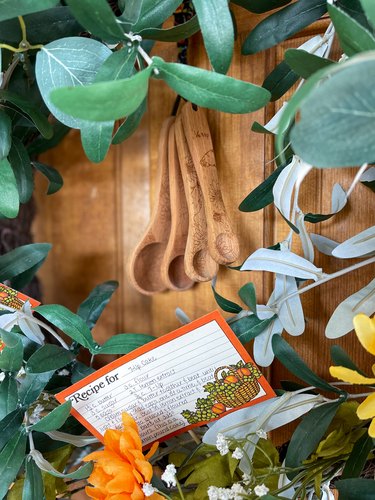
We opted for wooden measuring spoons. To adhere your extra decor, simply grab a strip of cloth, tie it around the spoon set (or other items) and hang it in the middle of the wreath.
3. Dry oranges for wreath

To really capture the kitchen vibes with your wreath, why not throw in some food? Dry out oranges by slicing them and leaving them on a rack in the oven at 200°F for two hours. Flip every 20 minutes to prevent burning.
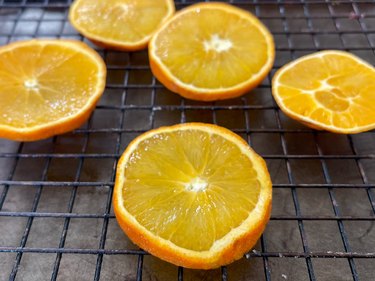
Once they're totally dry, scatter them around your wreath for a fun touch. You could even try drying lemons or limes for more citrusy delight.
It's amazing what you can create with family recipe cards and just a few supplies. Creating a kitchen wreath is doable for crafters of all experience levels—and it's such a meaningful way to honor family members.
Whether you want to personalize your decor for the holidays, highlight beloved heirloom recipes for a bridal shower or simply add cozy warmth to your kitchen, this project will make your space come alive with memories of previous generations. No matter the reason or the precise design, your keepsake kitchen wreath will be an instant conversation piece.