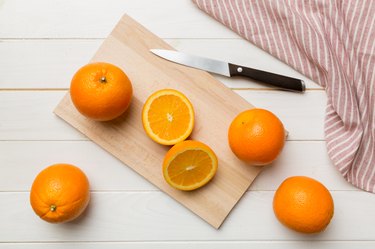
Ever found yourself standing in front of a cutting board, knife in hand, with no real clue how to cut the produce in front of you properly? We've all been there—and it can be challenging to decide the most effective (and least messy!) way to chop your fresh fruit and veggies for cooking or baking. Luckily, we've got an expert produce-cutting guide to get you started, along with knife safety tips. You'll be sharpening those skills in no time.
Part 1: Anatomy of a Knife
Video of the Day
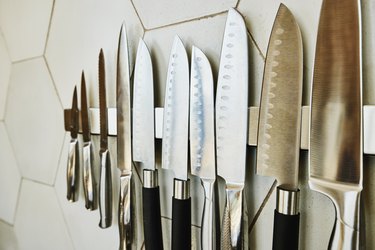
First, let's review the different parts of a knife.
Video of the Day
Blade: Every knife's blade serves a particular purpose. Some have plain sides, while others have a series of oblong hollows running the length of the blade (a Granton edge) to keep foods from sticking. Some have beveled angles at the cutting edge (like an ax, only smaller), while others are finely serrated, making them less useful for general-purpose cutting but excellent for delicate produce such as perfectly ripe tomatoes.
Bolster: At the end, where blade meets handle, you might find that the blade thickens into a non-cutting section. This thicker part is called a bolster, and it stiffens the blade while providing a safe place for fingers to rest. Not all knives have them and not all chefs think they're a good idea, but they're traditionally the sign of a better-made knife. Why? Lower-end knives are stamped out of a flat sheet of metal and therefore automatically don't have one.
Handle: Finally, we come to the handle, which can be made of plastic, metal or wood. The handle also hides one further detail called the tang: the part of the blade that fits inside the handle. A "full tang" means it goes the whole length of the handle and is much less likely to eventually separate from it. There are two knives you're most likely to use for preparing most of your produce. One is the traditional Western-style chef's knife, and the other is the Japanese santoku. More on choosing the right knife to come!
Tip
There’s a third knife you might want to consider: A Japanese knife called a nakiri that’s used specifically for produce. It’s about the length of a santoku but has no point, with its blade shaped instead like a plain rectangle. They’re really good knives but meant to be used with a different cutting motion, so they might not be the best starting point for a novice.
Part 2: Knife Safety 101
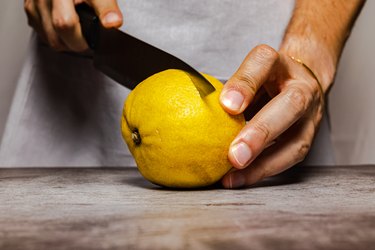
No matter what you're cutting, proper knife safety is paramount. We've got a handful of tips to help you chop, dice, shred and slice without incident while considering the best approach for various food types.
Tips for General Knife Safety:
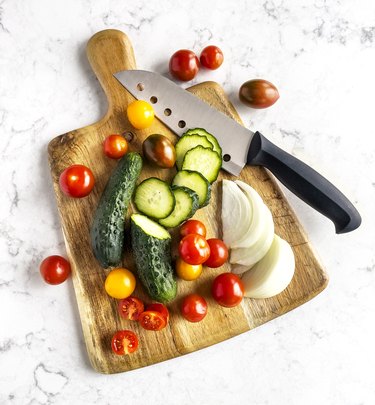
1. Choose the right knife
For practical purposes, the smallest functional chef's knife has an 8-in. blade. For home cooks, 8- and 10-in. blades are usually the best options. If you have a smaller hand or simply want a nimbler knife, you may find a santoku knife is more comfortable. Just be aware that you might still occasionally want a chef's knife for tackling large or extra-hard produce (winter squash, rutabagas, melons and so on). Choose a knife that feels comfortable in your hand and not oversize.
You'll also want a paring knife and a good peeler. The paring knife is handy for fruits and vegetables with tougher peels, while the peeler will speed prep for everything else. A paring knife is also a useful option for cutting up smaller vegetables, fruits or berries.
Warning
Theoretically, as long as you never lift your knife high enough to rise over your knuckles, you shouldn’t be able to cut yourself. Unfortunately, in the real world, it can still happen if you’re inattentive, if your knife slips or if you’re using excessive pressure to force a dull blade through a stubborn vegetable. That’s why one of the most-repeated knife safety tips is that “dull knives are the most dangerous.” While not entirely true (you can certainly cut yourself with a well-sharpened knife), it’s still good advice to heed.
There’s another saying in the professional kitchen: “A falling knife has no handle.” If you happen to knock your knife off the counter while you’re learning these skills, your immediate —and only—response should be to jump back out of the way. Trying to catch a spinning, tumbling knife as it falls creates a high risk of injury and will very often result in a trip to the emergency room.
2. Know how to hold a knife
The obvious and intuitive way to grip your knife is by wrapping your fingers around the handle (duh!). But professional cooks actually grip the back of the knife blade right where it meets the handle. This provides better blade control than a handle-only grip. If you have a small hand, you may find a handle-only grip is your surest bet. The last thing you want is to fumble your knife mid-slice.
3. Position food correctly
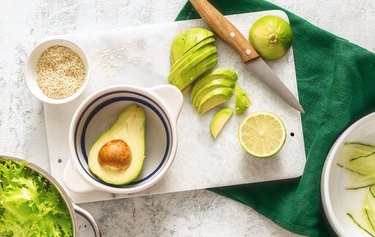
How you hold the knife is important, but so is how you hold the food you'll be cutting. Hold up your hand with the fingers curled toward you, as if you were checking your nails. You'll see that the second joints of your four fingers (doctors know those as the middle phalanges) form a nice, straight line. If you rotate your hand so your palm faces down, your hand will be in the exact position professionals use for holding fruits and vegetables that they're cutting. It's sometimes called the "claw" position because it looks like you're preparing to dig your nails into something.
When you want to cut a piece of produce, you'll place it on a flat surface—ideally a cutting board—then drop your hand onto it in "claw" position, with fingernails curled underneath and second joints forming a straight line across the front. Hold the food with your fingertips and slide the knife blade's flat side along the straight line formed by your knuckles. Whether you're raising and lowering the blade in a chopping or rocking motion or drawing it backward through your food, this technique offers excellent control.
Tip
Don't forget...a sharp knife is easier to use, and it certainly makes it a lot easier to prep a meal or work on skills such as dicing.
4. Use a nonslip mat
To safely use your cutting board, it's important to keep everything in place. When you're ready to dive in using the skills discussed above, start by washing or peeling produce as needed. Place a nonskid mat (rubber or silicone shelf liners work well) under your cutting board to keep it from moving around as you work. If you don't have a nonslip mat handy, a damp washcloth under your board helps stabilize it in a pinch.
Tips for Cutting Produce Safely:
5. Slice round produce

Many vegetables and fruits are round, so you'll want to begin by taking off a small slice from one side. This creates a flat spot, enabling the fruit or veggie in question to sit nicely on the cutting board. Next, hold your hand in the "claw" position on top. Pull back your hand to expose part of the vegetable (maybe 1/4, for example). Position the knife with its tip on the board and blade over the vegetable. Rock the blade downward, along its curve, to make your first slice. Pull your fingers back another 1/4 inch (or whichever size you're cutting) and repeat until you've sliced the vegetable or fruit across its entire width.
6. Shred leafy veggies
Shredding flat leaves (such as chard, spinach and lettuce or leafy herbs like basil or fresh sage) requires a very specific technique. First, wash and trim leaves as necessary and blot dry. Lay them out in a small stack on your cutting board, with the largest leaf on the bottom. Roll into a tight cigar shape and pin to your cutting board with your hand in the "claw" position.
Using a rocking motion, cut across the "cigar" with your knife. With this technique, it's easy to make very fine shreds (chiffonade is the classic term), or coarser, finger-width shreds for things like a chopped salad.
Slice & Dice...Or Don't!
You can always invest in alternative kitchen tools such as a mandoline slicer or a food processor with slicing and shredding discs in lieu of using a knife. You can also opt to pick up cut-resistant gloves to protect your nondominant hand from knives.
It’s also worth pointing out that most stores now sell prepared produce in both fresh and frozen forms, as well as useful shortcuts such as minced garlic in a jar or herb pastes in squeeze tubes. There’s no shame in using these, especially if it means you’ll be able to cook from scratch when you otherwise wouldn’t.
7. Cut onions with roots intact
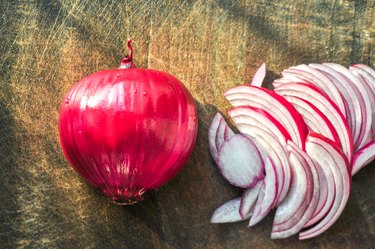
Onion layers can slip and slide as you try to cut them. The secret to slicing them safely is to not cut off the root end when peeling the onion. Instead, leave it in place to hold the onion together. Pros typically cut the onion in half from top to bottom, then place the flat side on their cutting board with the root end at the top. Now you can cut vertically through the onion to make long slices, then—for dice—turn it 90 degrees and cut across slices. When you're done, cut off the root end to release the slices or last of the dice.
8. Mince herbs & aromatics
For smaller herbs such as chives and parsley or aromatic ingredients like onions, celery and garlic, there's a different technique. Mound your herbs (or sliced onion or garlic) on the cutting board, then place your knife blade over them. Place your nondominant hand on the back of the blade to hold tip in place, then rapidly rock knife from point to handle. Move knife handle from side to side in an arc so you pass over all the herb or onion with your chopping motion. Scrape it all back together again and repeat. At first, you'll rough-chop, but you'll eventually end up with a fine mince.
How to Clean Knives
Clean knives are important, but they shouldn’t go in your dishwasher. The harsh chemicals in dishwasher detergent can damage the blades’ steel, and the blades can be damaged by jostling in the machine. Instead, wash knives by hand with soap and water immediately after each use. Never drop them into a sink full of soapy water. Under those suds, you can’t see the danger and risk cutting yourself.
9. Be careful with large, round produce
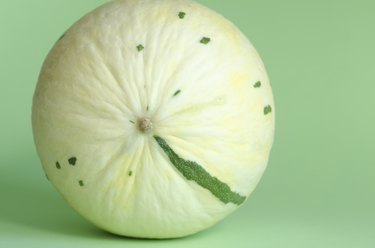
Fruit such as melons can be cut into wedges and peeled separately (or just served as is), but if you want to cut a whole melon efficiently, use the professionals' technique. Cut a small slice from bottom of the melon so it sits flat. Starting at the top (stem end), make a curving top-to-bottom slice to remove a strip of rind. Rotate the melon slightly and remove another strip. Repeat until you've gone around the whole melon, then turn it upside down and trim away any remaining rind from the bottom. Now you can halve and scoop out the melon and slice or dice it however you choose.
You can do the same with an orange or grapefruit, removing the rind to expose segments inside. Use a paring knife to separate segments from their membranes, leaving "skinless" segments to use in fruit salads and pastries or as garnishes on other dishes.
10. Cut hard fruits & veggies firmly
Some pieces of produce, including winter squashes, rutabagas and sweet potatoes, are unusually hard. To cut them safely, you'll need a large knife with a sharp edge. Start by peeling the vegetable, then cut a small slice from one side so it will sit flat on your cutting board. Position knife where you want the first cut to be, holding it firmly with your dominant hand and using your nondominant hand on blade spine to apply pressure. Rock blade back and forth, forcing it down vertically, until you reach the cutting board and remove that first slice. Repeat (carefully!) until you've sliced the whole thing.
How to Store Knives
Don’t store knives loose in a drawer, where you’re likely to damage either knives or your fingers while taking them out and putting them away. Instead, use a knife block, magnetic strip or in-drawer knife rack to secure them and keep fingers safe.
With this collection of tips and tricks for safe and effective knife use in the kitchen, you'll be a cut above your fellow home chefs. Now make the "claw" and get slicing!