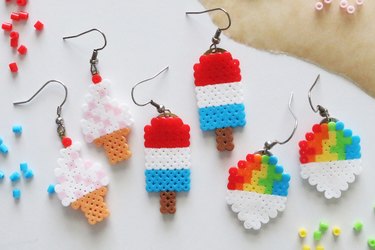
Summer is all about nostalgia. From tasty treats to colorful crafts, many seasonal pastimes sweep us straight back to childhood—so why not combine them? To make the most of all that throwback energy, we've matched frozen dessert favorites with a revamped DIY trend to create colorful, wearable blasts from the past: Perler bead earrings shaped like memorable summery treats.
If you grew up in the '80s or '90s, you probably have your fair share of Perler bead experience. Also known as fuse beads, Hama beads and "melty" beads, Perler beads are tiny plastic bits that can be melted together to create adorable, inventive patterns. For our nostalgic craft, we'll walk you through making Perler bead earrings in three unique designs: vanilla ice cream cones with pink sprinkles, rainbow snow cones and red, white and blue ice pops. We opted for mini Perler beads to make the earrings more wearable, but you're welcome to use regular-size beads for statement DIY jewelry.
Video of the Day
Video: Nostalgic Perler Bead Earrings with Sweet Summer Vibes
By the way, if you're new to jewelry-making or Perler bead crafts, you'll be glad to know that this project is ideal for beginners (or those who simply haven't picked up Perler beads in a few decades!). To make things extra seamless, our tutorial even includes free, easy-to-follow printable Perler bead patterns that are exclusive to ehow.
Ready to get nostalgic and make something sweet? Read on for our step-by-step Perler bead earrings tutorial plus tips and tricks for making each piece your own.
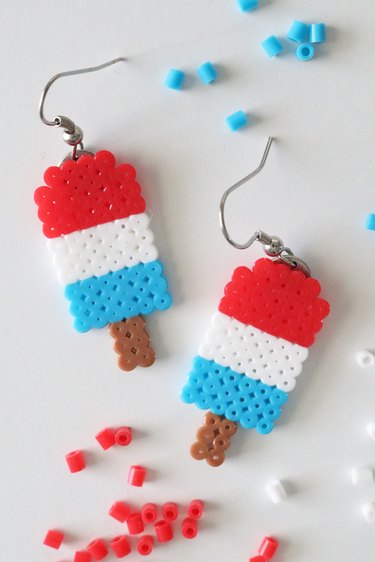
Earring Design 1: Ice Pops
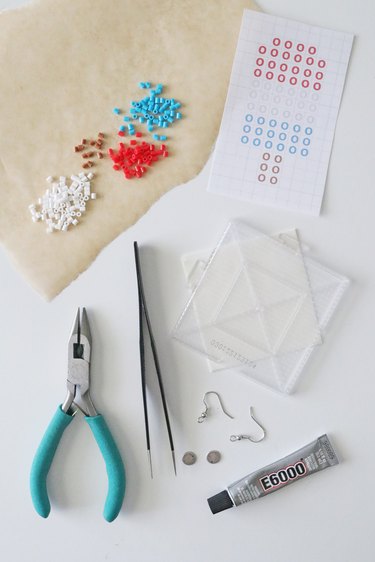
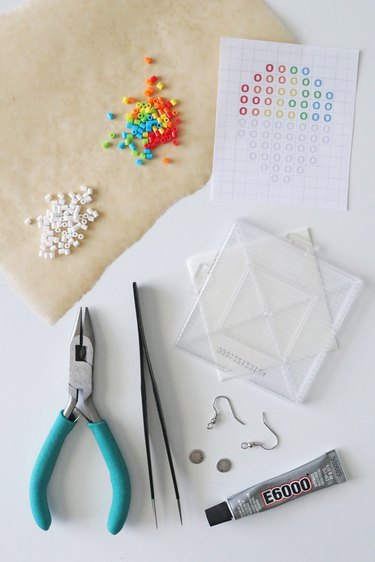
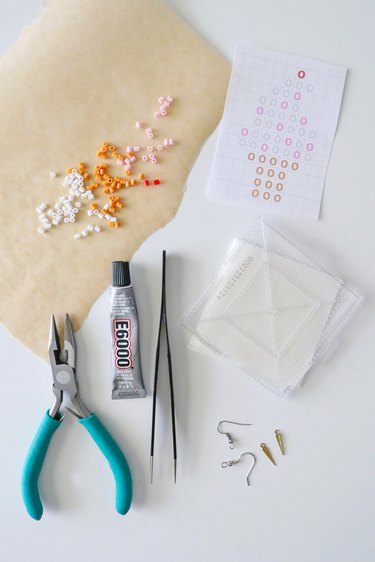
Things You'll Need
Red mini Perler beads
White mini Perler beads
Blue mini Perler beads
Brown mini Perler beads
Jewelry pliers
Craft tweezers
Ironing paper or parchment paper
Super glue (like E6000 glue)
Iron
Towel or ironing board
Tip
You can buy mini Perler beads on Amazon.
How to make Ice Pop Earrings:
1. Create ice pop pattern
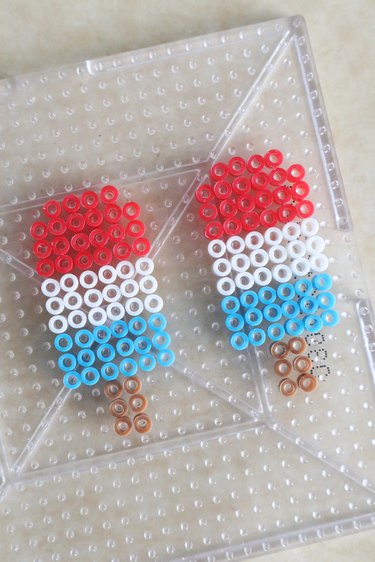
Following our free printable template, add mini Perler beads to pegboard. Since the beads are so tiny, craft tweezers will be useful for this step.
Tip
Make the ice pops bigger if you prefer a bolder design.
2. Fuse beads together
Place pegboard on ironing board or flat surface covered with a towel. Turn iron on to medium setting. Lay ironing paper on ice pop designs. Glide iron on top, moving in a circular motion. Repeat for 10 seconds or until beads are melted together.
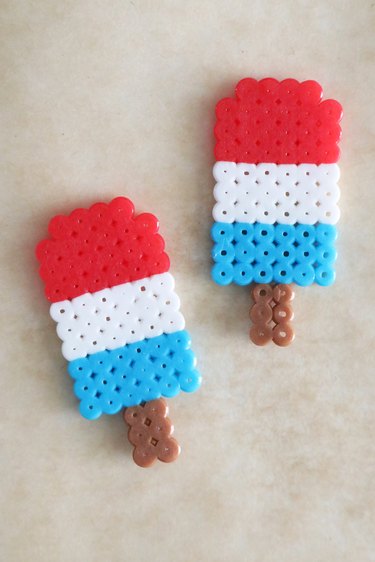
Avoid pressing down on project, as this can warp beads. Let ice pops cool and then carefully remove bead designs from pegboard.
Tip
If you’d like, flip over the design and repeat on other side.
3. Add jewelry pieces
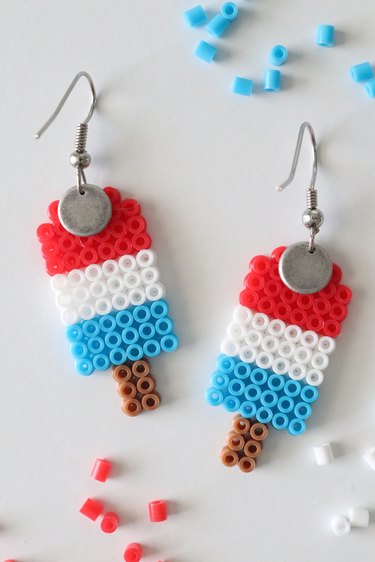
Glue flat charm to back side of each ice pop. Let dry.
Using jewelry pliers, add earring hook to each charm. Your sweet new earrings are ready to wear. This Perler beads idea also works well for the Fourth of July!
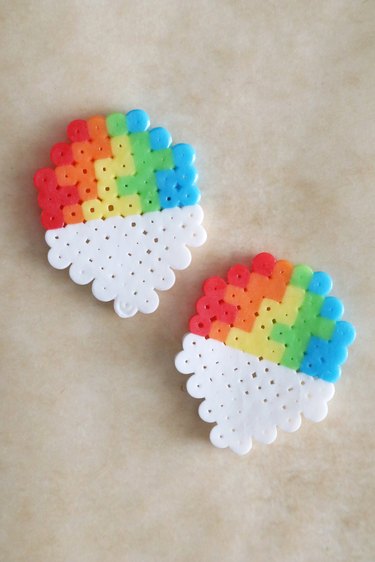
Earring Design 2: Rainbow Snow Cones
Things You'll Need
Red mini Perler beads
Orange mini Perler beads
Yellow mini Perler beads
Lime green mini Perler beads
Blue mini Perler beads
White mini Perler beads
Jewelry pliers
Craft tweezers
Ironing paper or parchment paper
Super glue (like E6000 glue)
Iron
Towel or ironing board
How to make Rainbow Snow Cone Earrings:
1. Create snow cone pattern
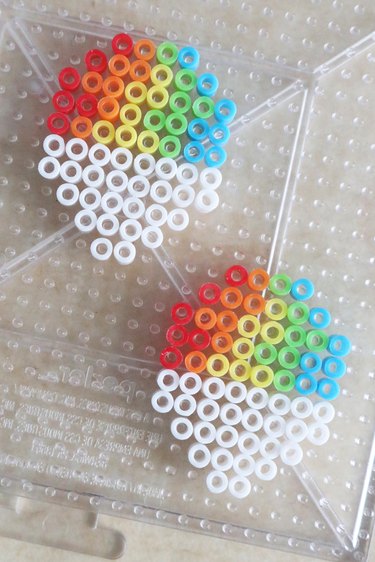
Using craft tweezers, add mini Perler beads to pegboard according to free printable pattern.
Tip
Feel free to make your snow cones red, white and blue or just one color. Get creative!
2. Fuse beads together
Place pegboard on ironing board or flat surface covered with a towel. Turn iron on to medium setting. Place ironing paper on snow cone designs. Run iron across design, moving in a circular motion. Continue for 10 seconds or until beads are fused.
Let designs cool and then carefully separate snow cones from paper and pegboard.
Tip
Again, you can flip over the design and repeat on the other side if you’d like.
3. Attach jewelry pieces
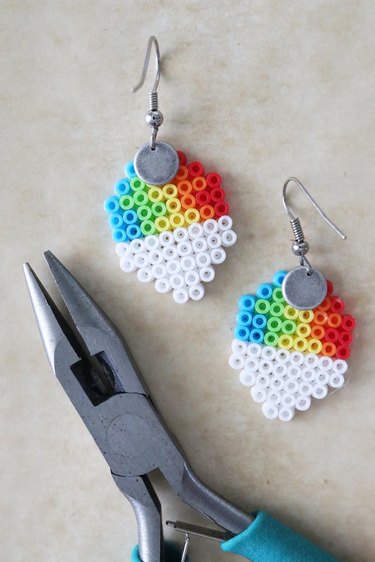
Glue flat charm to back side of each snow cone. Let dry.
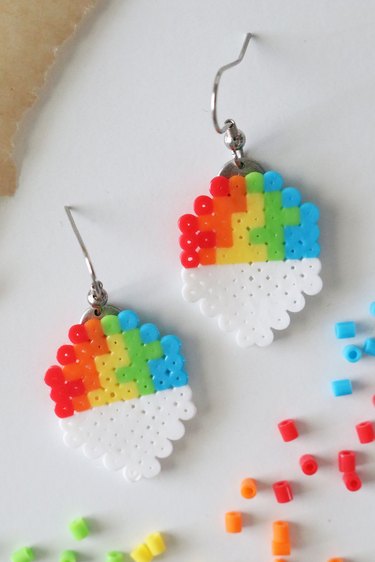
Using jewelry pliers, add earring hook to each charm. So fun!
Earring Design 3: Ice Cream Cones
Things You'll Need
2 red mini Perler beads
White mini Perler beads
Pink mini Perler beads
Light brown mini Perler beads
Jewelry pliers
Craft tweezers
Ironing paper or parchment paper
Super glue (like E6000 glue)
Iron
Towel or ironing board
How to make Ice Cream Cone Earrings:
1. Make ice cream design
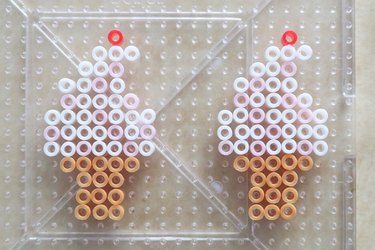
Place mini Perler beads on pegboard as shown in free printable pattern. Use craft tweezers to make this step easier.
Tip
Your ice cream can be any color, like brown for chocolate or pink for strawberry. You can also omit sprinkles for a simpler look.
2. Melt beads together

Place pegboard on ironing board or flat surface covered with a towel. Turn iron on to medium setting. Place ironing paper on ice cream designs. Slide iron across design, moving in a circular motion. Continue for 10 seconds or until beads are fused.
Let designs cool completely. Carefully separate Perler bead ice cream cones from paper and pegboard.
3. Attach earring pieces

To the back of each ice cream cone, glue flat charm. Let dry.
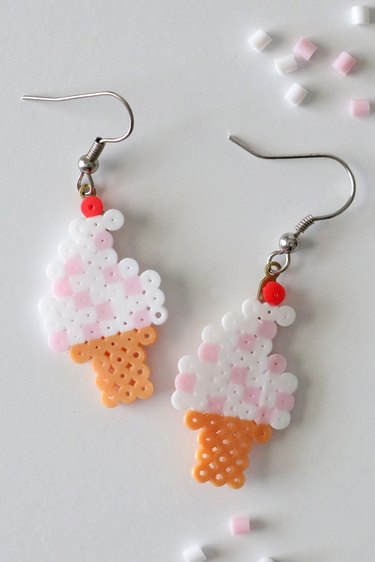
Add earring hook to each charm using jewelry pliers.
Now that you have a trio of easy Perler bead design ideas that look good enough to eat, it's time to get creative! Draw inspiration from our tutorial and dream up your own Perler bead earrings (or keychains, coasters, mini photo frames...the list continues!) and embrace the joy of nostalgic crafting.