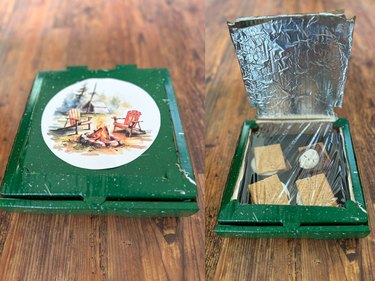
Are you ready to harness the power of the sun and create your very own solar oven? In this guide, we'll show you how to transform a humble pizza box into a solar cooking marvel, perfect for outdoor adventures or simply enjoying camping vibes (s'mores and all) in your backyard. You'll get to bask in the sun's rays, unleash your creativity and savor a mouthwatering treat. Round up a cardboard box and let's get cookin'! It's time to create a DIY solar oven with a touch of camping-themed flair.
Video: A Homemade Solar Oven With Vintage Camping Vibes
Video of the Day
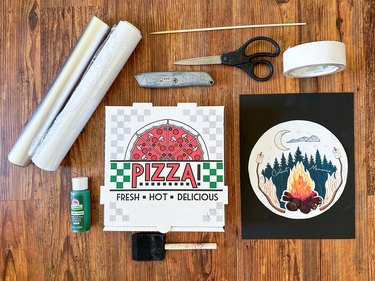
Things You'll Need
Small pizza box
Utility knife
Craft paint
Foam brush
Small paint brush
Glue stick
Black construction paper
Aluminum foil
Clear cellophane
Tape
Fun camping image (like this one from Etsy)
Part 1: Prepare Pizza Box
1. Cut flap
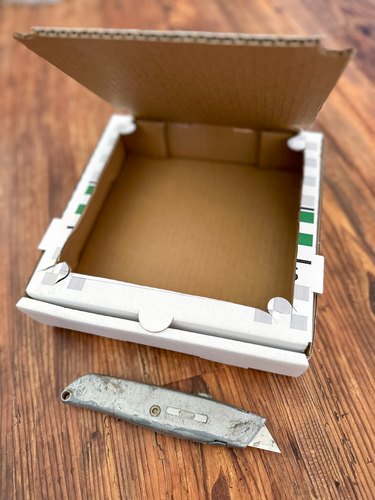
Use a utility knife with a sharp edge to carefully slice a square flap, approximately 1/2 in. away from box edges, in the top of the box.
2. Paint box
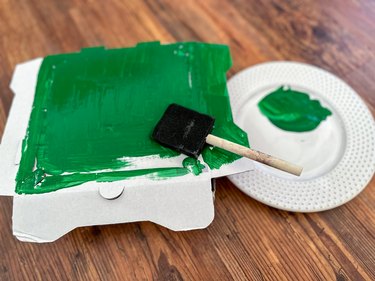
To capture the nostalgic vibe of vintage camping dishes, we opted for a green enamelware look by painting our box and playfully splattering it with white paint. However, we suggest you choose a color that speaks to you.
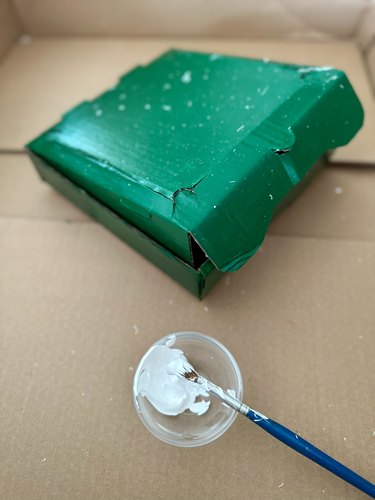
3. Attach black paper
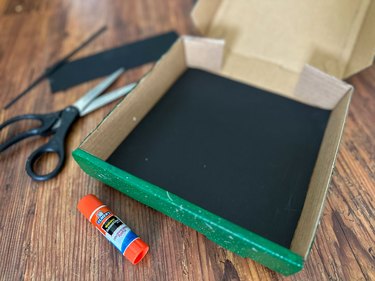
For optimal heat absorption, opt for black paper in your solar oven. It has the ability to absorb and amplify heat, thereby enhancing your cooking power. Carefully cut black construction paper to fit bottom of box. Once you have the perfect dimensions, secure paper using a glue stick.
4. Attach foil
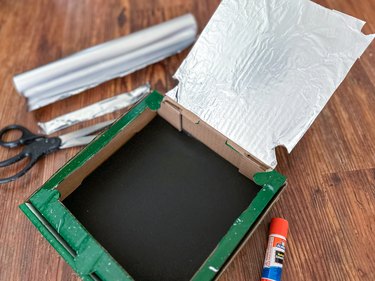
Apply a layer of foil to underside of the flap, harnessing its reflective properties to intensify the solar energy within your DIY oven.
5. Adhere clear cellophane
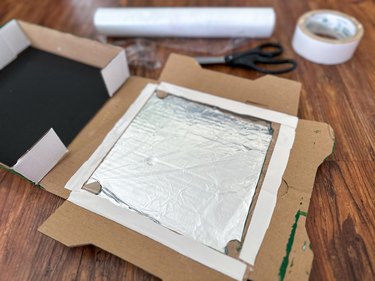
To safeguard your culinary creations from pesky bugs and create an additional heat-trapping layer, affix a piece of clear cellophane to the underside of box top interior using duct tape.
6. Decorate box
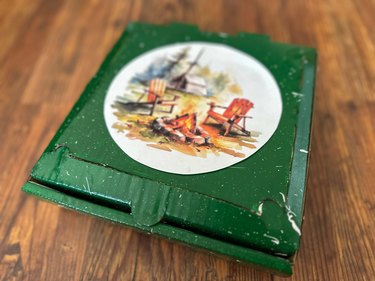
Take your solar oven's camping vibes to the next level with a touch of visual flair. Find camping-themed images in magazines, books or online. You can even explore platforms such as Etsy for delightful watercolor downloads like the one we used. Select images that resonate with your adventurous spirit, attach to the top of the box lid and let your creativity shine while personalizing your solar oven.
Part 2: Cook Treats
1. Fill solar oven
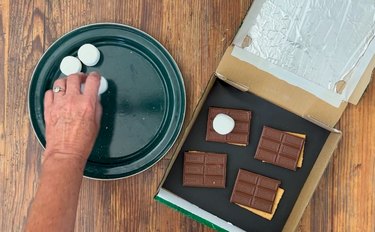
On a sunny day, fill your solar oven with a delectable array of treats, such as marshmallows, chocolate and graham crackers for a serving of homemade s'mores. Seal box snugly using cellophane-covered section.
2. Place in sunlight
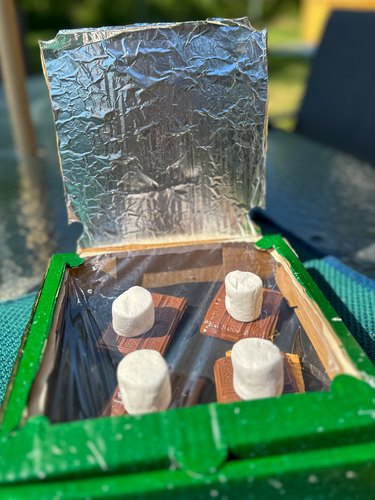
Place box in direct sunlight and position foil in a way that reflects the sun's rays directly onto food within. With this setup, you're all set to harness solar power and transform your tasty treats into a camping-inspired culinary delight. Bring on the s'mores!
By incorporating a reflector, we've harnessed the power of the sun to transform this simple box into a homemade solar oven capable of cooking delicious food. Whether you're whipping up scrumptious nachos for a gathering or planning a science project for the kids, this cooking contraption will amaze you with its functionality and charm.