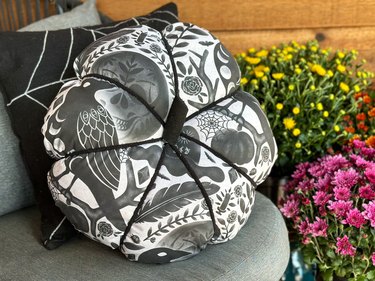
Ready to cozy up your home with some homemade Halloween decor? We've got you covered with an easy-to-follow DIY guide for crafting a pumpkin-shaped throw pillow with Halloween fabric. We opted for a raven pattern, but the beauty of this tutorial is that you can tailor it to your own style, whether you prefer an eerie orange jack-o-lantern vibe, more of a general pattern with fall leaves or even a plaid pumpkin design.
What's more, this fall pumpkin pillow project doesn't require expert sewing abilities. With just a few simple stitches and a dash of creativity, you'll have a soft and sustainable pumpkin to dress up your fall decor. Your completed plush pumpkins (because you'll almost certainly want to make multiple) will steal the show as outdoor pillows, decorative throw pillows for seasonal displays or simple boho additions to your dining room table.
Video of the Day
Feeling those autumn vibes? Let's get to work on this gourdgeous decorative pillow DIY!
Video: Easy Pumpkin Pillows Made From Fabric & Yarn
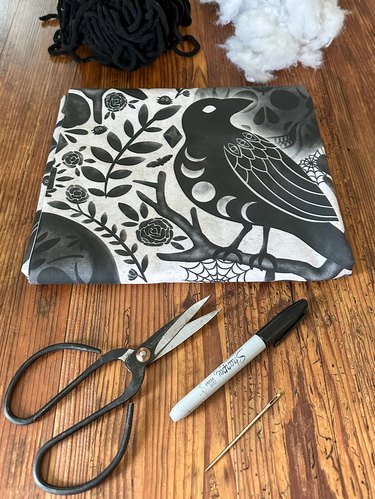
Things You'll Need
1 yard of fabric
Tape measure
Marking pen
Yarn
Sharp scissors
Yarn needle
Fiberfill stuffing
Hot glue gun
3-in. by 8-in. piece of felt
1. Measure and tie yarn to pen
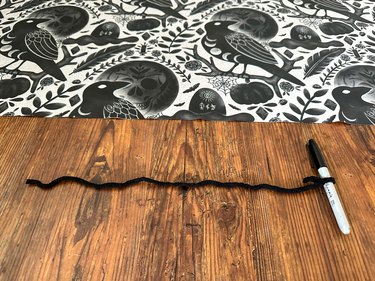
For a precise circular cut, measure and cut a piece of yarn equivalent to desired radius of fabric circle. In our case, aiming for a 14-in. accent pillow necessitated a fabric circle with a 30-in. diameter, so our string measured 15 in. Feel free to adapt measurements to suit desired size of pumpkin throw pillow.
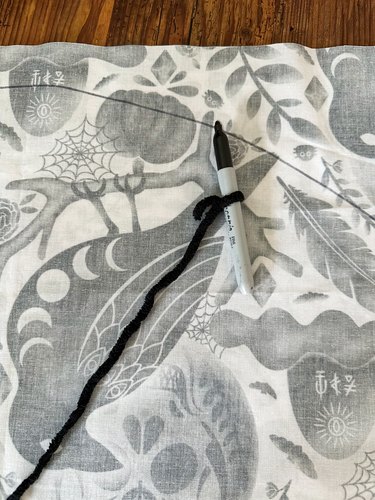
2. Fold fabric in half and mark half circle

Tie length of yarn (the length of circle's radius) to a fabric pen or marker. Position end of yarn at center along folded edge and hold steady. Use marking pen to draw a half-circle.
3. Cut fabric
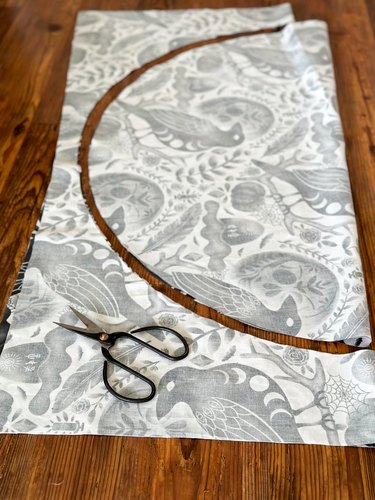
Cut around marking of half-circle.
4. Baste around circumference of fabric circle
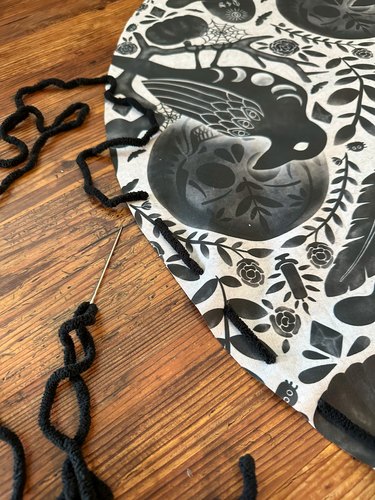
Open fabric circle and sew a long stitch approximately 1/2 in. from edge using an embroidery needle and yarn. This is commonly referred to as a basting stitch.
5. Gather basting stitches
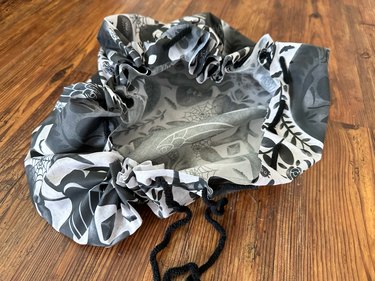
Loosely pull basting stitches to create a cup shape in fabric.
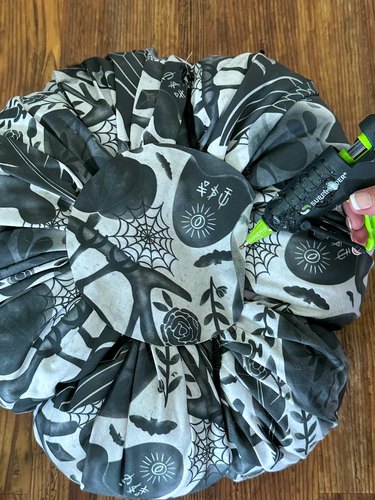
6. Fill with stuffing
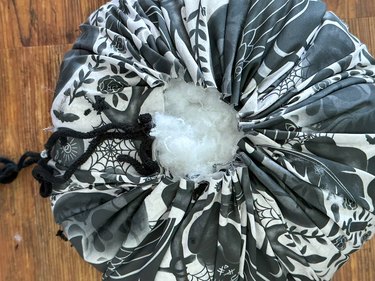
Fill fall throw pillow with fiberfill stuffing and then pull thread as tight as possible and secure it with a knot at the end. Refrain from cutting thread at this point. You'll use thread next to create pumpkin sections.
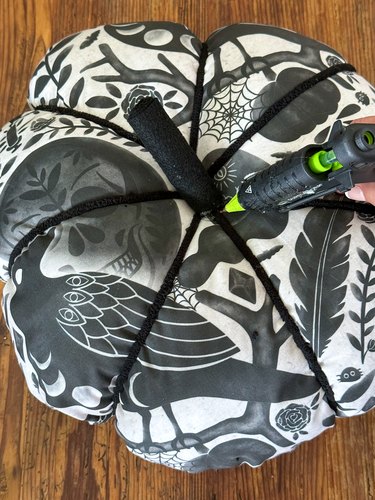
7. Create sections
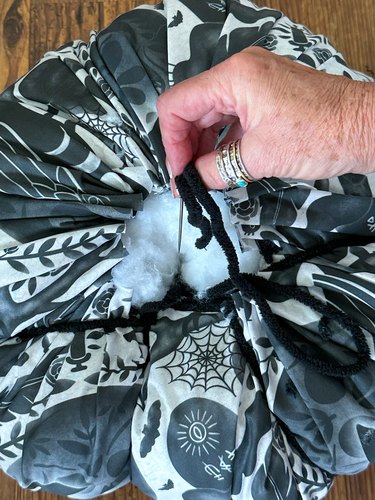
Guide needle through fluffy fiberfill, starting from beneath, and bring it up through heart of pumpkin's crown.
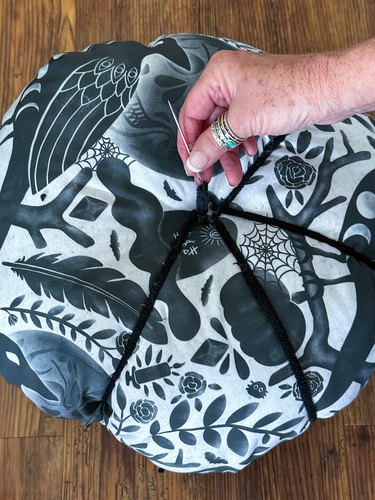
Loop thread around pumpkin's form and thread it up through center once more, ensuring each pull tightens thread snugly.
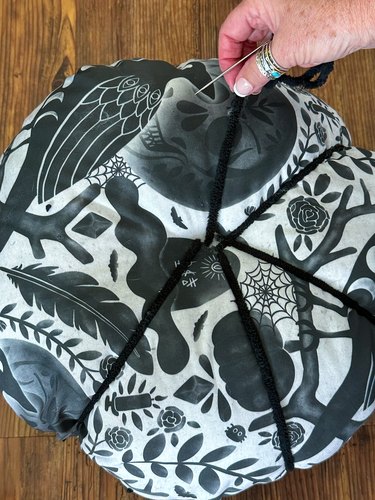
Continue this process 5-6 times, creating distinctive sections as you go. Embrace asymmetry, as natural pumpkins aren't perfectly even.
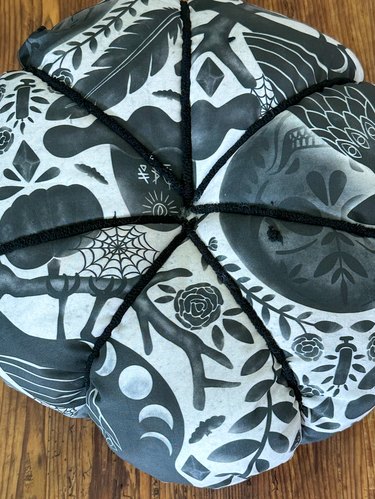
Once you reach end of stitching, secure with a knot in thread and trim away excess.
8. Cover bottom with fabric circle
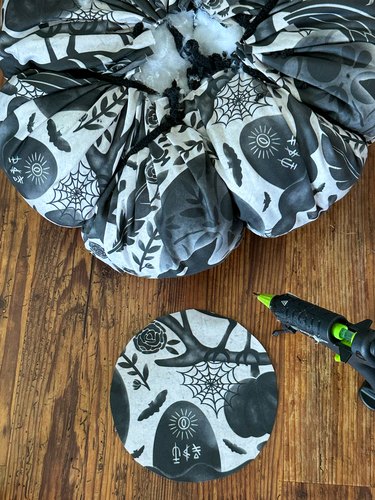
Cut a small fabric circle and then use hot glue to fasten it securely to base of pumpkin and cover opening.
9. Create stem
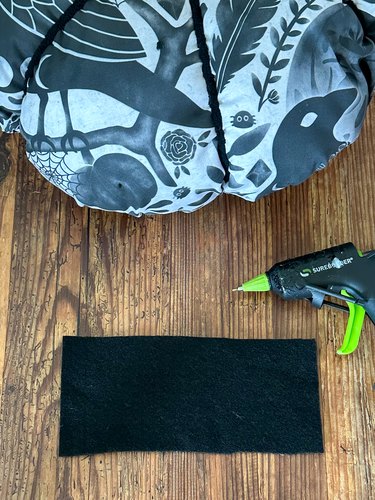
To craft the stem of your Halloween pillow, apply a narrow strip of hot glue along 2-in. edge of stem-shaped felt. Carefully roll felt strip, securing the other end with additional hot glue. Allow it to dry for 15 minutes.
Once dry, trim stem at an angle to preferred length and affix it securely to pumpkin decor pillow top using hot glue.

And you're finished! Whether it graces your living room couch, sits alongside a Halloween pumpkin on the front porch during trick-or-treat hours or adds a festive touch to your bedroom, this DIY pumpkin-shaped pillow is the perfect autumn addition to any home decor scheme. Happy Halloween and happy crafting!