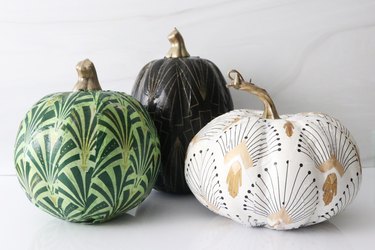
There's something so nostalgic about pumpkin decorating. After all, there's a reason the activity plays a timeless role in fall events, seasonal competitions and Halloween parties! Best of all, you don't need to be a professional artist to decorate pumpkins, and we've got the perfect design for beginners and experts alike: art deco pumpkins made with decoupage glue and tissue paper. Simply cut printed tissue paper into strips, brush decoupage glue onto a real or faux pumpkin and apply paper for an impressive effect.
Why art deco, you ask? This 1920s and '30s style is super trendy right now, especially in the home decor world, so it's only fitting it gets a seasonal spin for Halloween. What's more, art deco patterns are rarely found in fall decor, so you'll be able to display festive pieces with a totally unique twist!
Video of the Day
You can use either real or faux pumpkins for this DIY project. Just keep in mind that you won't be able to compost real pumpkins after decoupaging because of the glue and tissue paper. We used faux pumpkins from the craft store since they provide a lot of versatility and ease. Not only can fake pumpkins be used for years to come but they're generally easier to handle and decorate, especially when kids are involved.
Read on to learn how to make art deco-inspired pumpkin crafts, complete with tips for customizing each piece. History fans, architecture enthusiasts and crafters unite for the ultimate DIY pumpkin tutorial!
Video: Art Deco Pumpkins for a Very Vintage Halloween
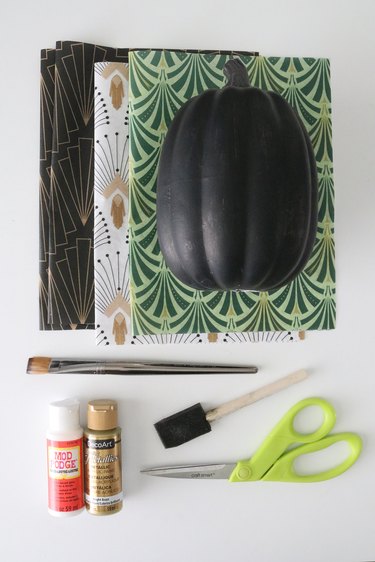
Things You'll Need
White or black foam pumpkins
Decoupage glue, such as Mod Podge
Foam brush
Bristle paintbrush
Art deco tissue paper (we got ours from Zazzle)
Gold acrylic paint
Scissors
Tip
If possible, use white or black faux pumpkins for this craft project. White pumpkins will allow colorful art deco patterns to pop, while black pumpkins will ensure the background of black art deco prints remain dark.
If you only have orange faux pumpkins (or you're using real pumpkins), simply coat each with a layer of white, black or light gray paint. Matte paint works best, as it will better “cling” to the pumpkin, but acrylic paint will work in a pinch.
1. Cut tissue paper
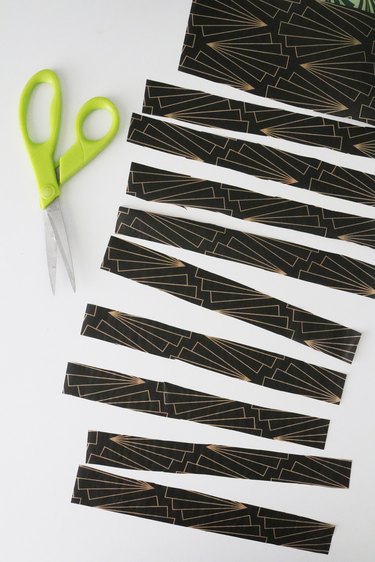
Cut tissue paper into strips about 1 to 1 1/2 in. wide.
Tip
You can also use decorative napkins for these and other decoupage projects.
2. Coat pumpkin with tissue paper
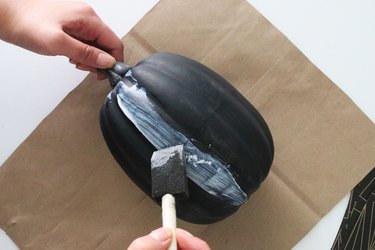
Using foam brush, apply stripe of decoupage glue onto pumpkin, moving from top to bottom.
Tip
Pumpkin size is up to you. Feel free to make one large pumpkin or multiple small pumpkins! You can find fake pumpkins at the dollar store (like Dollar Tree), craft store or department stores such as Target.
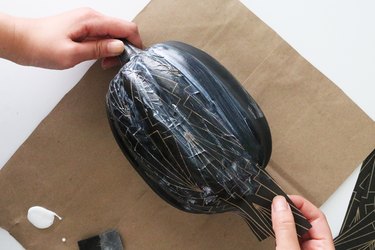
Add a strip of tissue paper, gently smoothing it out with your finger. Apply another layer of Mod Podge on top, making sure to glue down edges. Smooth out wrinkles with your finger or other end of foam brush.
Continue around pumpkin, adding strips of tissue paper. Try your best to match up the pattern but don't worry if it's not exact. Also, keep in mind that the pattern won't line up along top of pumpkin. This is normal due to its curved shape! Instead, focus on matching up the pattern around widest (and most visible) parts of pumpkin.
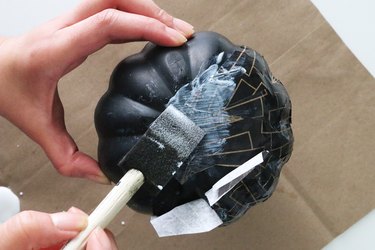
About halfway through, trim excess paper on bottom (if any) and glue ends down. Let dry for about 30 minutes before continuing.
3. Paint pumpkin stem
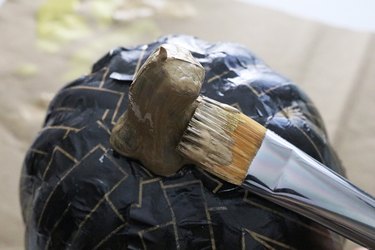
Once you've decoupaged the entire pumpkin with tissue paper, paint pumpkin stem with gold paint. Depending on thickness of paint, you might need to add a few coats, allowing time to dry in between.
Tip
For extra art deco flair, hot glue rhinestones or metallic embellishments to each patterned pumpkin.

Try this fall craft with prints in different colors to make a set of unique and pretty pumpkins. Halloween decor has never looked so jazzy!