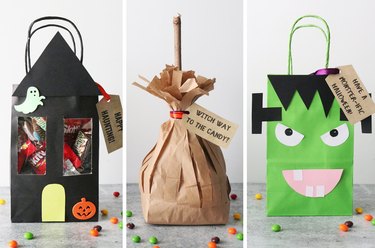
There's no doubt about it—one of the best parts of Halloween is the crafting! So, why not create something that's both functional and fun? Whether you're planning a full-blown costume party or looking for unique favor bags, this trio of DIY Halloween treats bags is a perfect fall project.
Our tutorial includes Halloween candy bags inspired by three iconic motifs: a haunted house candy bag (complete with clear "windows" that let you see the candy!), a witch's broom candy bag made of brown paper bags and a candy bag that looks like Frankenstein (everyone's favorite monster). We've even included an exclusive printable of funny Halloween bag tags, making it easy to spruce up your Halloween goodie bags.
Video of the Day
Of course, these treat bags aren't just for candy. If you're hosting a Halloween celebration, they can be used for Halloween-themed gifts, prizes and other noncandy party favors. You could even use trick-or-treat goodie bags as Halloween decorations; just pack them with tissue paper or other festive fillers and display with seasonal tableware.
Needless to say, these eerily adorable bags are sure to be a hit with trick-or-treaters and partygoers alike. If that weren't enough, they're a great alternative to plastic bags and treat boxes! Read on for three scarily easy DIY projects.
Video: 3 Mini Treat Bags for a Sweet Halloween
1. Haunted House Treat Bag
Things You'll Need
Black paper bag
Black card stock
Yellow card stock
Clear plastic scraps
Halloween foam stickers
Ribbon
Pencil
Craft knife
Hole puncher
Clear tape
Glue stick
Scissors
Scrap cardboard
Ruler
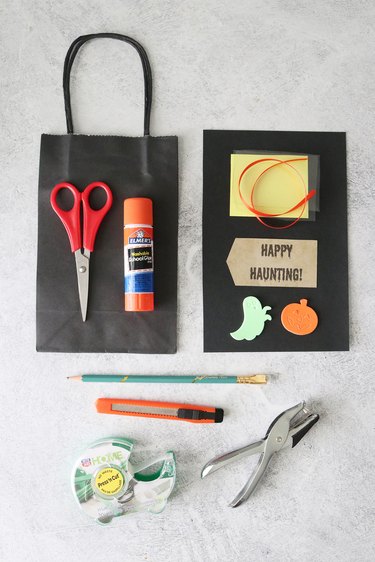
Tip
Plastic from produce containers works great for this bag's windows. Just be sure to wash and dry the plastic first.
1. Make windows
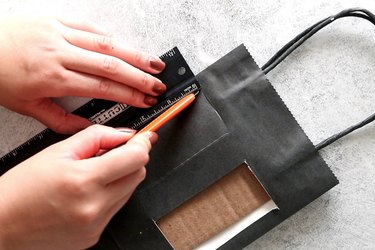
With a pencil, draw two rectangles on the paper bag. Use a ruler (or make a template) to ensure they're the same size. Cut out rectangles using a craft knife and ruler, preferably one with a safety guard.
Warning
If you’re making this bag with kids, do this step yourself.
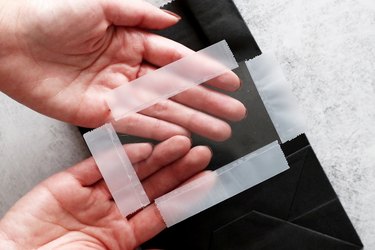
Trim plastic scraps so they're slightly larger than rectangle openings. Next, place a strip of clear tape along each edge of plastic. (For outside edge of each window, you might have to trim width of tape depending on size of windows and paper bag.)
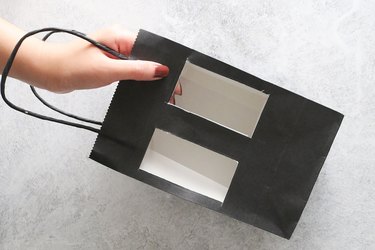
Stick plastic to inside of bag, making sure it covers entire window opening. Repeat with other window.
2. Decorate and add tag
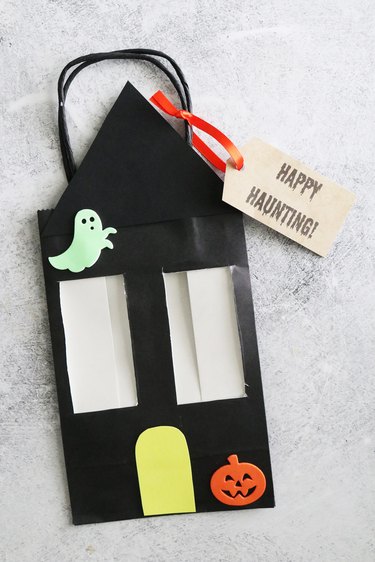
To complete your haunted house-themed Halloween gift bag, glue a black triangle "roof" on the top and a door on the bottom. We used bright yellow paper for the door, but you're welcome to use any color you'd like. You could even go for Halloween paper with a fun pattern or a glow-in-the dark version.
Print, cut and hole-punch tag. Then, tie to bag. Add foam stickers. Our haunted house bag is decorated with a glittery ghost and jack-o'-lantern, but other motifs, like spider webs, spiders and black cats, also work great.
Tip
We printed our tag on parchment paper, but again, feel free to use any type of paper.
3. Fill with candy
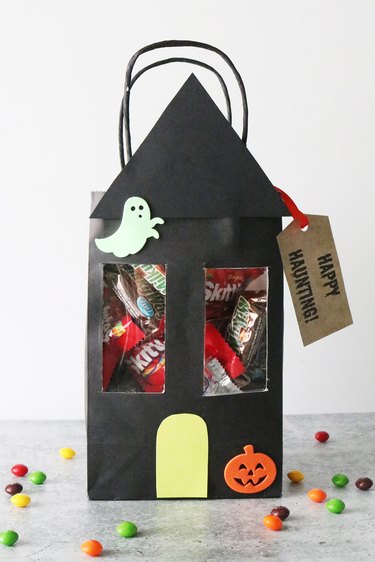
Finally, add candy or party favors to trick-or-treat bag. Since windows are clear, you'll be able to see candy inside the bag. How delightful is that?
2. Witch’s Broom Treat Bag
Things You'll Need
2 brown lunch bags
Twig or wooden dowel
Ribbon
Scissors
Hole puncher
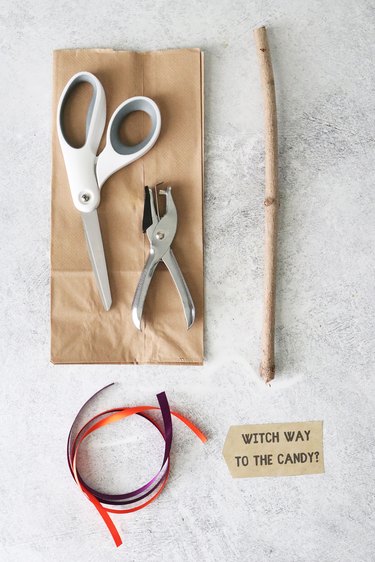
1. Cut bags
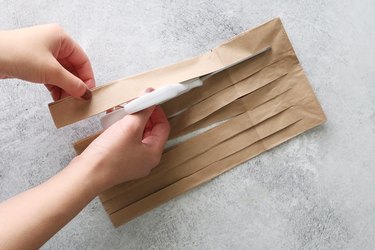
Cut horizontal slits in first paper lunch bag, stopping about 1 in. from bottom. Be sure to avoid cutting through bottom flap.
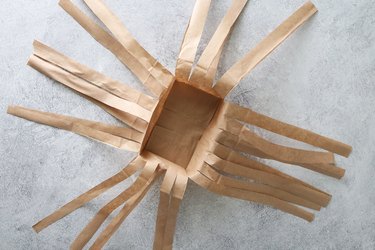
Open bag and separate strands of paper.
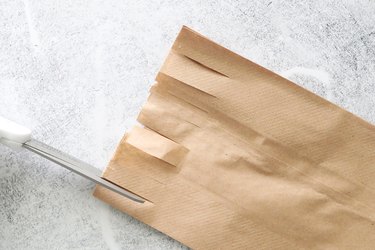
Cut short slits along top of second bag.
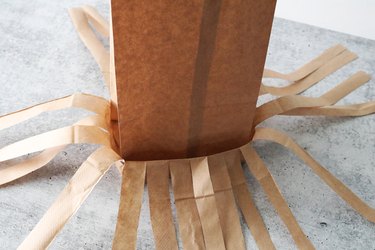
Place this bag in first one.
2. Add twig and candy
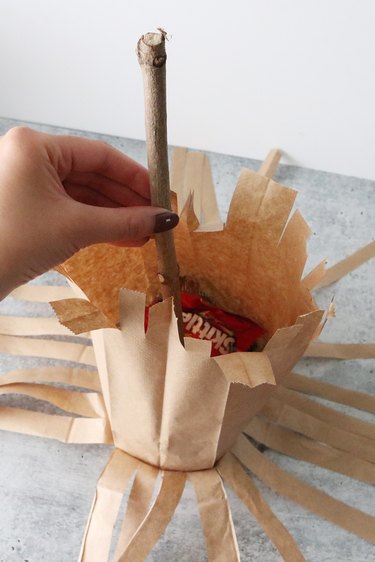
Fill bag with candy and place twig in middle.
3. Tie bag and add tag
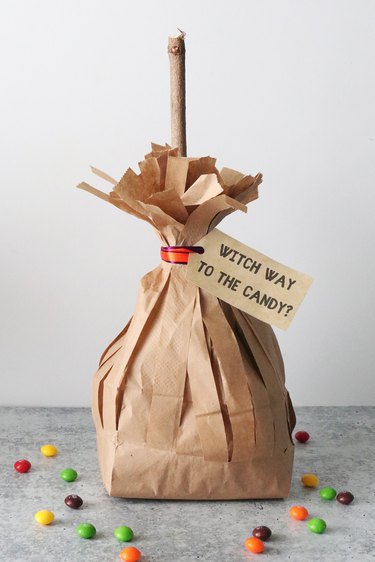
Print, cut and hole-punch tag. Gather strands of paper around the twig and then tie ribbon and tag around it. So cute!
3. Monster Treat Bag
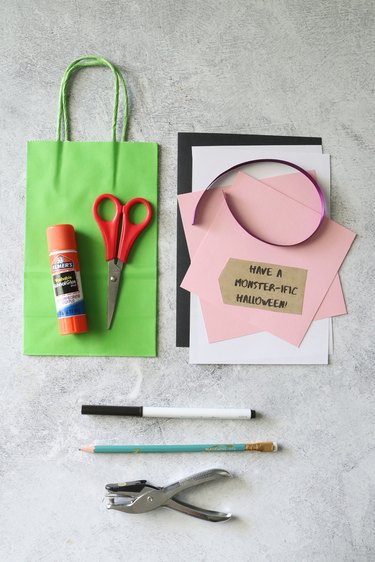
Things You'll Need
Green paper bag
Black, white and pink card stock
Ribbon
Pencil
Black marker
Hole puncher
Glue stick
Scissors
Tip
If you want to make a general non-Frankenstein monster, use paper bags in different colors.
1. Add paper hair and face
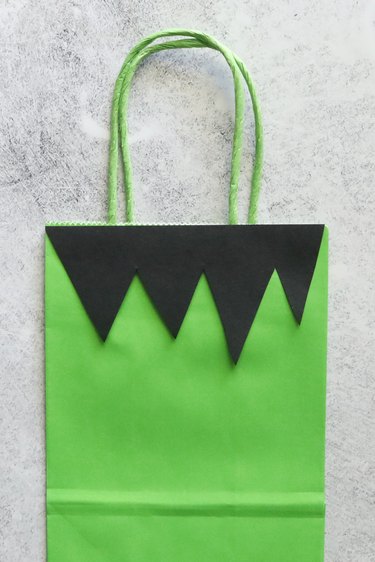
Cut a strip of black card stock with a zigzag edge for hair. Glue to top of bag.
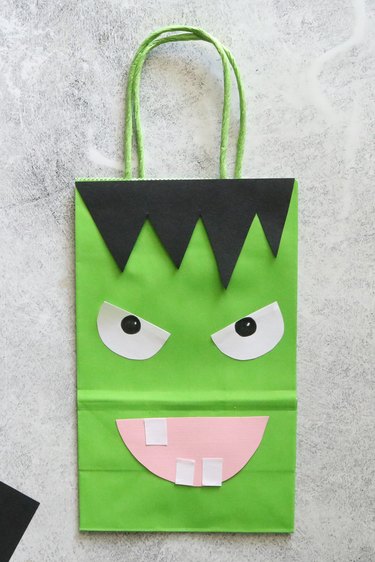
Next, cut half circles out of white card stock and glue them to bag. Draw circles with black marker. Cut a larger half circle out of pink card stock. Glue it to bag, followed with small white rectangles for teeth.
2. Add "bolts"

To make bolts, cut two T-shaped pieces of black card stock.
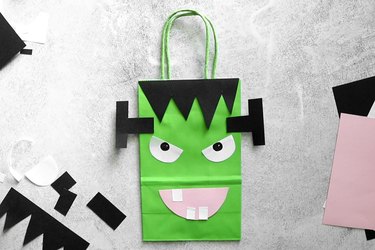
Glue one bolt to each side.
3. Add tag and candy
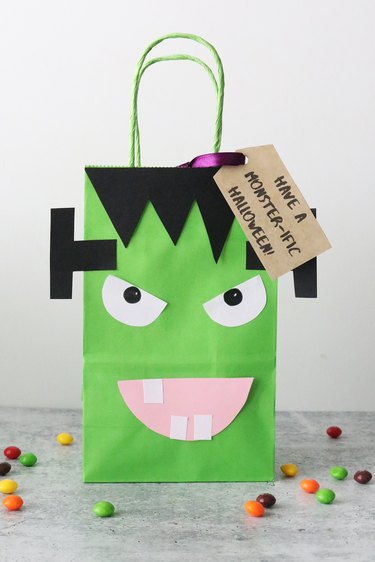
Print, cut and hole-punch tag. Tie it to bag with ribbon and then fill bag with lollipops, candy corn or other Halloween party favors.
With such celebratory and unique treat bags, you'll be the craftiest parent in the trick-or-treating group—or the coolest party host on the block. Wishing you a safe and happy Halloween season!