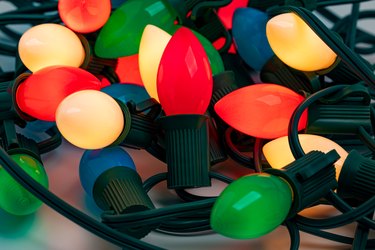
When it comes to holiday decorating, we've all got our own style. Some of us opt for minimalist vibes, while others hang Christmas lights with all the restraint of Clark Griswold in National Lampoon's Christmas Vacation. Whatever your style, holiday lights are almost certainly a part of it, from a few string lights around your windows and Christmas tree to a curtain of icicle lights along your roofline. However you choose to use lights, we've got a few tips to help you get maximum enjoyment from them without frustration and inconvenience.
Ready to decorate? Here a few holiday light FAQs and answers to get you started:
Video of the Day
Video of the Day
1. Are LED or incandescent Christmas lights better?
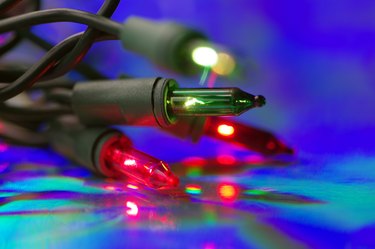
For decades, incandescent holiday lights were the only game in town, but LED lights have become hugely popular in recent years. Both types are widely available as both indoor and outdoor Christmas lights. LEDs have a two key advantages: They'll last up to 25 times longer than traditional incandescent lights and use up to 90 percent less electricity. That means you can use several times as many lights without a bigger hit to your power bill!
On the other hand, incandescent bulbs are noticeably brighter, will give you that traditional appearance (which LEDs can mimic but not entirely replicate) and have a lower up-front cost. One isn't necessarily better than the other. It's up to you how you weigh the initial cost difference against LEDs' longer lifespan and lower overall cost.
Unpacking Your Christmas Lights
Storage isn’t necessarily easy on your lights, especially if you’ve hauled them down and packed them away in a hurry. At the beginning of each holiday season, take a few moments to check over each string as you unpack them. Look for worn or damaged plugs, frayed insulation or exposed wires and broken bulbs. Bulbs can be replaced easily enough (we’ll circle back to that in a moment), but if you find any of those other forms of damage, discard the whole string and replace it. Of course, if you plug in your lights and they don't work, that's also a pretty clear indication that there's a problem.
2. Can I combine LED and incandescent lights?
You can use both types of Christmas lights together, so it's not an all-or-nothing proposition. If you currently have incandescent bulbs, for example, start adding in a few strings of LEDs every year to replace old ones. If you already have lots of LEDs but are gifted some incandescent bulbs, you can certainly incorporate those into the mix (especially in areas where their brightness will add impact to your light display).
The only limitation—and it's an important one—is that strings of LED and incandescent lights should never be connected together because their power requirements are quite different. Plug in your LEDs and incandescents separately. When you daisy-chain strings of lights together, take good care to put only "like with like."
Tip
Most hardware stores sell electrical tape in multiple colors. Buy two colors of tape, then use one color to wrap plugs of LED lights and a different color for incandescent lights. That way, you’ll always know at a glance that you're joining the right strands together.
3. How do I untangle Christmas lights?
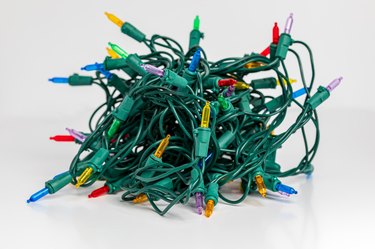
The only honest answer to that question is "slowly and patiently," because there are no meaningful shortcuts. Find a place where you'll have room to spread lights out: A basement or garage is often your best bet. Unplug cords from one another—the longer your string of lights is, the harder it is to handle—and identify troublesome snarls.
Locate the plug on your first cord. That's your point of reference, much like the corner piece of a jigsaw puzzle. Trace wires from the plug to the first knot, carefully loosen the knot—a pencil or chopstick can be handy for that—then pull the wire and plug through the knot. Repeat that process a few more times until string is freed up. For a really tangled mess, consider switching to the plug at the other end and working your way toward the middle.
It's also important to wind the string of lights around a length of broom handle or coat hanger as you work. Otherwise, as you tease apart snarls in front of you, lights behind you may begin tangling again.
4. How can I troubleshoot a string of lights that isn’t working?
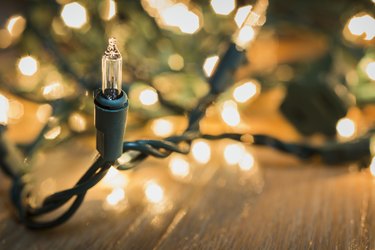
After you've gone to the trouble of untangling lights, it can be irritating to discover that they don't work. There are several steps you can take to troubleshoot them:
- Make sure there's power at the outlet. Try a second strand of lights in it or use an electrical test meter. If the outlet itself is dead, check to see if it's on a switch. If not, you'll need to check your breakers.
- Check the fuse (or fuses) in your lights. Many lights will come with one or two fuses concealed under a cover in the plug assembly. Eyeball the fuses to see if they're blown or set a test meter to its continuity setting and see if you get a tone. If not, or if a fuse is visibly blown, replace it.
- Check that all bulbs in each strand are firmly seated. If they're the push-in type, check that they're all snapped firmly into place. If they're the threaded screw-in type, check that they're screwed in all the way.
- Test each bulb individually. Some made-for-the-job Christmas light testers have a socket you can insert individual bulbs into for testing. With a pen-type voltage tester, work your way up the string methodically until you stop seeing a current (some models of tester give you both options).
- When in doubt, go old-school. If you don't have a tester, run through a string of lights one by one, checking each one visually to see if the filament is blown and replacing it with a spare if necessary. Remember, it's perfectly possible for a string to have more than one light out, so if you replace a clearly blown bulb and the string still doesn't work, you'll just have to keep going.
You can replace individual bulbs in a strand of lights as often as necessary, until and unless the wiring or bulbs' sockets begin to wear out. This isn't always a troubleshooting thing, either. Sometimes, bulbs may become scratched over time or you may want to change up the colors. You can even get replacement bulbs that will turn regular lights into a sting of flickering, sparkling lights instead. Be sure to buy the same kind of light bulbs or mini lights you're replacing—the replacement should have the same base (screw-in or snap-in) and should be the same size.
5. How do I attach Christmas lights to my house?
There are lots of viable methods for attaching lights, whether you're looking for a polished and professional appearance or you have more of a DIY attitude. Indoors, unobtrusive light clips that tap into place with a finishing nail are usually your best bet, though new stick-on clips—the kind with adhesive that releases easily from your wall without damage—work well too.
For outdoor use, you'll find specialized lightweight metal or plastic clips for attaching lights to every surface of your house, from railings and walkways to shingles, gutters and eaves. If you don't have the budget or patience to chase down that many different kinds of clips, screw-in hooks along roof fascia and wooden moldings are a versatile, old-school option. Insulated staples work too, though they're best kept for lights you plan to leave up year-round. You can also lash lights to ornamental features with zip ties or simply wrap lights around those same features.
Of course, there's also an aesthetic element to how you hang outdoor Christmas lights. You may want to emphasize your home's architectural features, for example, or simply use lights to outline windows and door frames. One pro tip: If you have a few high-impact Christmas decorations on your lawn, keep the lights behind and around them relatively simple and low-key so focus is on your decorations themselves.
Tip
Brick, stone and stucco walls can be especially challenging.
The traditional option for mounting lights directly to these surfaces is to drill an anchor into the wall for clips (or lights) to attach to, but this means you’ll need to seal the hole against water. No form of caulking will outlast your wall, so you’ll need to check and re-seal periodically.
One widely seen social media “hack” calls for sticking strands directly to your wall with hot glue or construction adhesive, but taking them down later becomes problematic. Your best bet is to use hot glue or construction adhesive to secure light clips to the wall instead, then use the clips to hold lights.
6. How many strings of lights can I have on one outlet?
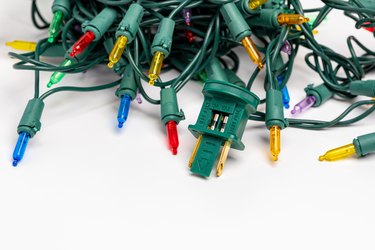
It really depends on how much power your lights draw, which is measured in watts. Most of the electrical circuits powering outlets inside your house are rated for 15 amps, while garage and outdoor outlets are often on 20-amp circuits.
- A 15-amp circuit can safely handle about 1,400 watts of lights.
- A 20-amp circuit can safely handle about 1,900 watts of lights.
Note that these are maximums for the entire circuit. If other things are plugged into the same circuit as the lights, it can't safely power as many lights. To figure how much power your lights use, simply add up the wattage ratings of all of the lights. For example, if you have three 25-foot strings of incandescent outdoor lights rated at 175 watts each, the total wattage is 525 watts. By contrast, three 25-foot strings of LED outdoor lights will likely use under 15 watts total.
Tip
Extension cords also have a wattage limit. The limit will be lower on a short, light-duty indoor extension cord than a long, heavy-duty outdoor one. If cords aren’t labeled with a maximum wattage limit, try looking it up on the manufacturer’s site or simply buying a new cord with a known limit. An overloaded cord can heat up to a dangerous extent, and it’s definitely better to be safe than sorry!
7. How can I safely use Christmas lights outdoors?
First, use lights that are designed (and ideally UL certified) only for outdoor use. You'll also want to use an outdoor extension cord for every set of lights. It's a good idea to wrap electrical tape around the plug where lights meet the extension to keep moisture out of the connection. (You can also buy a weatherproof housing or "boot" to cover it.)
A few other safety tips:
- Buy or borrow a sturdy extension ladder for high spots and have someone hold it for you while you're working (and please, don't stand it on an icy spot).
- Sketch out your plan before starting, then measure all the distances involved so you have the correct length of lights (and the right number of clips). Pay special attention to the distance from your outdoor outlets. You might need more extension cords than you think.
- Avoid running extension cords across high-traffic spots, like the walkway up to your door. That's just asking for accidents. It's better to add another cord if needed and go around (or up and over) instead.
- Double-check your math to make sure lights won't overload their power source, especially if you only have one or two outdoor outlets and major ambitions for your lights. If necessary, you may be able to run an extension cord into a garage or little-used spare bathroom where you won't unnecessarily chill the public areas of your house. By code, outdoor outlets are required to use a ground fault circuit interruptor (GFCI) to protect against short circuits, and bathrooms and garages will often have those as well. This makes your lights safer to use. In a worst-case scenario, you can use battery-operated lights to fill in gaps.
8. What's the best way to store Christmas lights?
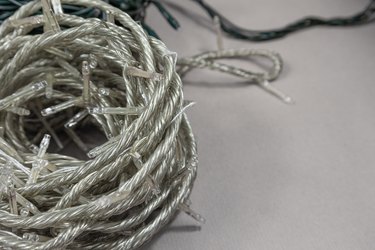
Smoothing the path for next year starts while you're taking down lights this year. The first rule is not to tug on light strings as you're taking them down, because that stresses wires and connections. Instead, lift them out of their clips or hooks (or snip zip ties and so on) before gently lowering them to the ground. If you have a helper to coil the lights neatly as you go, that's a really big help.
There are several ways to keep lights from tangling. In the "figure-8" technique, you'll wrap lights around two legs of an overturned chair in a loose figure-8 pattern, then wrap ends of strand around the spot in the middle where wires cross. You can also purchase spools made specifically for winding Christmas tree lights as they're taken down. An alternative is simply to wind them around something smooth and cylindrical, such as a broomstick or the cardboard spool from the middle of a roll of wrapping paper (a very seasonal option). Whichever method you use, don't wind strings tightly because—again—this puts unnecessary strain on wires.
For storage, a heavy-duty container with a sturdy lid is a better option than a bag or cardboard box, which leave your lights vulnerable to damage from something heavy being set (or falling!) on top. If you have a suitable storage spot in a garage or work area, hanging neatly coiled lights on pegs is another good option. Realistically, if your method until now has been "drop 'em in a box and worry about it in November," any of these options will be a huge improvement.
With these simple tips and tricks, your home will be decked out in twinkling holiday lights and before you know it—and you might even be the envy of the neighborhood. Happy decorating!