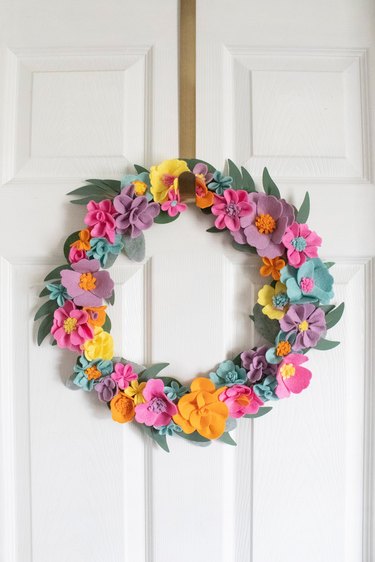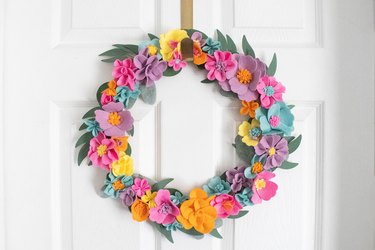
Now that spring has finally sprung, it's time to work on seasonal craft projects. This pretty felt flower wreath is the perfect place to start. Not only is it surprisingly easy to make but it will instantly brighten up any door or room.
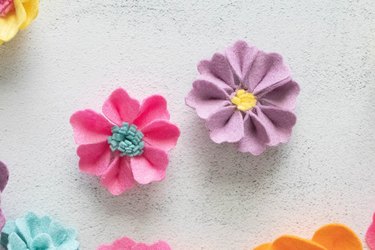
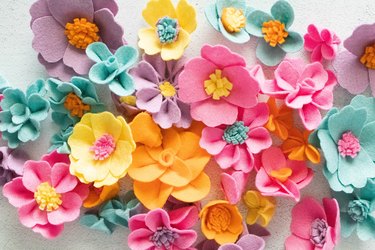
The trick to creating felt flowers is to experiment with layers, folding, and size. This will give the flowers dimension, especially if you vary the techniques. With that in mind, this tutorial explains how to make five (yes, five) different types of felt flowers with variations for each one. We've even included a free printable flower pattern to get you started.
Video of the Day
Also, feel free to customize the colors for this project. We chose a bright spring-inspired color palette, but you can go for pastels, jewel tones, or even neon shades. Read on to learn how to make a DIY felt flower wreath, with plenty of tips and tricks.
Video: Felt Flower Wreath
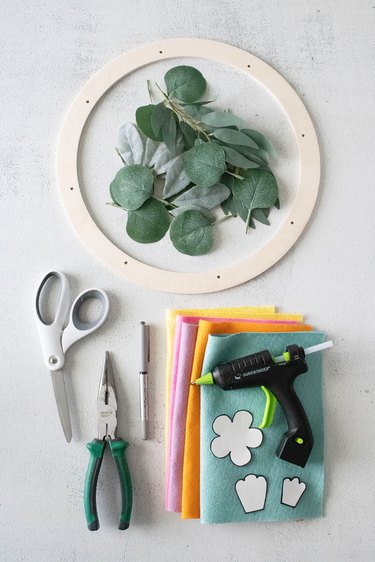
Things You'll Need
Flat wood or medium-density fiberboard wreath ring
Felt
Faux leaves
Fabric scissors
Pliers with cutters
Pen or marker
Hot glue gun
Wreath hanger or hook
Tip
Instead of buying a wreath ring, you can cut out a ring shape from cardboard. This is a great way to use what you already have!
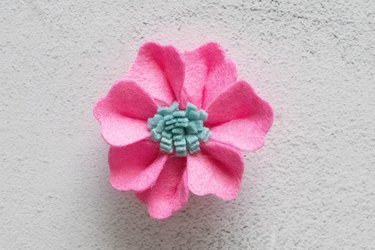
Flower Style #1
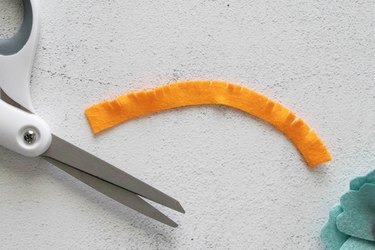
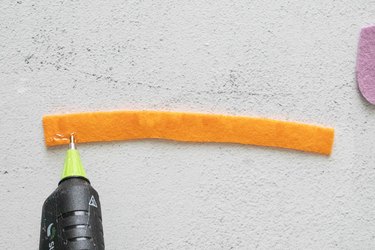
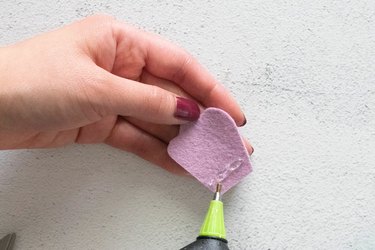
1. Make a fringe center
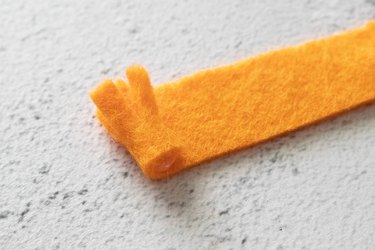
Cut a long strip of felt. Next, cut slits across the long edge to create a fringe.
Apply a bit of hot glue to one end of the felt.
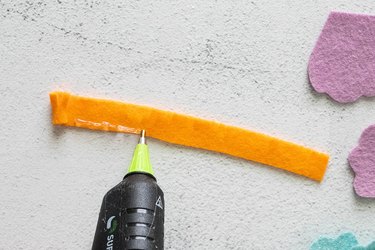
Roll up the end.
Continue applying hot glue and rolling the felt in short intervals.
Tip
By applying the glue in small amounts, you'll be able to gradually (and neatly) roll up the felt. You're welcome to apply hot glue along the entire edge and roll the felt in one go but be sure to do it quickly. The hot glue will start to cool in seconds.
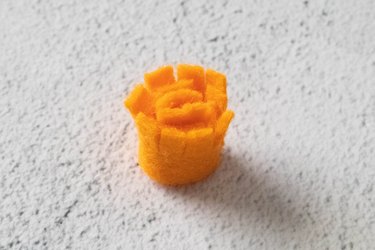
Continue until the entire strip of felt is rolled up.
2. Cut out the petals
On a piece of felt, trace the petal pattern. Feel free to use the small or large petal.
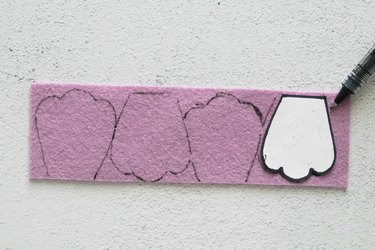
Cut out the felt shapes.

3. Glue the flower together
Apply hot glue to the bottom edge of one petal.
Stick it to the fringe flower center.

Glue another petal across the first one and then one on each side. This creates a flower with four petals.

To make a flower with eight petals, simply glue four more to the bottom. Each one should be placed between the top petals.
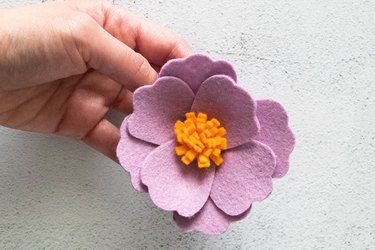
For another variation, wrap the fringe roll with a second color to create a two-tone center and then continue making the flower.

Flower Style #2
1. Make the fringe center
Prepare a fringe flower center using the instructions above.
2. Cut out the petals
Trace the small or large petal pattern on felt.

Cut out the petals.

3. Glue the flower together
Apply a vertical line of hot glue to the bottom half of a petal.
Fold the petal in half. Hold it for a few seconds to let the glue dry.
Apply hot glue along the bottom edge.
Stick it to the fringe flower center.
Continue folding and gluing petals around the center.
Switch up the size of the petals to make variations of this style.
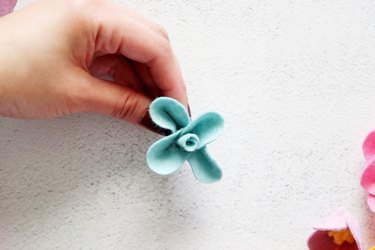
Flower Style #3
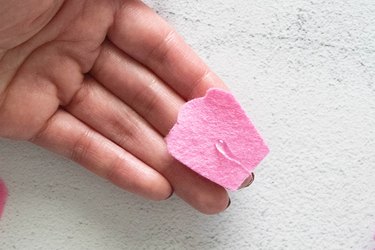
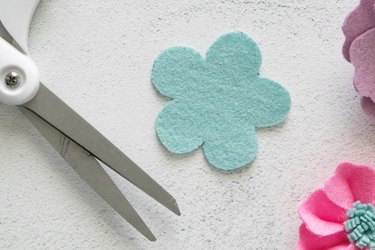
1. Cut out the felt
Trace the five-petal flower pattern on felt.
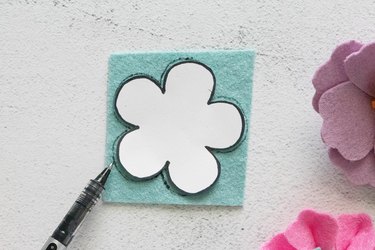
Cut out the flower.
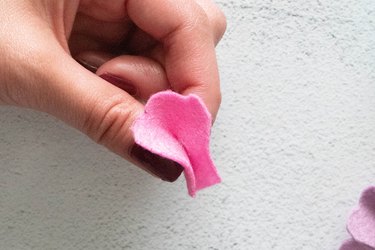
2. Glue the flower together
On one petal, apply a vertical strip of hot glue, starting near the top and moving toward the center.
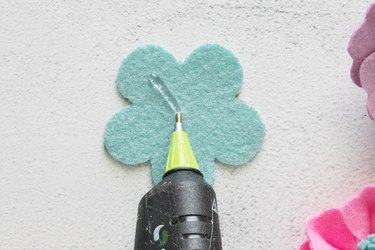
Fold the petal in half and hold it for a few seconds.
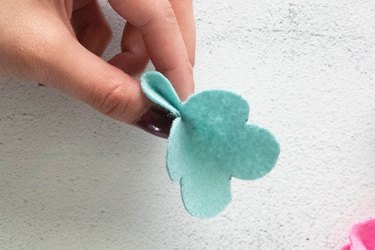
Repeat with the remaining petals.
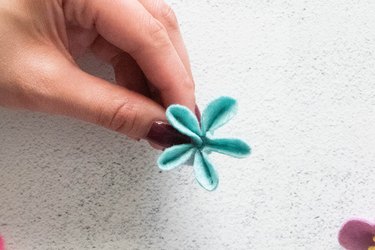
Tip
To make different versions of this flower, change the size of the pattern. This particular style makes a great filler flower for the wreath.
Flower Style #4
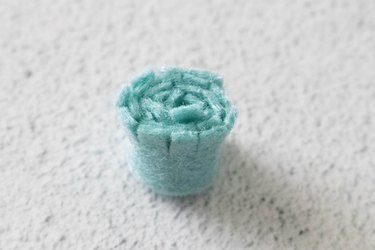
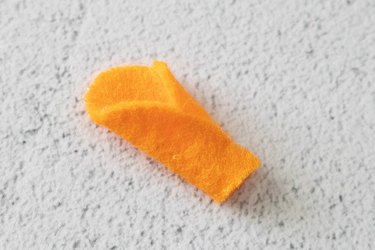
1. Cut out half circles
Cut out half circles of felt. They don't need to be exact replicas of each other, but they should be around the same size.

2. Make the flower center
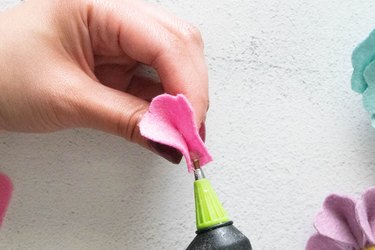
On one half circle, apply hot glue in a vertical line.

Roll it up to create the center of the flower.

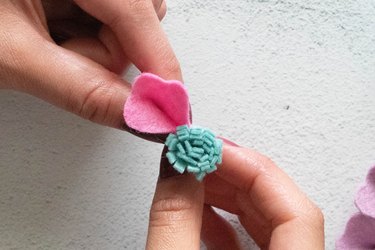
3. Glue the petals
On the remaining half circles, apply hot glue along the bottom edge.

Stick it to the flower center. Add one more across from it and then one on each side. This creates a flower with four petals.
Have fun with this! Try switching up the center and using the fringe version. Another option is to fold and glue the petals in half before gluing them to the center. If you want a fuller flower, simply add a bottom layer of petals.
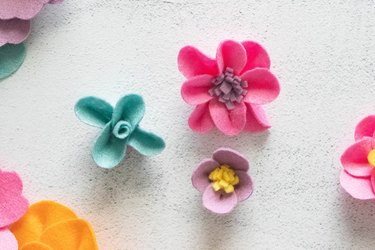
Flower Style #5
1. Cut out half ovals
Cut out half ovals or circles but with wavy edges. Keep it organic and fluid; this doesn't have to be precise.

2. Make the flower center
Apply a vertical line of hot glue to one half oval.

Roll it up to create the center.
3. Glue the petals
Apply hot glue along the bottom edge of a felt petal.

Glue it to the flower center. Add three more petals to complete the flower.

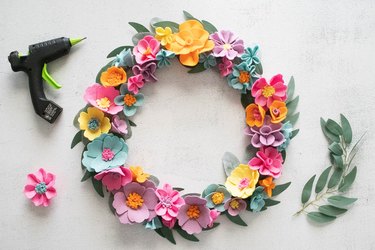
Felt Flower Wreath
1. Prepare the flowers
Make enough flowers to fill up your wreath form.
2. Glue the greenery
Hot glue faux leaves to the wreath form. Use the cutting portion of the pliers to trim stems as needed.

3. Add the flowers
Hot glue the felt flowers to the wreath.
Tip
Position the flowers on the wreath before you glue them. This will allow you to experiment with placement and the overall look before gluing them down.
To display your felt flower wreath, use a wreath hanger or hook. Happy spring!