My name is Teo, and I love plants. I'm the garden expert for ehow, and I spend my free time volunteering as a docent (sort of a tour guide) at the San Fransisco Botanical Garden, where kids come for special camps to learn about the wonderful world of plants.
I know how much kids like to grow things and to spend time outside (and so do I!). Here are some of the hands-on summer plant and garden projects that are super popular with kids of all ages in our summer camps.
Video of the Day
Video of the Day
Note: This list has too many projects to fit into one article, so we split it into two. Here you'll find projects 1–10. For projects 11–20, see How Does Your Garden Grow? Part 2.
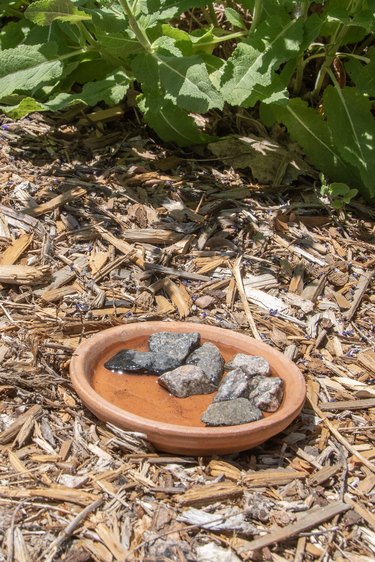
1. Create a Watering Hole for Bees
You may have heard that bee populations are dropping, and the truth is these important pollinators need all help they can get. We all know that bees sip pollen from flowers, but they also need water. The problem is, bees can't swim, and many of them drown in bird baths trying to get a drink.
Here's how to make a watering hole that's safe for bees:
- Find a shallow dish or tray — anything that holds water and can stay outside will work.
- Paint the dish (if you'd like). This is an optional but fun step. Use any type of paint, and let it dry completely.
- Gather small rocks and add them to the dish so it fills at least one-half of the bottom.
- Place the dish in a flat, stable spot that you can reach with a garden hose or otherwise will be easy to fill with water.
- Fill the bottom of the dish with tap water so that the tops of the rocks are above the water. That way, bees can land on the rocks and lean down to drink.
- Add water every day or two so there's always plenty for the bees to drink.
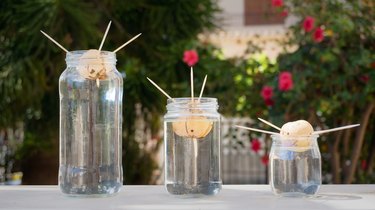
2. Grow an Avocado Plant
Did you know that an avocado pit is really a seed that can grow into an avocado tree? Kids at the botanical garden are curious about how plants reproduce, and this classic growing project never fails to entrance. Each child will need one ripe avocado, one glass, and a few toothpicks.
Here's how to grow guacamole:
- Remove the pit from the avocado and wipe it dry with a paper towel to make it easier to work with.
- Peel off the outer skin of the pit. This can take time, but it's fun. Look for a place to start and keep peeling. The more you can get off, the faster your plant will grow.
- Set down the pit so the pointed end is facing up and the dimpled, flatter end is facing down. Poke three toothpicks into the pit about a third of the way down from the pointed end. Space the toothpicks evenly around the outside of the pit.
- Set the pit onto a glass or jar so the toothpicks hold it over the middle. Fill the glass with water until it reaches halfway up the avocado.
- Change the water every few days until the pit splits and roots appear from the bottom. This usually takes about 1 month.
- Transplant the pit to a small pot filled with potting soil so the top of the pit is above the soil. Place the pot in bright, indirect light, and water frequently to keep the soil moist.
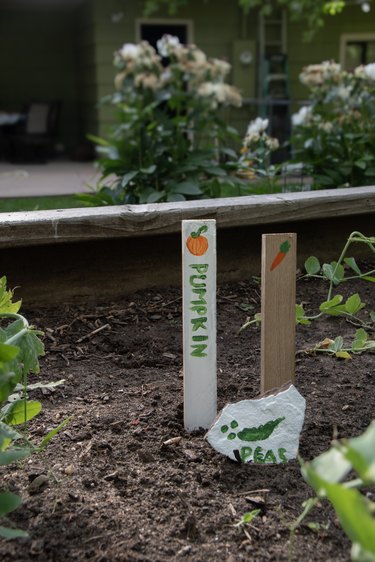
Grown vegetables are easy to identify — you'd never mistake a carrot for a tomato, for example — but lots of seeds look alike, as do the baby shoots that come out of the ground. So gardeners like to make markers so they remember where they planted everything!
The classic way to mark where seeds are planted is to make little signs using the seed packets and sticks, but custom garden markers are even better, and they're fun to make. You'll need flat garden rocks or popsicle sticks plus waterproof paint and brushes.
- Each child gets to pick their preferred option for a marker: rock or stick.
- Paint either the name of a veggie or a picture of it on the stick or stone.
- Let the artwork dry in the sun and then arrange them in the garden.
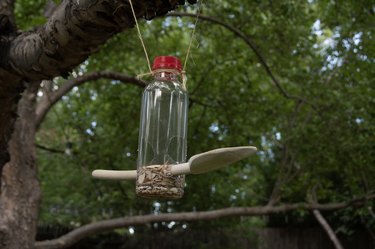
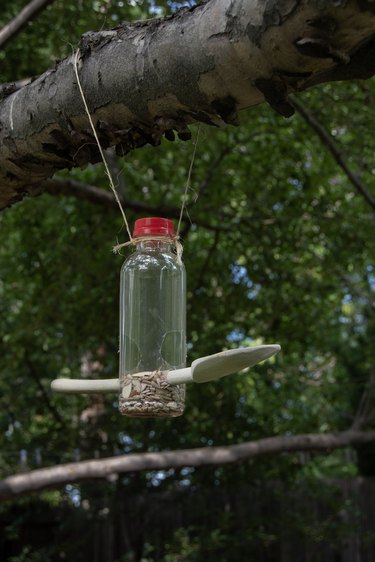
4. Make Recycled Bird Feeders
One of our most popular projects at kid camp is to use plastic water bottles and wooden spoons to feed our feathered friends. Here's how:
- Make sure the bottle is completely dry inside.
- Cut holes or slots in the bottle through which you will poke wooden spoons. (You can use pencils or wooden chopsticks in a pinch.) Right above each of these holes, cut a larger hole. These will be the feeding holes where the birds can access the seeds.
- Insert the spoons into the slots.
- Fill the bottom of the bottle with birdseed, up to the larger holes.
- Tie one end of a string or ribbon around the neck of the bottle, wrap the other end around a tree branch and tie it to the bottle, then screw on the cap.
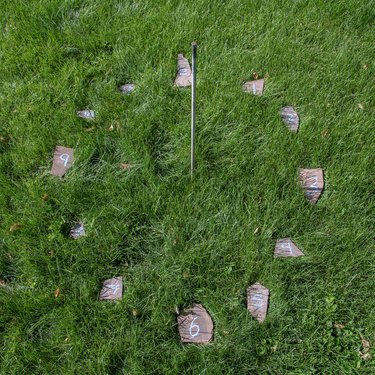
5. Build a Sundial
Gardening is not just green leaves and blossoms. There's more than a little science involved, and these projects can help kids understand basic but often forgotten facts about the universe, including how humans keep time.
Work some astronomy basics (how Earth moves around the sun) into the summer fun with this very old-school science project that proves that it's possible to tell the time without a smartphone! Here's how kids get started:
- Find a flat area of ground, and clear away any weeds and rocks.
- Draw a circle that's as large as your cleared space will allow. You can do this with a tool indenting the soil or you can use a circle of rocks. This is the body of the sundial.
- Pound a post or fat plant stake into the very center of the circle.
- Decorate 12 flat rocks with the numbers 1 to 12.
- At noon, note where the shadow of the post hits the outer edge of the circle. Place the rock marked with "12" at that point on the circle.
- Place the "6" rock opposite the "12" rock and then add the "3" rock and the "9" rock halfway between the "6" and the "12," just like on a clock. Add the other rocks in their appropriate places.
- Check at 3 p.m. and 6 p.m. and adjust the rocks as needed.
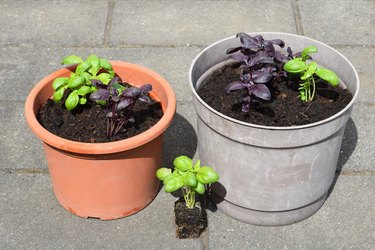
6. Grow an Herb Garden
Herbs are the race cars of the garden, with some going from seed to shoot in less than a week! This makes them ideal for getting kids excited about gardening.
You'll need a container for each herb as well as potting soil and easy-to-grow herb seeds, like chives, basil, mint, cilantro, and dill. Setting up the herb garden is a one-afternoon project, but the fun keeps right on coming over the next weeks as the herbs sprout and grow.
- Choose pots with drainage holes.
- It's always fun to paint the pots if you have the time. Do this a full day or even two days before planting so the paint dries completely.
- Fill each pot with potting soil 1 to 2 inches from the top, and water it well.
- Sprinkle 6 to 12 seeds on top of the soil and then press each one about 1/4 inch into the soil. Place the pots in a location with bright, indirect light.
- Watch for the seeds to germinate and then move to a direct-sun location.
- Water herbs like chives, cilantro, basil, and parsley well. Mediterranean herbs, like thyme and rosemary, prefer their soil to dry out before watering.
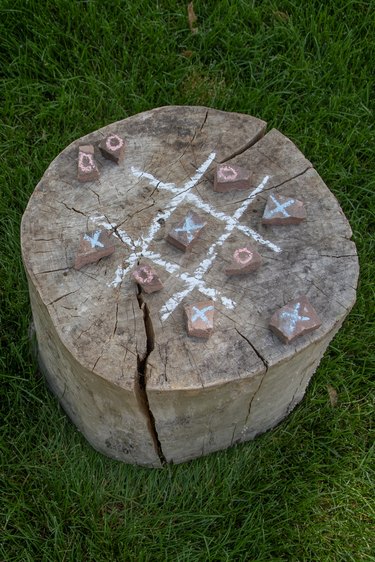
7. Play Games in the Garden
Tic-tac-toe is a timeless favorite that's even more fun when played outside. There are two great ways to make a garden game board. The simplest method is to draw a tic-tac-toe board on top of a flat tree stump. The other option is to make a game board on the ground with old ceramic tiles:
- Clear a square area on the ground about 2 by 2 feet for small tiles or 4 by 4 feet for larger tiles. Top it with potting soil and walk all over it to tamp down the soil.
- Place nine tiles on the flattened area in rows of three that are a few inches apart. That's the game board.
To make game pieces, find 10 flat rocks. Paint or draw an "X" on 5 of them, and make an "O" on the other 5.
8. Make Your Own Plants
Making new plants from parts of existing plants is called propagation. While some plant propagation involves male and female plants or fruits and seeds, there is also vegetative propagation, a simple cloning process of taking plant cuttings and getting them to grow roots.
Not every plant will grow roots if you place it in water, but many will. Some grow better in soil. This can be staged as a scientific experiment to figure out which plants will and which plants won't. (Expert tip: Garden plants like willow trees, succulents, geraniums, hydrangea, and vines are most likely to succeed.)
Here's how to propagate with cuttings:
- With garden scissors, cut two stem cuttings from 10 to 12 different garden plants. Each cutting should be about 6 inches long and include some leaf nodes —
little knobs on the stems from which leaves would normally grow.
- As you take each cutting, write the name of the plant on two paper cups. Place one cutting in each cup. Do this with 10 to 12 plants.
- For each type of plant, fill one of the paper cups with water and the other with moist potting soil.
- Every few days, change the water in the water cups and moisten the soil in the soil cups. See whether roots grow. You can see roots in the water cups, and you'll be able to tell that roots are growing in the soil cups if the plants start new growth.

9. Find This Leaf
This is a game we play at the botanical garden that teaches us how to "see." Seeing involves more than just looking. It's a real art, and there's no better time to get started than during childhood. The kids will need pencils, erasers, crayons or colored pencils, and drawing paper as well as a timer.
- Do this with a partner.
- Set a timer for 15 minutes.
- Find one plant in the garden that intrigues you. Then, pick one leaf, stem, or blossom on that plant.
- Draw your plant selection on the drawing paper with all the details you can include. Use crayons or colored pencils to add color. You can add features, such as leaves above or below a flower, to provide some context.
- When the timer sounds, meet your partner back at the patio. Try to locate the specific leaf or flower your partner has sketched. Then, they try to find yours.

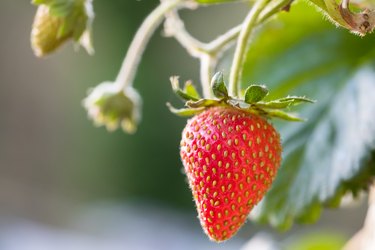
10. Plant a Strawberry Wall
Old fabric shoe organizers make great hanging walls for plants. While flowers look lovely cascading down from the shoe pockets, my personal favorite is strawberries. You'll need to get potting soil and a strawberry start for each pocket. Hang the shoe organizer on a sunny garden wall at a height all the kids can reach. Then, let the kids do the planting:
- Fill each of the pockets in the hanging organizer about half full with potting soil. Water it well. The water should seep through the fabric; if it doesn't, poke a few holes along the bottom of each pocket to provide drainage.
- Remove one of the strawberry starts from its container. Plant it in one of the upper pockets. Tuck in potting soil around the edges.
- Continue filling pockets with strawberry starts, working from the top to the bottom until there is a plant in each pocket.
- Water down the entire group with a hose.
- Water every few days and watch for fruit to grow. It will cascade out of the pockets.