Kaleidoscopes always bring me back to my own childhood. Crafting one with your kids this summer offers not only unique entertainment but also a fun-filled educational adventure that combines creativity with a touch of science.
So, gather your materials, unleash your creativity, and prepare to discover the magical world inside a homemade kaleidoscope!
Video of the Day
Video: Kids' Kaleidoscope
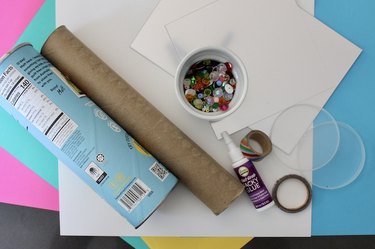
Things You'll Need
Cardboard tube
Card stock or cardboard (optional)
2 plastic lids or acetate sheet
Colorful beads
Sequins or colorful paper (optional)
Adhesive mirror sheets
Scissors
Drill
Ruler
Clear tape
Clear glue
Colorful card stock, markers, stickers, washi tape, and/or acrylic paint (optional)
1. Measure the tube
Start by measuring your cardboard tube to determine the size of your kaleidoscope.
A potato chip tube measures approximately 9 inches long and 3 inches wide. This is a great size for a homemade kaleidoscope because it is big enough to fit different beads and sequins and create intricate patterns.
If you use another type of cardboard tube and want to create a shorter version, measure it and cut it to the ideal size using scissors or a utility knife.
2. Create the viewing window
If you're using a potato chip tube, punch a hole in the bottom using a drill or another pointed tool. The hole should be approximately 1/2 inch wide — big enough to see through it.
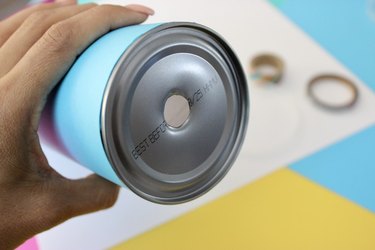
For other types of cardboard tubes, such as paper towel rolls, cut a piece of card stock or cardboard to fit over one end of the tube. Securely tape or glue this piece in place and make a hole in it for viewing.
3. Add reflective material
Measure the inside of your cardboard tube. Cut three pieces of adhesive mirror sheet to create a triangular prism.
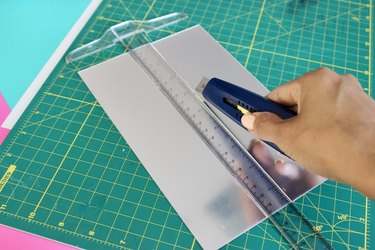
Use clear tape to connect the three pieces of adhesive mirror.

The prism should fit snugly inside the tube.
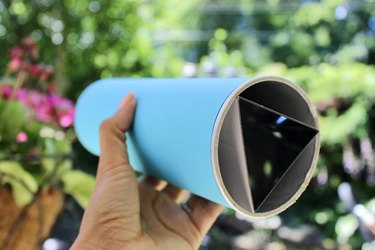
The reflective material should create multiple reflections of the objects inside.
Tip
You could also create the triangular prism with cardboard and cover it with aluminum foil.
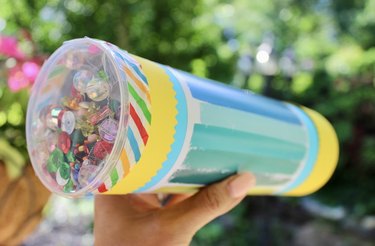
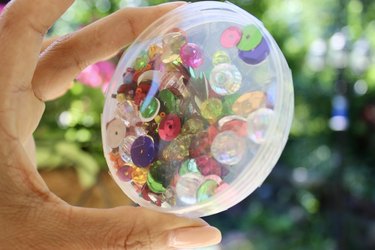
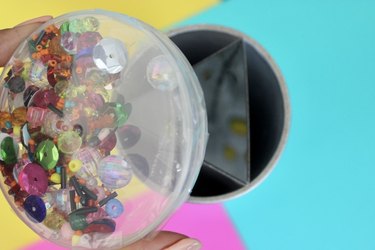
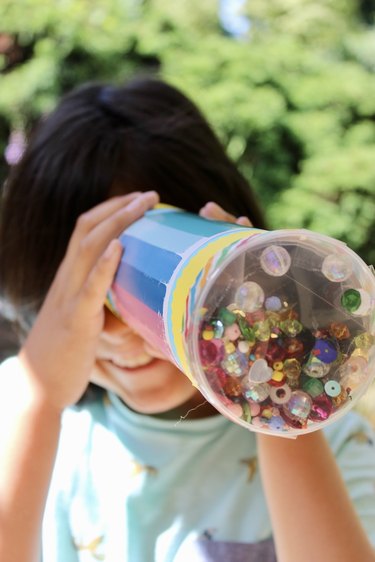
4. Add objects to create patterns
Reuse two lids from other potato chip tube packages to create the other side of the kaleidoscope. Another option is to cut circular pieces of transparent acetate sheet.
Fill one of the plastic lids with colorful beads. Choose beads with some transparency because they will catch light well.
Tip
Other great materials to use are sequins or even colorful pieces of paper.

Cover the lid containing the beads with another plastic lid or acetate sheet using clear tape.
Close the other end of the kaleidoscope using clear tape or something stronger, like hot glue, to keep it in place.
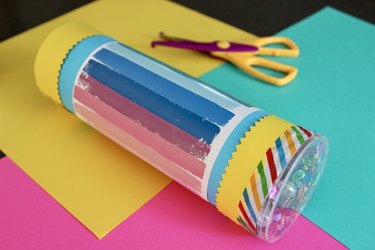
5. Decorate the kaleidoscope
Encourage your kids to decorate the outside of the kaleidoscope using colorful card stock paper, markers, stickers, washi tape, or acrylic paint. This will add a personal touch and make your homemade kaleidoscope extra special.
6. Enjoy the magic
Hold the kaleidoscope up to the light and rotate it slowly. Watch as the objects inside create beautiful and changing patterns of color and light.

Maximize the learning opportunity by encouraging the kids to talk about how mirrors and light combine to create the kaleidoscope effect. Explore related topics, such as the principles of light, reflection, and symmetry.
Tip
For extra fun and experimentation, try making variations of patterns using different beads or cardboard tubes. You can even create mini kaleidoscopes using toilet paper rolls, or you can use adhesive reflective vinyl instead of mirrors. Each variation will produce unique patterns based on the materials used, making the exploration even more captivating and educational.