This is the second half of our list of 20 summer garden projects for kids. As I note in How Does Your Garden Grow? Part 1, my name is Teo and I'm a garden expert and a guide at the San Fransisco Botanical Garden, where we run summer camps that get kids involved in plants and gardening and just being outdoors. Here are numbers 11 through 20 of our most popular activities at summer camp.
11. Grow a Wall of Edible Flowers
Video of the Day
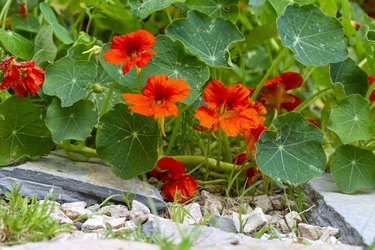
Kids visiting the botanical garden are amazed to learn that there are a number of common garden blossoms that are edible. These can be munched right off the stem but are usually added to fresh salads. My personal favorite is the nasturtium. It wins my heart with its brilliant orange color; its peppery taste; and, most of all, its eagerness to grow. The seeds are bigger than capers, and germination seems lightening fast.
Video of the Day
Do you have a garden fence or latticed wall that could use some color? One pack of seeds of climbing nasturtiums for every two children will do the trick. Kids can plant pots of nasturtiums at the base of the fence, and every day will bring new progress as the vines grow up to the top.
- Fill long rectangular plant pots with well-draining potting soil to within 2 inches of the top. Leaving that space makes them easier to water. Each child should have their own container.
- Open a package of nasturtium seeds. While all types of nasturtiums grow fast and provide great garden color, using climbing nasturtium seeds works best for this project.
Plant the seeds in twos every 8 to 10 inches to a depth of about 1/2 inch deep.
- Move the containers so they are touching the latticework or fence lengthwise. Water well after planting. Water again as the soil dries out. Look for shoots in the first week. As the plants grow, they will naturally entwine themselves on the lattice or up the fence slats.
- As the plants flower, pick some to top each child's dinner salad.
12. Create a Rock Doll Family
My daughter's all-time favorite dolls when she was young were the family of rocks she "discovered" among the rocks on our property. This was a simple game that she played outside under the old oak tree. She had store-bought toys aplenty, but finding mother and father rocks, girl rocks, and boy rocks and then making them a house and a life story took up most of one summer.
- Find a comfortable, shaded spot to set up camp. Lay out a towel or blanket to make a comfortable seat.
- Start your search for a rock family. Decide on how big you want the family to be and what members you want it to have. Then, start scouting around.
- Trust your instincts. If a rock is calling to you, it's the right one.
- Once the family is configured, sketch out their home on a piece of paper and decide on its size and how many rooms it will have. Then, use anything you find in nature to build the home. Leaves make great carpets, and large flowers are perfect beds for the family.
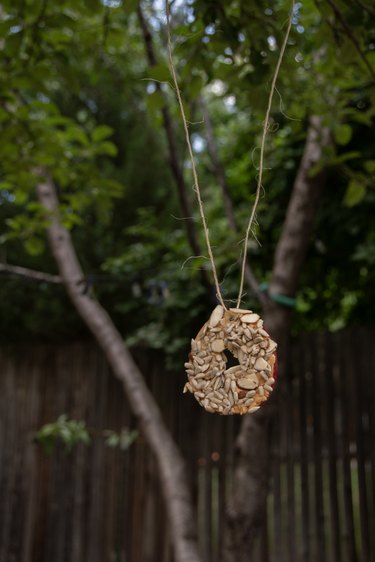
13. Cook Up Treats for Birds
Hanging seed feeders is great for birds, but nobody likes to eat the same thing day after day. Birds also like fruit and nuts and sources of fat like nut butter and suet. Let your kids "cook up" bird seed treats with no baking required. They will need apples, peanut butter, wild bird seed, and yarn.
- Core and slice the apples. Parents or older kids can help the younger kids, or let them use an apple corer.
- Cut 12-inch pieces of yarn.
- Poke a hole in the tip of each apple slice. Thread a piece of yarn through the hold and tie the ends together to make a loop.
- Spread natural peanut butter (with no sugar added) onto one side of the apple slice, then press the peanut butter side into a bowl of birdseed.
- Hang the treats on a tree branch for birds to enjoy.
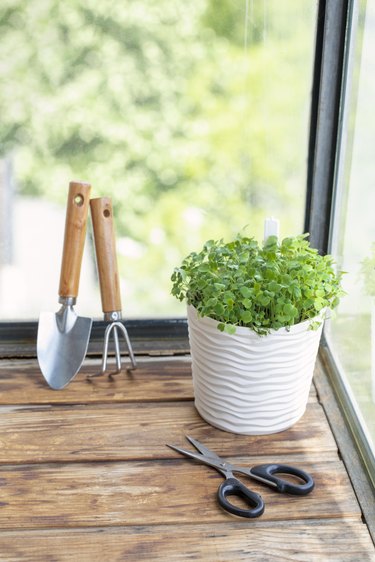
14. Grow Microgreens
Lots of farmers' markets have stands selling microgreens, but what exactly are these tiny veggies? They are neither more nor less than very young plants — baby plants. Because you eat the plants so young, they don't develop deep roots. That means the equipment required to grow them is simple: shallow trays, potting soil, and seeds. It is simple, and children will love being microgreen "farmers." Here's how:
- Put 1 to 2 inches of soil in the tray. If all you have is a regular flower pot, you'll need to fill it up with soil since the microgreens will need sunlight.
- Sprinkle seeds on top of the soil. Lettuce, Asian greens, and watercress are easy-to-grow choices. You'll need to sprinkle thickly, not lightly.
- Add about 1/2 inch more soil on top of the seeds and then dampen the soil with a plant mister.
- These greens are ready to eat in 10 to 14 days. Cut them with kitchen scissors and pop them right into a salad.
15. Make a Sunflower Fort
Every kid needs a fort at some point in childhood, if not two or three or four. It's a space to call their own, and whether it's in a tree or on the ground, it's more fun if they make it themselves — or in the case of a sunflower fort, plant it themselves.
This was another activity my daughter loved, so I know it works well. The kids "build the walls" with fast-growing sunflower plants!
- Pick a spot for the fort. Ideally, the ground should be flat and in a sunny site. If it's a grassy site, mow the grass or have a grown-up do it.
- Using a stick or spade, trace
out on the ground a square or circle big enough
for one or two people to be inside. This will be where the fort walls will go. Select and mark the area that will be the door.
- Use a shovel or trowel to work the soil around the perimeter of the square or circle. Dig down 6 to 10 inches to loosen the soil for the sunflower roots. Then, plant sunflower seeds 6 to 8 inches apart all around the perimeter of the fort except in the door area. Plant the seeds in twos in case one doesn't germinate.
- Water the seeds well after planting and water every few days until shoots appear. After that, water when the soil is dry. Sunflowers grow fast, and soon the plants stand as the walls of the fort.

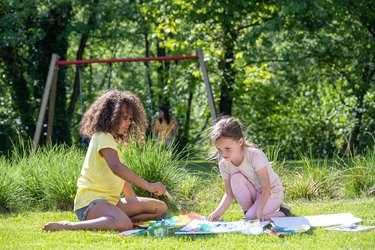
16. Make a Backyard Map
Maps aren't as important today as they used to be before smartphones. But mapping is fun for kids both young and old. Drawing a map of the backyard is a fun activity and a great way to learn the names of some of the trees and shrubs in your garden. Older kids can even draw theirs to scale.
- Draw the outside edges of the map. If you are doing it to scale, you'll want to use a tape measure to measure the area and scale it down to a workable size; for example, 1 yard could be 1 inch or 1/2 inch on the map.
- Using a pencil, lightly sketch the most important features of the backyard. Start with the house and any other buildings. Move to the pathways, the compost bin, and the garden beds. Then, add the trees and shrubs. Again, if you are working to scale, everything will need to be measured.
- Draw over the pencil lines with crayons, colored pens, or markers. Color them in with paint or crayons. Use a dark pen to write in the names of the kind of trees and shrubs in your yard.
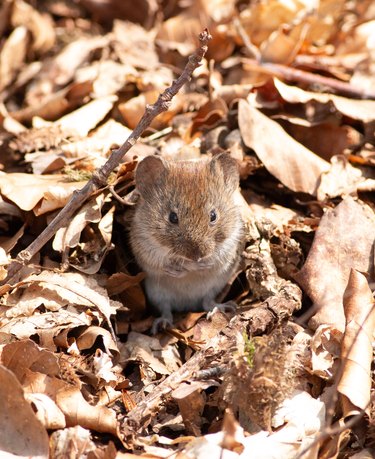
17. Build Homes for Small Animals
Humans aren't the only ones who need shelter from the elements. Small mammals do as well. Critters like hedgehogs (in Europe), opossums, squirrels, chipmunks, and rabbits help your garden ecosystem by eating bugs and snails. You can make your garden safer for these wildlife species by organizing a habitat-building project for your kids.
Giving small mammals homes doesn't mean building tiny houses. The best shelter would be a pile of brush in a corner of the garden. Your kids will learn about wildlife and enjoy keeping an eye out for mammals using their shelter.
- Install your home for small mammals in a protected corner of the backyard. Pile up brush, twigs, cuttings from shrubs, and moss.
- Top this off with evergreen branches since they offer the most protection from rain.
- Keep an eye on the area and see who visits.
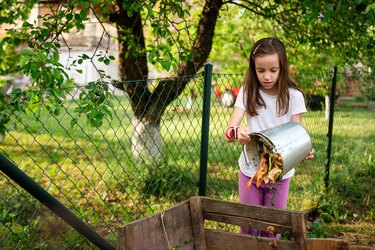
18. Make a Compost Pile
Kids love projects that help the environment. A home compost pile does just that, and it helps your own garden grow!
- Work with your kids to choose a spot for the compost pile. It should be in a flat area that gets some sun and can be accessed year-round. You'll want to water it down from time to time, so make sure it's reachable with a hose.
- Clear the area of rocks and weeds, and mow down any tall grass.
- Layer on 4 to 6 inches of bulky "brown" materials. This can include twigs, dead leaves, dried grass cuttings, and wood chips.
- Add a layer about half that deep of "green" materials. This includes kitchen leftovers of fruits and vegetables as well as garden clippings. Do not add meat or dairy scraps to the pile; eggshells are ok.
- Spray it down with the hose.
- Continue layering as if you were making lasagna. Add at least two to three times the volume of browns to the volume of greens. Cover all food scraps with 4 to 8 inches of browns.
- Let the microbes do their work. When the compost is all brown and crumbly like soil, that's when you can add it to your garden beds.
19. Press Garden Flowers or Leaves
Pressing flowers was one of my favorite activities when I was a child growing up in central Alaska. Summers were short, and winters were long, cold, and dark. The only flowers that grew wild were lupine, wild roses (with four petals), and bluebells. We pressed them between the pages of a Sears catalog and then displayed them in frames to remind us of the warm, sunny days of summer.
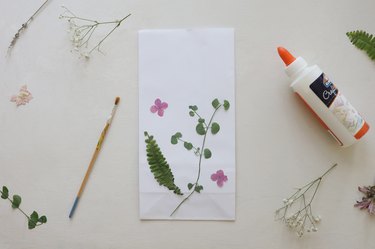
Pressing flowers appeals to children today as well, and it's one of the popular projects in the botanical garden. It's another way for children to capture and hold onto nature's beauty. When pressed flowers dry, they can be made into bookmarks, greeting cards, stationery, and much more, combining the beauty of nature with the creativity of art.
- Have the children choose flowers and pretty leaves from the garden.
- Get a thick, heavy book, like a dictionary. Lay tissue paper or paper towels on one of the inner pages, arrange the flowers or leaves on that paper, add another sheet on top, and close the book.
- Repeat this with more flowers and leaves in another section of the book.
- When you are finished adding flowers and leaves, close the book and take it indoors. Stack several heavy books on top of it. Leave the book there for several weeks until the flowers are dry.
Tip
For an additional fun project, you can make this Flower and Plant Pressing Kit with a few basic supplies.
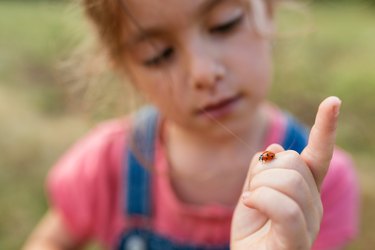
20. Study Garden Insects
A garden can become a child's biology laboratory for discovering and learning about different insects. There are a couple of ways to get this started. You can prepare a list of five common insects found in the area, and the children can try to find all of them and check them off of their lists as they go. Or, they can simply explore the garden and make notes about any insects they find.
This activity is most fun when each child has a magnifying glass, their own notebook to sketch the bugs they find, and a book or printed guide to common garden insects. In addition to drawing each insect, encourage the little scientists to make note of its behavior. Does it eat the leaf? Eat some part of the flower? Fly away? They can refer to the guide to find the name of the insect as well as fun facts they can copy into their notebooks.