Have a wall or fence that's begging for a bit of character or charm? Adding a wall trellis can create a gorgeous focal point in your yard, patio, or front entrance. Europeans have been using the practice of espalier for centuries to train plants to grow vertically in an array of stunning shapes.
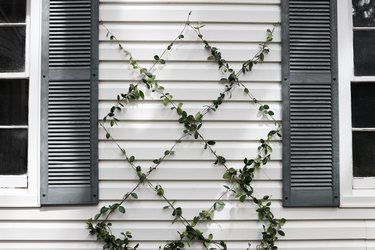
It's quite easy to create a wire wall trellis with just a few supplies from the hardware store. You can form it into any pattern you like, such as the diamond pattern I've chosen here. It's a simple project that will completely level up your outdoor space with gorgeous European garden vibes.
Video of the Day
Video: Wire Wall Trellis

Things You'll Need
Tape measure
Pencil
Power drill
Masonry drill bit (if needed)
#10-12 by 1 1/4-inch plastic ribbed anchors
Hammer
3 5/16-inch by 1/4-inch corrosion-resistant screw eyes
1/16-inch by 50-feet vinyl-coated wire
1/16-inch ferrules
Pliers
Wire cutters
Exterior caulk
Shovel or garden trowel
Climbing vine plants
Floral wire (if needed)
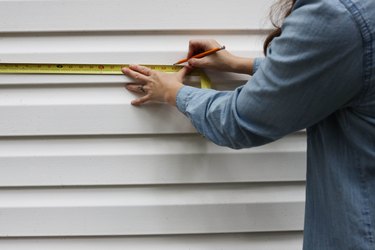
1. Measure the wall area
Measure the area where you plan to install your trellis. You'll need to know how tall and how wide the area is so that you can plan your design accordingly. Here, I've decided to install my trellis on the side of my house between two window shutters.

2. Plan your design
Decide how tall and wide you'd like to make your trellis. You'll also need to figure out how many rows of diamonds you'd like to have. Use the dimensions of the area you measured to figure out how many inches apart the screw eyes need to be spaced to create your desired pattern.
I decided on a trellis size that is 46 inches wide by 78 inches tall, and in order to have five rows of diamonds, I needed to install 12 eyes spaced evenly apart.

3. Mark the design on the wall
Use a tape measure and a pencil to measure and mark your trellis pattern on the wall surface. You'll need to make a mark for each place where you'll attach an eye.
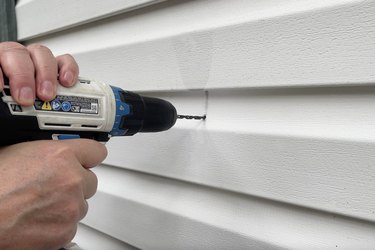
4. Drill the holes
Use a power drill with the appropriate drill bit to drill a hole in each of the marks you made. My house has vinyl siding over brick, so I used a masonry drill bit.
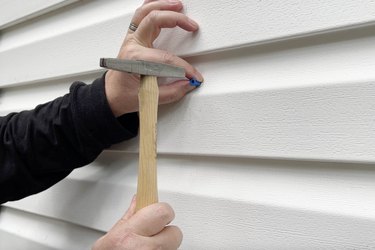
5. Install the anchors
Hammer a plastic ribbed anchor into each of the holes you drilled. If you're installing your trellis directly into a wood fence, you can skip this step.
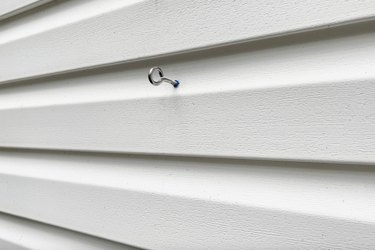
6. Install the screw eyes
Twist a screw eye into each anchor, making sure to leave about an inch of the eye's bolt protruding from the wall. This will give you room to twist your vines between the wall and the wire.
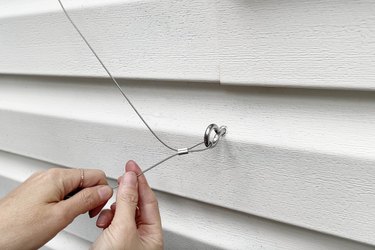
7. Thread the wire
Starting at one of the outer corners, attach one end of the wire to a screw eye, making a small loop in the wire and securing it with a ferrule: Start by sliding the ferrule onto the end of the wire, loop the wire through the screw eye hook, and slide the end of the wire through the ferrule again. Use pliers to crimp the ferrule in place and then clip off any excess wire using wire cutters.
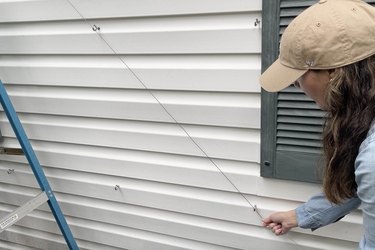
Thread the wire through the next eyes in a line, according to your pattern. At an opposing corner, loop the wire through the eye, pull it taut, and secure it with a ferrule. Based on your pattern, you can minimize the number of places you need to secure the wire. I ended up using six wires to create my pattern, but you may get away with fewer, if desired.
Apply a small amount of exterior caulk around each anchor and screw eye, to prevent moisture from getting into the siding. Let the caulk cure as directed.
8. Plant the vines
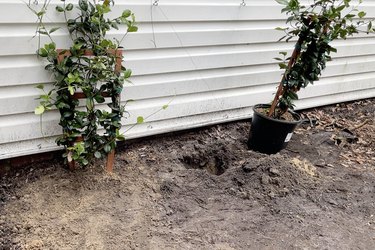
Once you've attached all of the wires, you're ready to plant your vines. I opted for two 2.5-gallon star jasmine plants since my trellis isn't very wide, but you may need more than two plants if your trellis is larger.
Use a shovel or garden trowel to dig a hole in the ground for each plant (or place planters beneath your trellis if you plan to use potted plants). Carefully remove your vine plant from the plastic bucket and wooden trellis it came with, loosen the roots, place it in the hole, and fill in the hole with topsoil.
Tip
Be sure to choose a plant that will grow well in the area where you installed your trellis. My wall gets plenty of direct sunlight during the day, making it a favorable location to plant star jasmine.
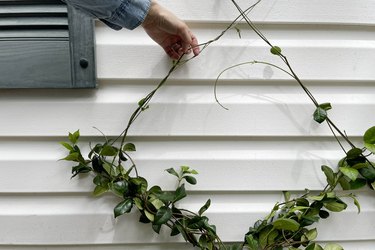
9. Wrap the vines
Take your vines and start wrapping them around the bottom wires. Work your way upward so that they follow the diamond pattern of your trellis. If needed, you can use floral wire to attach the vines so that they'll stay secure. You may not have enough vines to make it to the top of your trellis yet, but it won't be long before you do. Just be sure to water and fertilize your plants routinely.
To keep training the plants into the diamond pattern, be sure to wrap any new growth around the wires every so often and prune your plants as needed. It doesn't take much maintenance, and the payoff of having a stunning trellis is definitely worth it!
