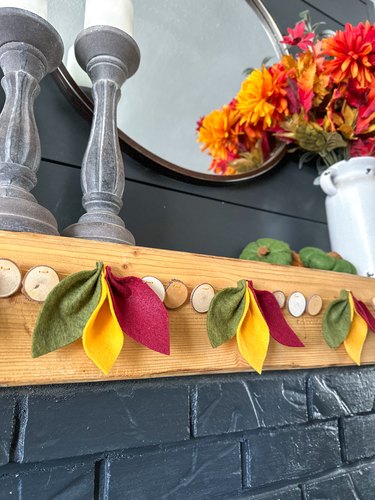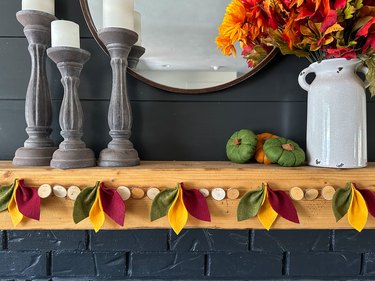
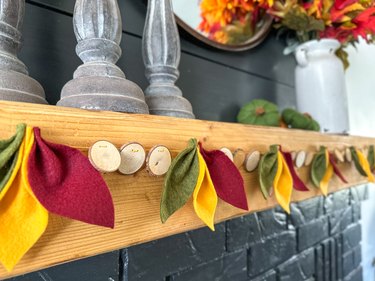
Ah, there's nothing like that crisp autumn breeze to get you in the mood for cozy home decor! Why not dive into a fun DIY project and whip up a felt fall leaf garland? This simple yet charming craft is perfect for adding a splash of seasonal flair to your space. Whether it's draping across a mantel, accentuating a centerpiece, or greeting guests over a doorway, this garland will transform any nook into a cozy autumn haven.
Video: Fall Leaf Garland DIY
Video of the Day
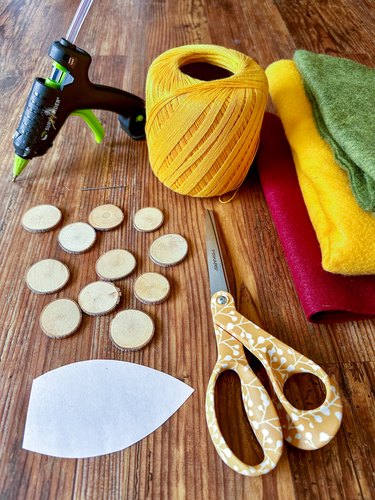
Things You'll Need
Paper
Felt
Sharp scissors
Hot glue gun
Wood slices or wooden beads
Drill and 1/16-in. drill bit
Needle
Cord or yarn
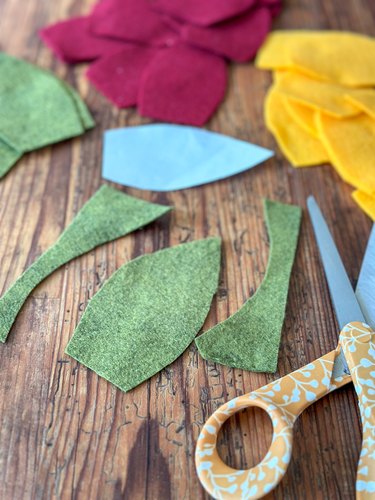
1. Cut the felt leaves
Start by creating a paper pattern to ensure all your felt leaves are uniform in size and shape. If you're a budding artist, sketch your own pattern. Not so artsy? No problem! Just find an image online and print it out.
Video of the Day
Make sure the bottom edge of each leaf is flat, setting the stage for some folding action in the next step. With your pattern in hand, cut out at least 10 leaves from three different colors of felt.
2. Create leaf shapes
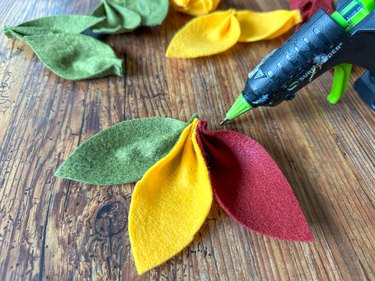
To give your leaves a lifelike, three-dimensional effect, fold the bottom edge and secure those neat little pleats with a hot glue gun. This simple step adds depth and character, making your leaf project pop.


3. Glue the leaves together
To bring your leafy trio together, simply join the pleated edges of three leaves using a hot glue gun.
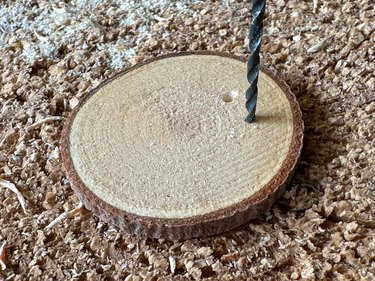
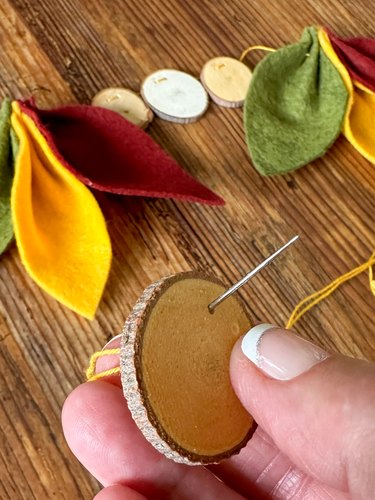
4. Drill holes in the wood slices
To add some character and spacing between your leaves, try using wooden rounds or beads. We opted to use leftover slices from cherry branches — talk about recycling, right? By drilling two tiny holes in the top part of each slice, you'll have the perfect setup for threading your cord through in the next step.
Tip
You can buy small wood discs or rounds from craft suppliers.
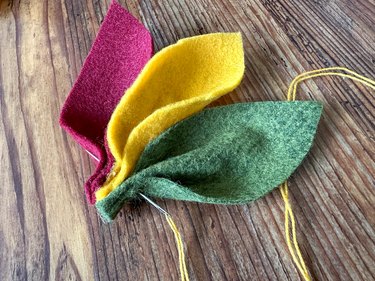
5. Thread it all together
It's assembly time! Grab some yarn or cotton cord and thread it through your needle. Start by weaving it through the pleated edge of a leafy trio. Then, spice things up by adding three wooden slices or beads. Keep this pattern going until your garland reaches the perfect length.


Tie a neat knot at each end of your garland, and it's ready to hang!