Lemon Pudding Fluff Recipe: How to Make Lemon Lush
Search for "lemon pudding fluff recipe" and you'll get two different things. One is a loose, spoonable bowl dessert. The other is Lemon Lush: a sliceable, layered 13x9 pan dessert built from a baked shortbread crust, a lemon cream cheese layer, a set pudding layer, and whipped topping on top. This guide covers the latter. By the end, you'll have 24 servings ready to slice cold the next day.
Hands-on work runs about 15 minutes, per The Sisters Cooking. Total time from start to serve is just over two and a half hours, almost entirely because of mandatory chill windows between layers. Build it the night before. Refrigerate overnight. Slice it cold.
What Lemon Lush actually is
Video of the Day
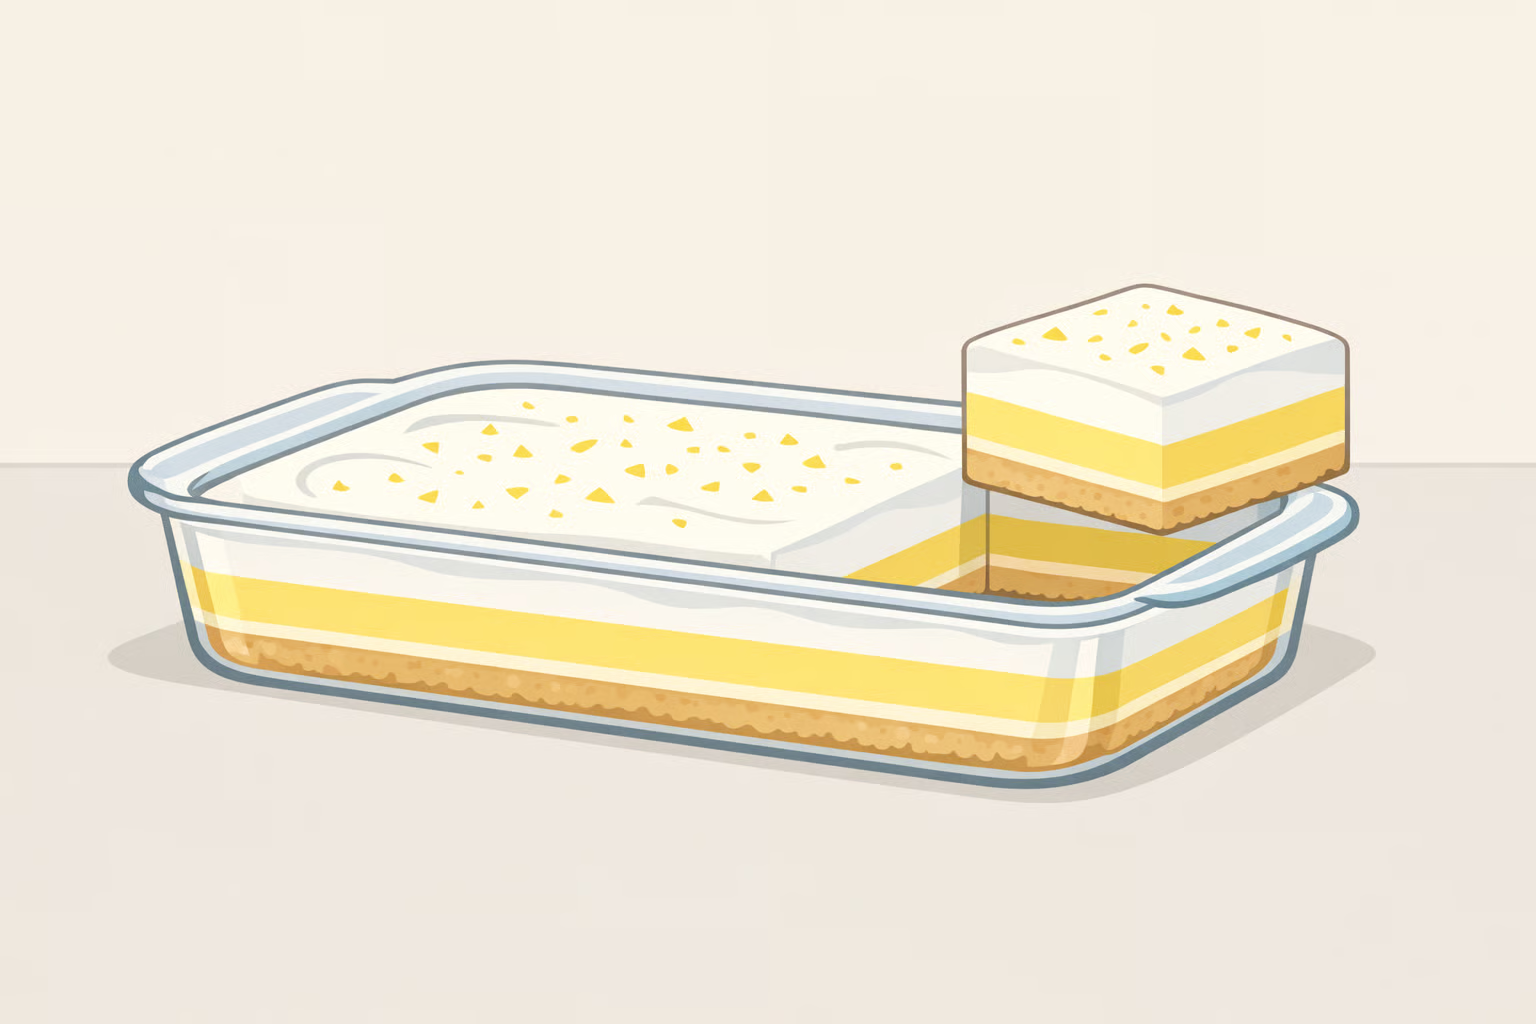
The "lemon pudding fluff" name creates a reasonable expectation of something loose and spoonable. Lemon Lush is a different animal: four distinct horizontal layers that set firm enough to slice with a knife and lift with a spatula, closer in structure to a dessert lasagna than anything you'd eat from a bowl. That distinction matters because it changes how you handle every stage of assembly. You're building something that has to hold its shape when cut, which is why the chilling order isn't optional.
The "no-bake" label is only partly accurate. The crust bakes at 350°F for 15 to 18 minutes. Everything above it requires no heat at all, per The Sisters Cooking. One baking step, then cold assembly from there.
Video of the Day
Before you start: ingredients and equipment
The recipe calls for softened cream cheese and softened butter. Both need to be at room temperature before you use them, so pull them from the refrigerator 30 to 60 minutes before beginning.
Equipment: a 13x9-inch baking dish, a hand or stand mixer, two mixing bowls. One practical note on the refrigerator: clear a shelf that holds the dish flat. You'll be sliding it in and out three times during assembly.
Everything below is per The Sisters Cooking, scaled to 24 servings.
Crust
- 1 cup all-purpose flour
- 2 tablespoons granulated sugar
- ¼ cup pecans or walnuts, finely chopped
- ½ cup (1 stick) unsalted butter, softened
Cream cheese layer
- 8 oz cream cheese, softened
- 1 cup granulated sugar
- Zest of 1 lemon
- Juice of 1 lemon
- One 8-oz container whipped topping, thawed
Pudding layer
- Two 3.4-oz boxes instant lemon pudding mix
- 3 cups cold milk
Top layer
- One 8-oz container whipped topping, thawed
- Optional garnish: lemon zest, thin lemon slices, or chopped nuts
On the nuts: the recipe includes them in the crust for texture. If you're feeding a crowd with unknown allergies, the source recipe is worth consulting before modifying.
On whipped topping: the recipe calls for store-bought thawed whipped topping. If you want to substitute homemade whipped cream, the source recipe doesn't address that swap, so proceed with that uncertainty in mind.
How to make this layered lemon pudding dessert: step-by-step
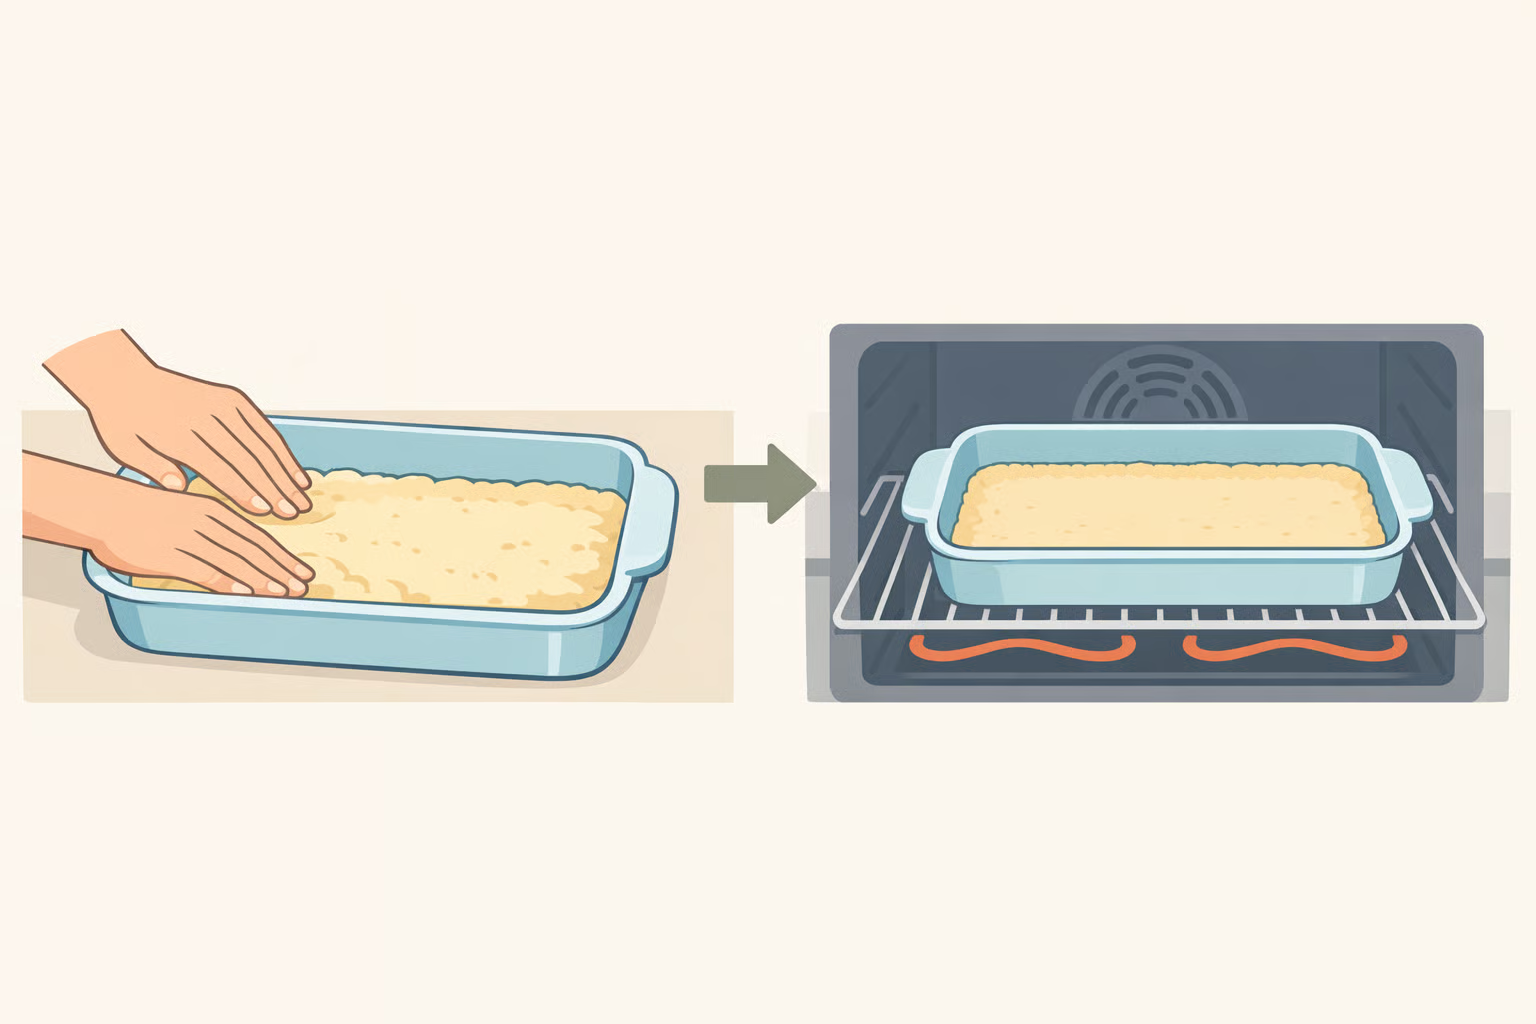
Step 1. Preheat the oven to 350°F and grease the 13x9-inch baking dish.
Step 2. Combine the flour, sugar, chopped nuts, and softened butter in a large bowl and mix until a dough forms. Press it into an even layer across the bottom of the dish. Take a few extra seconds on this: uneven thickness means thinner spots overbrown while thicker sections stay pale.
Step 3. Bake for 15 to 18 minutes until golden brown, then remove and let the crust cool completely before touching it again (The Sisters Cooking). Budget 30 to 45 minutes for this. The cream cheese layer goes on a fully cooled crust not a warm one.
Step 4. Beat the softened cream cheese and sugar together until completely smooth. Add the lemon zest, lemon juice, and one container of thawed whipped topping, then mix until uniform.
Step 5. Spread the cream cheese mixture evenly over the fully cooled crust, then refrigerate for at least 30 minutes (The Sisters Cooking). Chilling each layer before adding the next is what produces clean separation in the finished dessert, per The Sisters Cooking.
Step 6. When the 30 minutes are nearly up, whisk the two boxes of instant lemon pudding into the cold milk until smooth, then spread it over the chilled cream cheese layer right away. Don't let it sit in the bowl. Return the dish to the refrigerator for 15 to 30 minutes until the pudding layer is set (The Sisters Cooking).
Step 7. Spread the second container of whipped topping evenly over the set pudding layer. Add lemon zest, thin lemon slices, or chopped nuts if you want a finished look (The Sisters Cooking).
Step 8. Refrigerate for at least one hour before cutting. Overnight produces firmer, cleaner slices, per The Sisters Cooking. Cut into 24 squares to serve.
Why the layering order matters
The sequence isn't arbitrary. Each layer has a different consistency, and piling them in the wrong order, or skipping chill windows, causes the softer layer to bleed into the firmer one. The recipe specifies 30 minutes after the cream cheese layer and 15 to 30 minutes after the pudding layer for exactly this reason, per The Sisters Cooking.
The crust anchors everything. It bakes hard enough to hold its shape when you cut and lift a square, which is what allows this to be a sliceable dessert rather than a scoopable one. The cream cheese layer goes on second because it's the densest of the soft layers it can sit under the pudding without collapsing into it once chilled firm. The pudding layer is more fluid when freshly mixed, so it needs a stable, set surface underneath to spread evenly. The whipped topping goes on last because it's the lightest, and adding it to anything that hasn't fully set would push the layers below it out of position.
The pudding step has a specific timing challenge: mix it close to the moment you plan to spread it. Once it starts firming in the bowl, spreading it creates drag against the layer below rather than a smooth surface. Mix, spread, return to the refrigerator.
The final overnight rest takes all of this further. One hour is the minimum required; overnight is when the layers genuinely firm up and the slices hold their shape cleanly at the cut edge, per The Sisters Cooking.
Make-ahead timeline: working backward from serving time
This dessert is built to be made the day before. The overnight hold isn't a concession to convenience the layers set more firmly and the texture improves, per The Sisters Cooking. The make-ahead window is up to 24 hours. If you're serving early afternoon at a summer gathering, assembling the evening before lands exactly in that window.
Here's how to map it backward from a noon serving time:
The evening before (plan for roughly two hours of elapsed time, about 15 minutes of actual work):
- Start the crust around 8:00 pm; it bakes 15 to 18 minutes and then needs 30 to 45 minutes to cool
- Spread the cream cheese layer around 9:00 pm; refrigerate 30 minutes
- Mix and spread the pudding layer around 9:30 pm; refrigerate 15 to 30 minutes until set
- Add the whipped topping layer around 10:00 pm, cover, refrigerate overnight
The day of:
- The dessert is ready to slice by morning. If transporting, cut it at home rather than on-site; the layers hold their shape better when sliced cold
- Keep it refrigerated until 15 to 20 minutes before serving
The 30 to 45 minute crust cooling window is the one most people underestimate. It's not a step you can rush by putting the hot dish on a cold surface the crust needs to reach room temperature fully before the cream cheese layer goes on. Build that time into the plan.
Serving, storage, and what changes over time
Slicing cleanly. Use a sharp knife and wipe the blade between cuts. The layers are soft, and dragging a knife through multiple cuts without wiping transfers material from one square to the next. Cold dessert, clean knife, one motion per cut.
Transporting. Keep it refrigerated until 15 to 20 minutes before serving. A short rest at room temperature takes the edge off the fridge-cold texture without softening the layers enough to lose their definition.
Storage. Leftovers keep for up to four days covered in the refrigerator, per The Sisters Cooking. The layers gradually soften over that window; by day three the texture is looser and harder to cut cleanly. Still good, just different. Serve from the top down and avoid cutting into sections you won't finish within a day or two.
Nutrition. Per the source recipe, each serving comes in at 107 calories, with 19g carbohydrates, 3g fat, and 3g protein.
About 15 minutes of hands-on assembly, one night in the refrigerator, 24 servings, nothing needed on-site except a spatula and a sharp knife. For a summer gathering where you want to arrive with something that doesn't require any on-site work, it's a hard format to beat.