Ways to Reuse Old Mason Jars: Sorted by Jar Type
The jar sitting in your recycling bin right now qualifies for at least a dozen ways to reuse old mason jars covered in this guide. Most roundups treat all jars as interchangeable, which is how people end up pressure-canning in pasta sauce jars or making candles from whatever glass is on the counter. Some uses are open to any intact jar. Others require a specific type. Sorting what you have takes thirty seconds and determines which sections apply to you.
Identify your jar before reading further:
- Verified true canning jar: Ball, Kerr, or Bernardin, purchased new for home canning. All sections apply.
- Commercial food jar: pasta sauce, jam, pickle, salsa, mayo. Sections 1 and 2 cover everything appropriate. Section 3 is limited or off-limits depending on the project.
The guide runs from broadest access to narrowest. Most readers will find everything they need in the first two sections.
What any intact jar can do: storage, fermentation, and everyday use
Video of the Day
Every use in this section works regardless of whether your jar came off a grocery shelf or out of a canning supply aisle. No heat, no special hardware, no testing required.
The UC Master Food Preserver Program explicitly confirms two uses as safe for commercial food jars: dry food storage and fermentation. The remaining ideas below are common-sense household applications that don't involve heat, pressure, or food safety risk. They aren't sourced claims; treat them as practical suggestions.
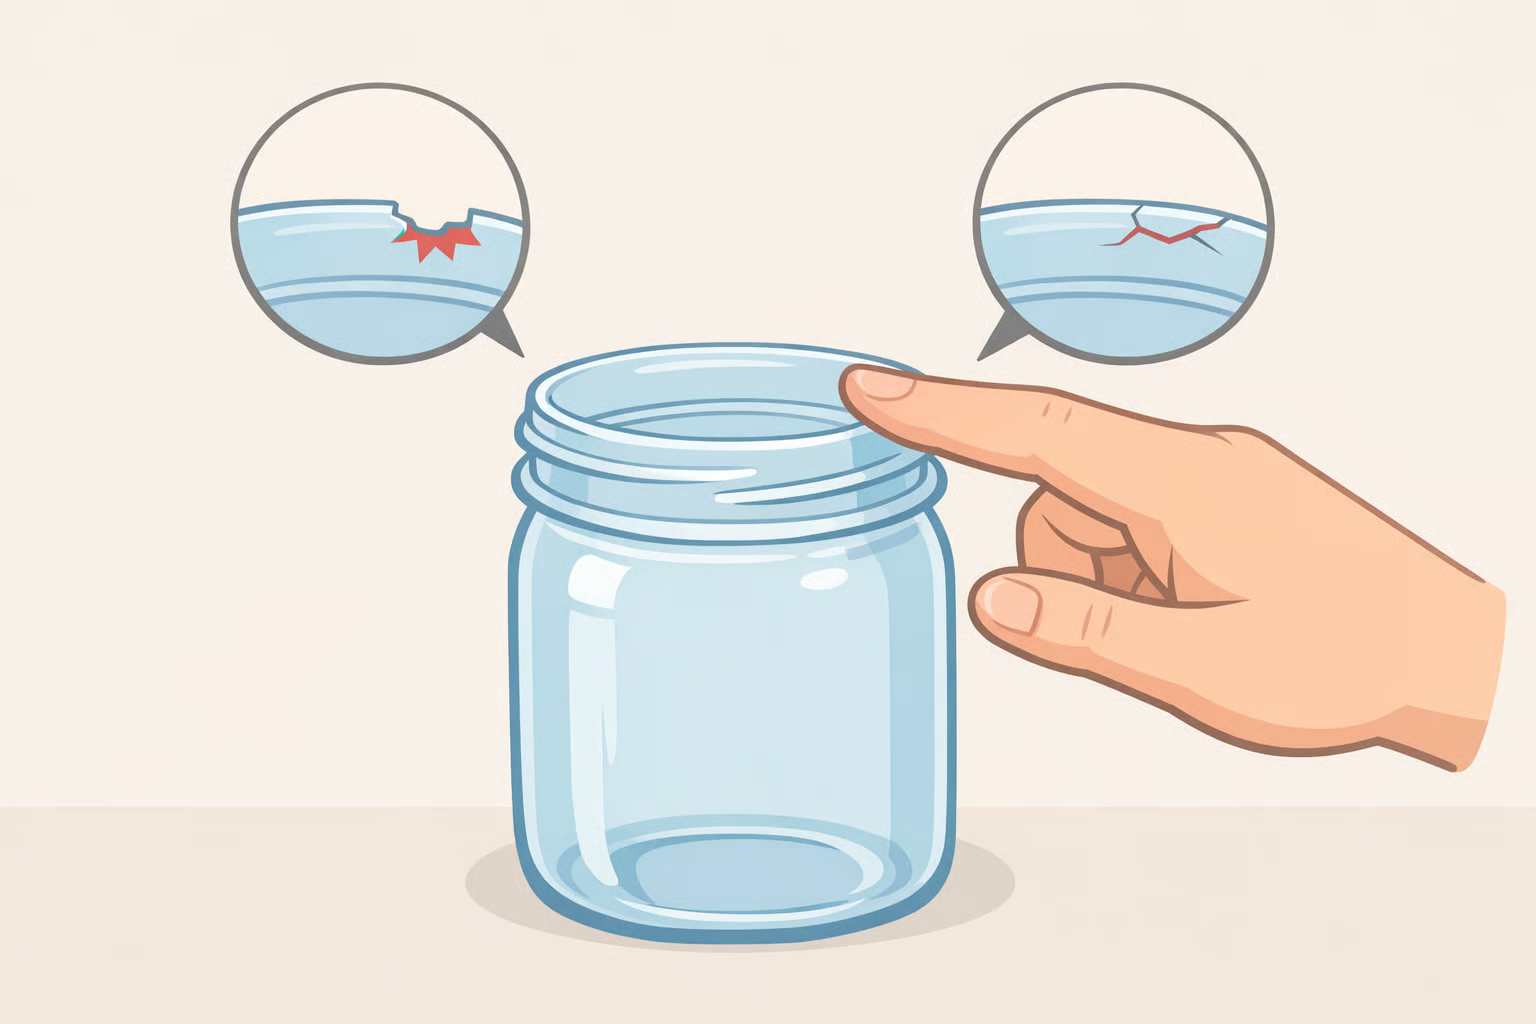
Quick jar check before anything else
Run a finger around the rim. Discard any jar with chips, cracks, or deep scratches. A chipped rim cuts hands; a cracked base can fail under the weight of dry goods. Wash in hot soapy water, dry completely, then proceed.
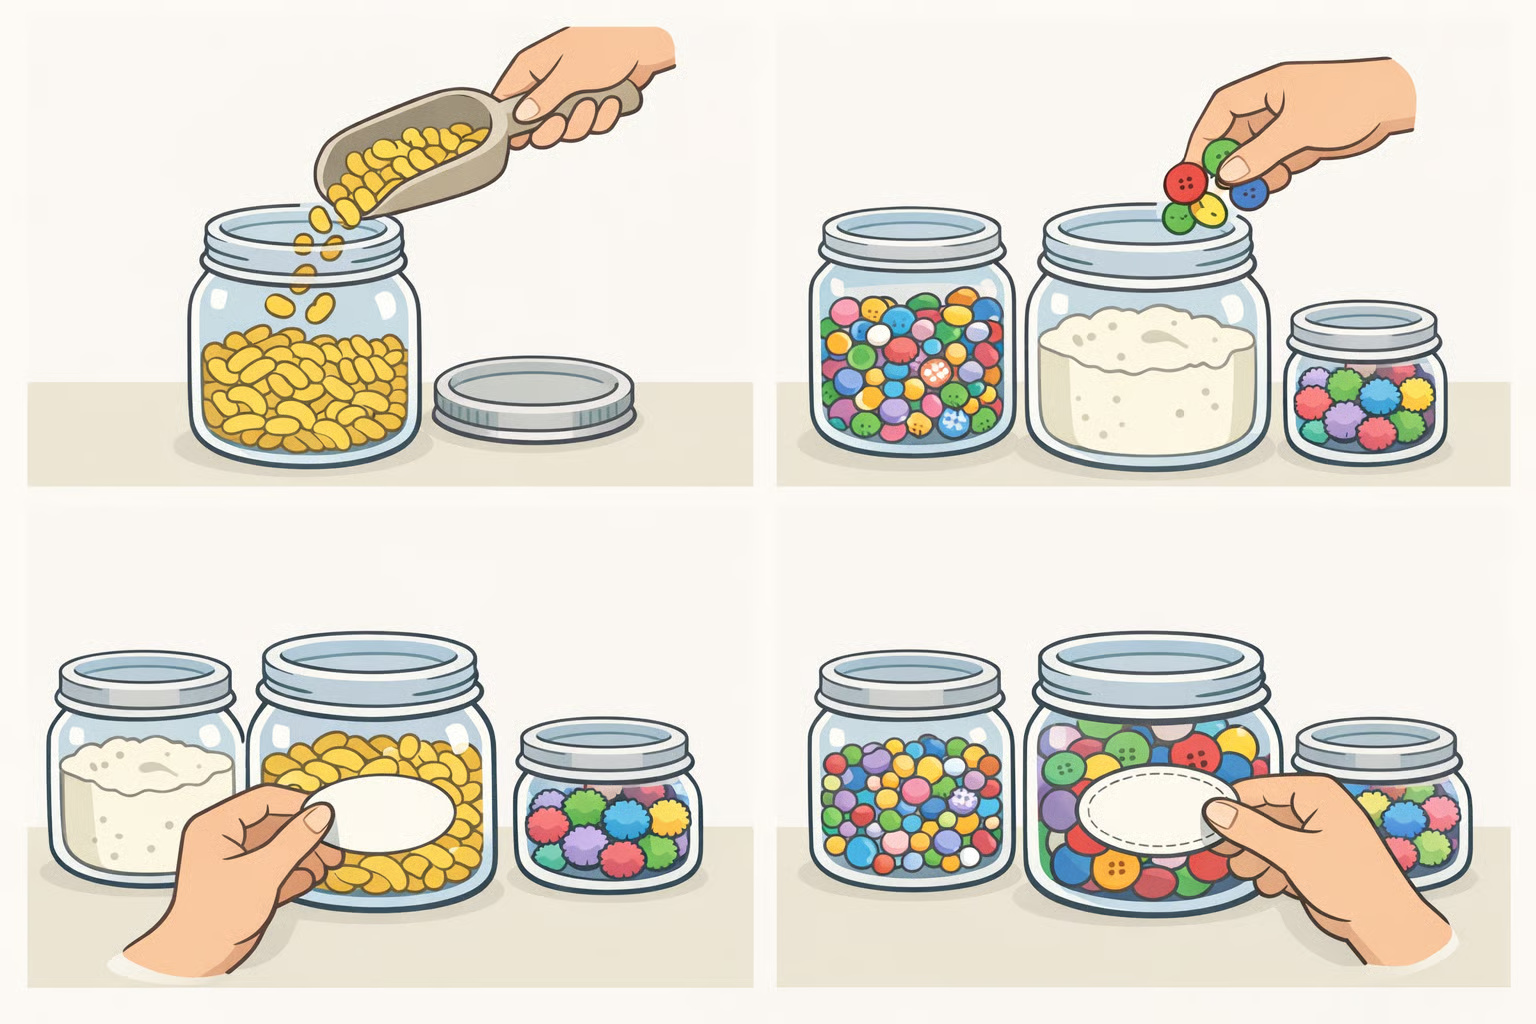
1. Dry food storage
The UC Master Food Preserver Program states that commercial product jars are safe for storing dry foods. Pasta, rice, lentils, dried beans, coffee, loose tea, and flour all transfer cleanly.
- Step 1: Clean and dry the jar completely.
- Step 2: Fill with dry goods.
- Step 3: Label with a removable chalkboard or masking tape label.
If the original lid no longer sits flat, a plastic storage lid in the correct mouth size handles the job. These run cheap for both standard and wide-mouth sizes.
2. Fermentation vessels
The UC Master Food Preserver Program confirms commercial jars are appropriate for fermentation when fitted with proper airlocks. Unlike canning, fermentation requires no heat; the jar sits at room temperature while beneficial bacteria do the work. That's why a pasta sauce jar qualifies here even though it wouldn't survive a pressure canner.
- Step 1: Clean the jar thoroughly.
- Step 2: Pack with your ferment. Sauerkraut, kimchi, or a simple vegetable brine are good starting points.
- Step 3: Fit a wide-mouth airlock lid rather than sealing with the original metal lid.
- Step 4: Store at room temperature, away from direct sunlight.
Video of the Day
DIY mason jar projects: storage, display, and one functional build
The uses below aren't addressed in the cited research, but none involve heat, pressure, or food safety considerations. Common sense, not sourced guidance.
Small-item storage around the house
Jars make efficient containers for anything small that tends to scatter, and the right jar size makes a real difference. At a desk or in a craft space, wide-mouth pints fit brushes, scissors, and pens without requiring you to dig. In a bathroom, short quarter-pint or half-pint jars with lids keep cotton balls, hair ties, and bobby pins dust-free on a counter. For a pantry or junk drawer, standard-mouth pints work well for batteries and rubber bands visible at a glance, no rummaging required.
For wall-mounted storage, screw the lid to a board or pegboard first, then twist the jar onto it from below. Wide-mouth jars are far easier to reach into than standard-mouth for this setup.
Spice storage follows the same logic. Wide-mouth jars in the 4-oz or half-pint range are the right scale: large enough for a usable quantity, small enough to stay organized on a shelf. Decanting from bulk bags is cheaper than buying pre-packaged spices, and a shelf of uniform jars with handwritten labels is easier to scan than a drawer full of mismatched tins.
Display and propagation
Jars with embossed designs or interesting shapes make functional vases. Short, wide jars suit a handful of herbs or wildflowers; taller narrow ones handle long-stemmed cuts. No tools, no cost, and they're easier to clean than most purpose-built vases.
For plant propagation, fill a jar with water, set a cutting so the node is submerged and the leaves stay dry, and place it in indirect light. The clear glass lets you watch root development directly, which is a practical advantage over opaque propagation pots. Pothos, begonias, basil, mint, and most soft-stemmed cuttings root well this way.
Gift packaging
Layer dry ingredients for cookie or soup mixes in a wide-mouth jar, add a printed recipe tag, and tie with twine. The contents are the gift; the jar is the packaging that gets reused afterward. This works because the recipient already knows what to do with a mason jar.
One build-it project: the soap dispenser
A single functional build, one tool, one salvaged pump. Works with any intact food jar and costs nothing if the pump comes from a finished soap bottle.
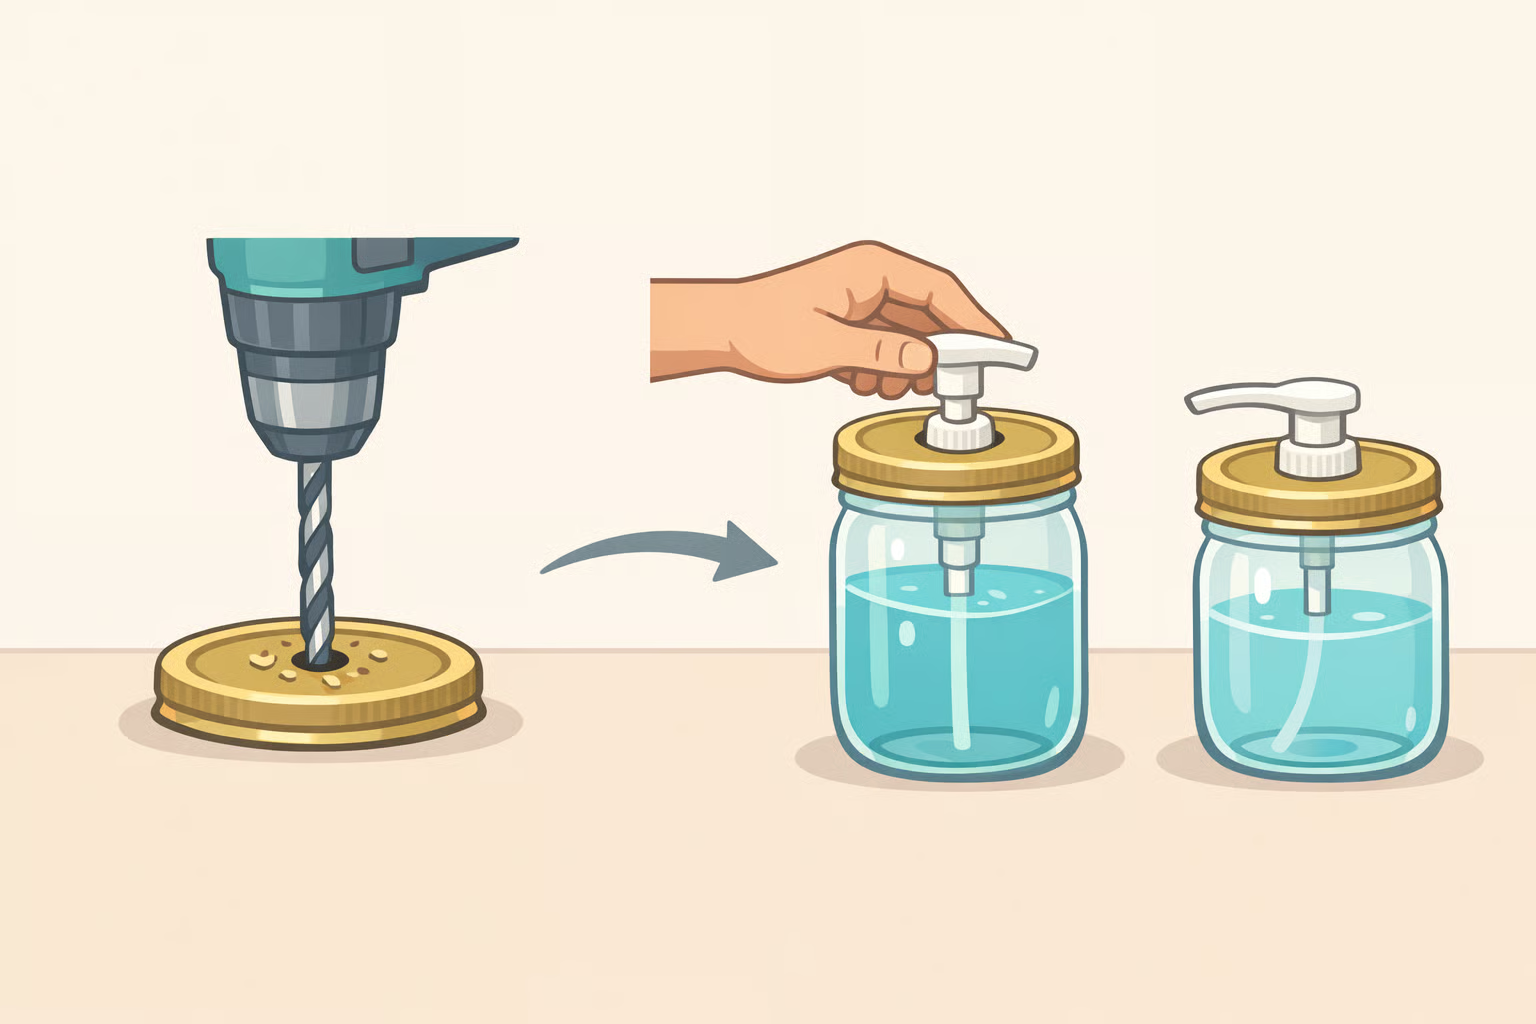
Better Homes & Gardens covered a widely shared version of this project last summer: drill a hole in the jar lid, trim a reused pump tube to match the jar's depth, push it through. A Smucker's strawberry jam jar became a countertop soap dispenser in under ten minutes.
What you need: An intact food jar with its lid, a drill with a bit slightly smaller than your pump neck, a pump salvaged from a finished soap bottle, liquid soap.
- Step 1: Clean and dry the jar completely.
- Step 2: Screw the lid on. Drill a hole in the center, sized slightly smaller than the pump neck so the fit is snug, not loose.
- Step 3: Trim the plastic pump tube so its intake end sits near the jar's base. Plastic pump tubes cut easily with scissors.
- Step 4: Fill the jar roughly three-quarters with liquid soap.
- Step 5: Push the pump through the drilled hole. The pump head sits above the lid; the tube should be fully submerged.
Gotcha, labels near a sink: Paper labels peel or bubble within weeks. Either seal the label with a clear spray topcoat before placing the jar near water, or remove it and paint directly onto the jar. Per Better Homes & Gardens, acrylic paint or markers work for decorating the lid if you want a custom look. Wrapping a scrap of gingham fabric over the lid and securing it with twine is another option that requires no paint.
One finishing detail worth the extra thirty seconds: match the soap color to the jar's original contents. Better Homes & Gardens suggests strawberry-red soap for a strawberry jam jar, dark blue for blueberry, or orange for marmalade. It reads as intentional rather than improvised.
Things to do with old mason jars that require the right jar: candles and home canning
Both projects below appear in every mason jar roundup. Both carry conditions most guides skip. Neither is appropriate for commercial food jars.
Candle-making
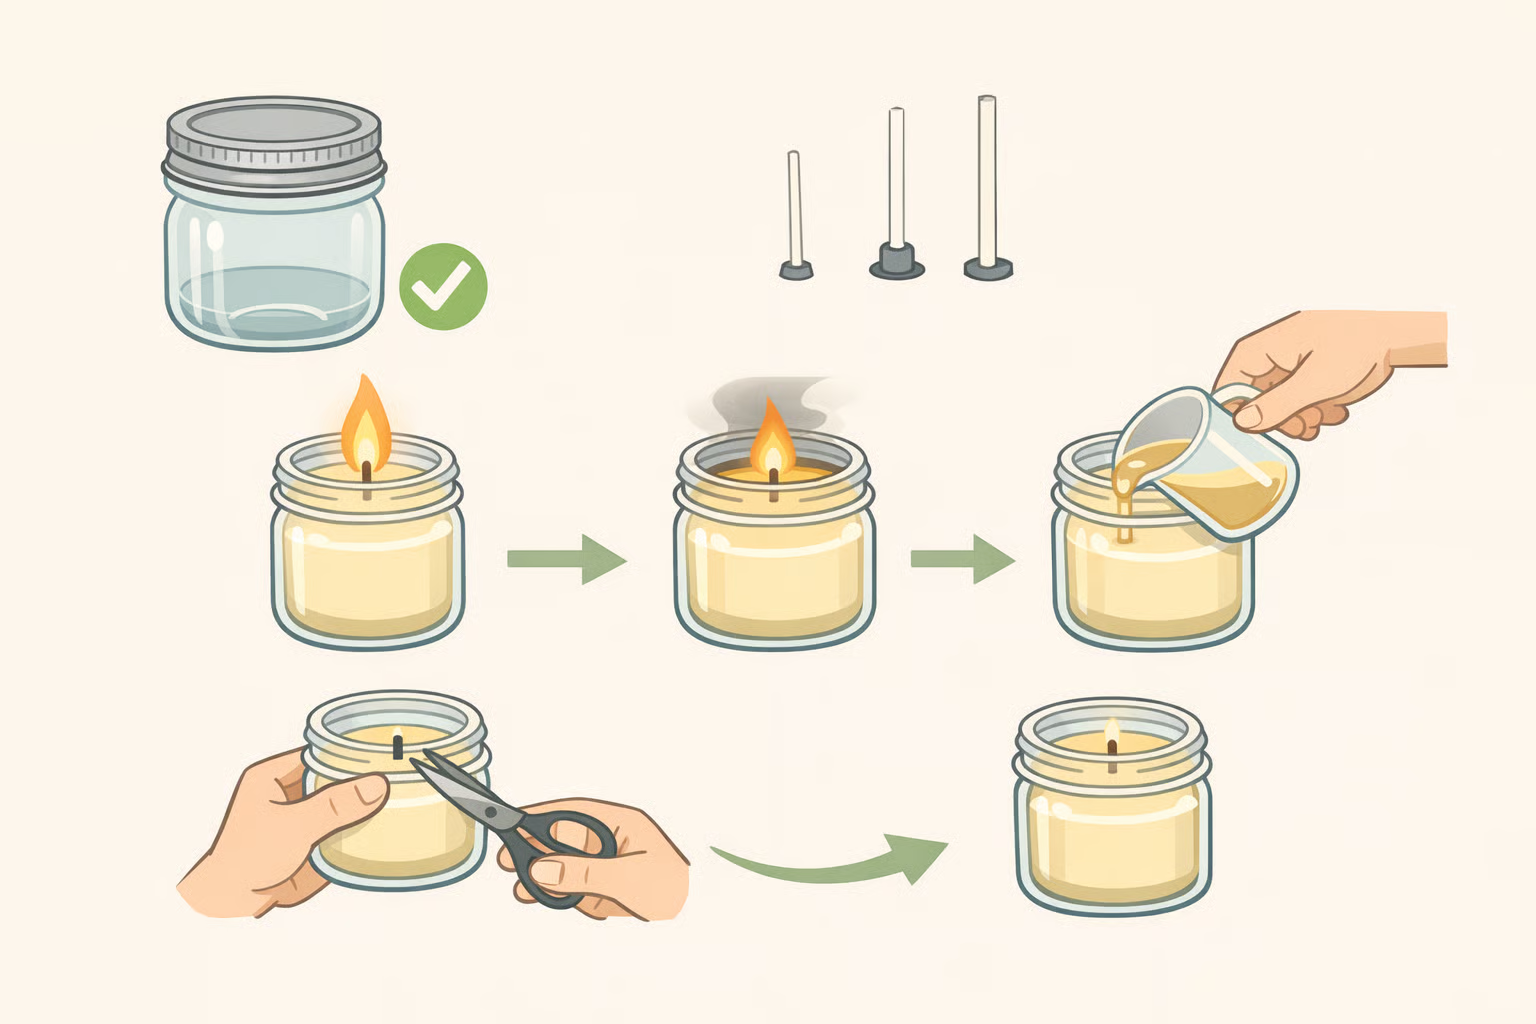
The jar has to earn this use. DIY Products 101 is direct: safety decisions are "not based on the word 'mason' alone." A verified, undamaged true canning jar, Ball, Kerr, or Bernardin purchased new for that purpose, is the only reasonable starting point. If the jar's origin is unclear, the answer is no.
-
Step 1: Inspect before anything else. Any jar with cracks, chips, deep scratches, or stress marks is a reject for candle use. That screening takes under a minute, per DIY Products 101. Be firm with it.
-
Step 2: Manage temperature before the pour. DIY Products 101 distinguishes between thermal shock, glass failure caused by a fast temperature swing, and overheating, which is heat buildup across multiple burns. Prevent both: let a cold jar reach room temperature before pouring, pour on a dry level surface rather than cold stone or bare metal, and don't move hot glass into a cooler room or near an open window.
-
Step 3: Size the wick to the inside diameter. Overfilling reduces heat margin and can make an otherwise appropriate wick burn too hot. DIY Products 101 recommends filling to the jar's shoulder rather than the rim. That headspace is a buffer, not wasted space.
-
Step 4: Burn-test through multiple cycles. A clean first burn proves nothing. Heat problems often surface in later burns, per DIY Products 101. Change one variable at a time between test cycles, wick size, fill level, or wax type, not all three at once. Stop at the first sign of repeated soot, high flame, or a jar that heats quickly. Lids and screw bands add nothing to burn safety and are not a substitute for proper testing.
Home canning
This is the clearest caution in the research, and the source's hedging is worth preserving. The UC Master Food Preserver Program acknowledges that some people have used commercial jars for canning with some success, but calls it technically possible, not advisable. Commercial jars aren't designed for home canning: the glass may lack the tempering needed to survive processing temperatures, and rim dimensions can differ enough from true canning jars to cause seal failures, meaning lost food and potentially a broken jar.
The "Atlas Mason" stamp on pasta sauce jars is a marketing device, not a heritage marker. The original Hazel-Atlas Company ceased operations in 1964, according to the UC Master Food Preserver Program; any jar carrying that name on a grocery shelf today is a commercial container. For anyone who proceeds despite the recommendation against it, the same source limits the advice to boiling water or steam canning only. Pressure canning is off the table entirely, and any failure should be treated as a complete loss.
Start here, skip this, save this for later
Start here. If your jar came from a grocery store, the first two sections cover every appropriate use. Dry storage, fermentation, household organization, display, propagation, and the soap dispenser build, all without heat or specialized equipment. No jar goes to waste because it can't handle a canner.
Skip this. Home canning in commercial food jars. Breakage and seal failure are realistic outcomes, not remote risks, per the UC Master Food Preserver Program.
Save this for later. Candle-making with a verified true canning jar is viable, but it takes inspection, careful temperature handling, correct wick sizing, and several burn-test cycles before the jar earns regular use, per DIY Products 101. Not a shortcut. A beginner project that takes a few sessions to do right.
The working rule across all of it: the more heat involved, the more the jar's origin and condition matter. Pick the jar in your recycling bin right now and work backward from that principle.