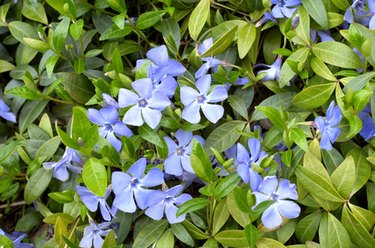
The glossy evergreen leaves and pretty blue-lavender flowers of vinca (Vinca spp.) make it an attractive choice as a groundcover in U.S. Department of Agriculture plant hardiness zones 4 through 9, depending on the species. Vinca vine propagation is easy, but use caution where you plant the new vines. The plant's aggressive growth can become invasive if it escapes the garden.
Tip
Vinca is easy to propagate from cuttings placed in water or potting mix. You can also take rooted cuttings from established plants in the garden.
Video of the Day
About Vinca Vine Propagation
Vina vine propagation is easily accomplished in water or potting mix, as the plants quickly develop new roots where the leaf nodes touch the soil. While vinca thrives in full sun and shade, it's best confined by concrete barriers or other hardscape or limited to containers and hanging baskets.
Video of the Day
Vinca includes approximately 12 species of evergreen vining plants, with two species commonly grown as groundcovers and hanging plants. Common periwinkle (Vinca minor) is hardy in USDA zones 4 through 8 while greater periwinkle (Vinca major) prefers USDA zones 7 through 9. Though the species plants feature green leaves and blue flowers, cultivars may have white or reddish purple flowers and various shades of green, yellow or variegated foliage.
Sterilizing Containers and Tools
Put on gloves and safety goggles to protect your skin and eyes. Thoroughly clean the containers, then sterilize by immersing in a solution of 1 part bleach to 9 parts water for at least 10 minutes. Rinse in clean water and allow to dry.
Sterilize your cutting tools in rubbing alcohol or Lysol. Avoid using chlorine bleach solutions for your tools; bleach corrodes and pits the metal blades. Allow the blades to air dry before snipping the stems.
Taking the Cuttings
Take 4-to-6-inch cuttings from non-flowering stems in spring or fall. If taking cuttings from young plants, a 2- to 3-inch tip cutting will suffice. Make sure there's at least one node on the stem. Strip the leaves from the bottom two-thirds of the stem.
Rooting in Water
Fill a container with room temperature water. Place the cuttings in the water with at least one node immersed in the liquid, but keep the remaining leaves above the water. Change the water every three or four days or if it becomes cloudy. Keep in bright, filtered light.
New roots should sprout in a week or two. Allow the roots to develop for a week, then carefully plant in moist potting mix. Don't allow the roots to dry out, keeping the potting mix evenly moist but not waterlogged until new growth appears.
Starting in Potting Mix
Moisten the potting mix, then put it into a small container. Swirl the end of the cutting in rooting compound if desired. Use a pencil or bamboo stake to make a 2- to 3-inch-deep hole and insert the cutting. Make sure at least one node is covered by the potting mix. Press the mix around the stem.
Cover the container and cutting with a plastic bag or other cover to keep the humidity high. Water as needed to keep the potting mix evenly moist. The cutting should root within two to three weeks. When new growth appears, remove the covering and place in bright, filtered light.
Taking Rooted Cuttings
When grown outside, vinca will develop new roots where the nodes touch the soil. Check the non-flowering stems. If one has developed roots, snip the stem between the parent plant and the rooted section.
Wet the soil in the new location by digging a planting hole and filling it with water. Allow the water to drain from the hole. Alternately, fill a container or hanging basket with moist potting mix.
Carefully dig up the rooted section, keeping as much soil as possible around the roots. Plant it in the garden or container. Water to settle the soil around the root ball. Keep evenly moist until it is established in its new home.