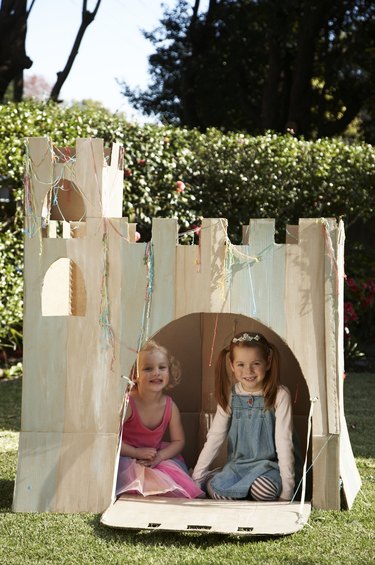
Things You'll Need
Cardboard box
Pencil
Ruler
Craft knife or scissors
String or twine

Medieval castles were key places during battles and often subject to sieges, so drawbridges were a defensive feature. These hinged bridges, which often spanned moats or ditches, could be drawn closed with ropes or chains to keep out enemies. When making a model castle out of cardboard, a working drawbridge adds authenticity and interest. A little planning at the design stage makes a working drawbridge simple to create.
Step 1
Find a cardboard box to use for the main body of the model castle.
Video of the Day
Step 2
Place the cardboard box, bottom-side down, on a flat work surface. The joint between the bottom and side of the box will form the hinge of the drawbridge.
Step 3
Choose which side you want the drawbridge on.
Step 4
Draw the outline of the closed drawbridge in pencil at the center-bottom of that side. The drawbridge draws up to form an arched, or rectangular, doorway in the castle wall. Make the doorway roughly one-third of the height of the castle wall. For an arched doorway, draw an upside-down U-shape. Draw a rectangular doorway with the help of a ruler. Make the rectangle about one-and-a-half times taller than its width.
Step 5
Cut the doorway shape out with a craft knife or sharp scissors. Leave the bottom of the drawbridge attached to the cardboard box.
Step 6
Use a large needle, or skewer, to make small holes in both sides of the drawbridge near the top. On an arched drawbridge, make the holes at the top of the widest part of the upside-down U-shape. On a rectangular drawbridge, make the holes in the top two corners.
Step 7
Make two holes in the castle wall just over the doorway, directly above the holes in the drawbridge.
Step 8
Cut two lengths of string, or twine, around one-and-a-half times the height of the drawbridge.
Step 9
Tie a knot in one end of the pieces of string. The knots should be large enough that they will not easily fit through the holes in the drawbridge and castle wall.
Step 10
Thread the strings through the outside of the holes in the drawbridge, leaving the knots on the outside.
Step 11
Lower the drawbridge so it is flat against the work surface.
Step 12
Thread the strings through the corresponding holes in the castle wall. Pull the strings so they run tight from the drawbridge to the castle walls. Tie knots in the string on the inside of the box so that the string stays taut when the drawbridge is down.
Step 13
Cut away excess string with scissors.
Tip
Glue a narrow strip of cardboard across the drawbridge on the outside near the top. Make the strip slightly wider than the drawbridge. This will stop the drawbridge bending in through the doorway.
Warning
Don’t let children use sharp tools. Do the cutting for them.
Video of the Day