Things You'll Need
Adjustable wrenches (2)
Masking tape
Slotted screwdriver
Pipe wrench
Gas-approved pipe thread compound
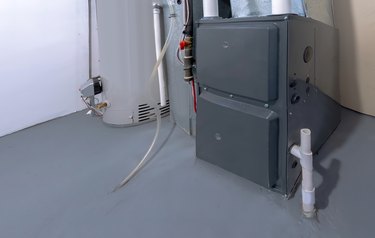
A malfunctioning gas valve will not supply the furnace's burners with the proper amount of fuel. Gas valves locked in the closed position starve the furnace burners of fuel while valves stuck in the open position will continually dump fuel into the furnace burners, even when the furnace turns off. Replace the valve to ensure it, and your furnace, functions properly.
Tip
Many local building codes require that a certified technician replace the furnace's gas valve so check before performing this repair. If at any point you have any doubt that you can replace the valve safely, be sure to hire a professional technician.
Step 1: Turn Off Circuit Breaker
Turn off the furnace's circuit breaker.
Video of the Day
Step 2: Turn the Gas Shutoff Valve
Close the furnace's gas cock knob—the gas pipe's shutoff valve. Turn the gas cock knob counterclockwise with an adjustable wrench until the knob hits its backstop. Local building codes determine the gas cock's placement. The gas cock is never mounted inside of the furnace.
Step 3: Disconnect the Electrical Components
Disconnect the gas valve's electrical connection. If the wire set from the control board uses a push-on wire connector, unplug the wire connector. If the gas valve uses screw-on wire terminals, tag each wire with masking tape.
Write the gas valve's wire terminal identification label, located next to the wire terminal, on its respective masking tape tag. Loosen the gas valve's wire terminal screws with a slotted screwdriver and pull the wires free from the gas valve.
Step 4: Position the Adjustable Wrench
Place an adjustable wrench on the gas pipe's union fitting. Grip the gas pipe union nut with a second adjustable wrench. Hold the union fitting still with the first wrench and turn the union nut counterclockwise with the second wrench until the nut comes off of the fitting. The union, located between the gas cock and the gas valve, connects two pieces of gas pipe.
Step 5: Rotate the Intake Pipe
Hold the gas valve still with the adjustable wrench and grip the gas valve's intake gas pipe with a pipe wrench. Turn the intake pipe—the gas pipe between the gas valve and the union—counterclockwise. Set the pipe aside.
Step 6: Remove the Old Gas Valve
Hold the gas pipe connected to the gas valve's output port—the pipe that feeds fuel to the furnace burners— with the pipe wrench. Turn the old gas valve counterclockwise with the adjustable wrench. Remove the old gas valve from the furnace.
Step 7: Check the New Gas Valve
Verify that the new gas valve matches the old gas valve, using the gas valves' identification labels as a guide. Never attempt to install a mismatched gas valve in a furnace.
Step 8: Apply Pipe Thread Compound
Cover the threads on the furnace burner's gas pipe with a gas-approved pipe thread compound. Keep the compound out of the interior of the gas pipe.
Step 9: Connect the New Gas Valve
Twist the new gas valve's output port clockwise onto the furnace burner's gas pipe threads. Hand-tighten the gas valve. Slip the pipe wrench onto the gas pipe and turn the gas valve at least one full revolution, using the adjustable wrench for leverage. Continue to turn the valve until it sits in the upright position.
Step 10: Connect the Gas Pipe
Cover the threads on the gas pipe that connects to the gas valve's intake port with pipe thread compound. Insert the threads into the intake port and hand-tighten the gas pipe. Hold the gas valve still with the adjustable wrench and tighten the gas pipe, using the pipe wrench for leverage.
Step 11: Tighten the Union Nut
Slip the gas pipe's union nut onto the gas pipe's union fitting. Hand-tighten the union nut. Hold the union fitting still with one adjustable wrench and tighten the union nut with the other adjustable wrench.
Step 12: Reconnect the Electrical Connection
Replace the furnace gas valve's electrical connection. If the gas valve uses a push-on electrical connection, align the wire connector with the gas valve's wire terminals and push the connector onto the gas valve. If the gas valve uses screw-on wire terminals, slip each wire into its respective wire terminal and tighten the terminal with the slotted screwdriver. Each wire's masking tape tag must match the gas valve's wire terminal identification label.
Step 13: Check for Leaks
Turn on the gas cock and check for gas leaks per your local building code. Tighten all leaking fittings. Turn on the furnace's circuit breaker and adjust the gas valve, according to the gas valve manufacturer's instructions.
Warning
Do not smoke or create any sparks while working with a gas valve. If you smell gas, stop. Turn off the gas cock and identify the source of the smell. Many local building codes require that a certified technician inspect the gas valve repair prior to turning on the gas cock.
Video of the Day