Things You'll Need
Broom
Baking soda
Gloves
Protective eyewear
Breathing mask
Acid
2 stiff-bristled brushes
Wet/dry vacuum
Plastic disposal container

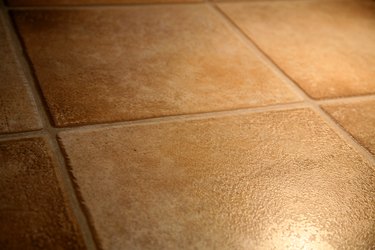
A high-gloss ceramic tile maintains its shiny texture indefinitely, giving your floor a shiny, clean appearance even if you have not had time to sweep and mop. Unfortunately, if you want to paint over your tile, the slick glaze will prove problematic as paint does not stick well to high-gloss surfaces and you cannot sand ceramic tile. Whether you plan to paint over your concrete or ceramic tile floor or simply want to do away with the shine, acid etching your floor will help you achieve the rough, matte finish you desire.
Step 1
Sweep and mop the floor and allow it to dry. Contaminants on the floor can interfere with the acid, leaving you with unevenly etched tile.
Video of the Day
Step 2
Mix a neutralizing agent of 1 lb. baking soda to 5 gallons of water and set it aside.
Step 3
Put on protective gloves, eyewear and a breathing mask. Acid made for eating through flooring is powerful enough to cause severe injury if it comes into contact with your skin. Open any windows or doors to the outside before beginning the project. Proper ventilation is essential as acid fumes are toxic.
Step 4
Dilute the acid if you are using a liquid solution rather than an acid-etch powder. The dilution ratio will differ depending on the type of acid you use, but the standard dilution for muriatic acid is ten parts water to each part acid.
Step 5
Wet the floor. Sprinkle the acid solution uniformly over the section you plan to etch. Bubbling indicates that the acid solution is eating through the top surface of the tile, dulling your tile's glossy finish.
Step 6
Scrub the floor with a stiff-bristled brush, working the acid solution into the grooves where each piece of tile meets. The time frame may vary but should take no longer than 10 minutes.
Step 7
Spray your work area with the baking soda neutralizing agent. This neutralizes the acid, preventing it from damaging any other surfaces or causing injury after you rinse it from the floor.
Step 8
Rinse the floor well. Scrub the area with a clean, stiff-bristled brush to remove all acid residue.
Step 9
Vacuum up the neutralized acid and water with a wet/dry vacuum. Place the acid and water mixture into a plastic container and dispose of it at a hazardous waste disposal facility.
Tip
Acid-etch your floor in small sections. This prevents the acid from drying out and allows you to take breaks when you need them without worrying about leaving the acid on your tile for too long.
Acid-etch a small, inconspicuous area of your tile to ensure that you like the results before starting the project on a larger scale.
You will probably need several batches of neutralizing agent when acid-etching an entire floor. The amount you need will vary depending on the size of the floor you're working with.
You can repeat the process if a single round of acid-etching isn’t enough to dull your tile’s gloss to your liking.
Warning
Never allow the acid solution to dry on your floor. Keep your work area damp at all times.
While sanding is an alternative to acid-etching, the tile’s shiny glaze is baked in, and sanding away a baked-in gloss requires extensive time and effort. Depending on the shape and layout of your tile, you may be left with curved spaces in between each tile that your sander cannot reach.
Acid-etching is only appropriate for concrete tile and ceramic tile. You cannot acid-etch wooden or vinyl floors.
Video of the Day
- Paint-N-Stain Inc.; How to Paint Ceramic Tile; 2011
- Ceramic Tile Institute of America: Acids and Acid Cleaning – Friend or Foe
- Seal Krete; Etching Concrete With Muriatic or Phosphoric Acid; 2003
- Ceramic Tile and Stone Consultants; Common Questions; 2011
- Floor World Inc.; Caring for Tile Flooring; 2007
- Shield Industries; Concrete Etching Tips; 2008