Things You'll Need
Stud finder
Pencil
Measuring tape
Level
Wallboard saw
Straightedge
2 planks 1-by-10 lumber, 16 inches
2 planks 1-by-10 lumber, 14 inches
2-inch wood screws
Drill
1 sheet 1/2-inch plywood, 16 by 16 inches
1-inch nails
Hammer
Paint
Paintbrush
Clamps
Wood putty

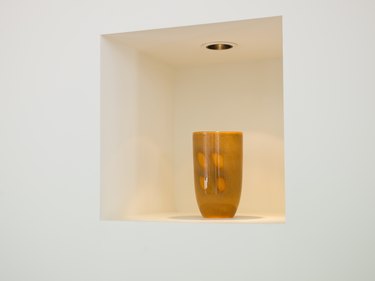
Most people would shy away from cutting into their walls to add in a recessed shelf. If you go about it willy-nilly, then shying away is a good option, but with the right process it can be really simple to recess a shelf in existing drywall. Because no load-bearing structure in the wall is being altered, it's safe for most do-it-yourself homeowners to install a recessed shelf themselves.
Making the Recess
Step 1
Find two adjacent wall studs in the area you want to recess the shelf using a stud finder. The studs will be 16 inches apart.
Video of the Day
Step 2
Pencil the inner edges of the wall stud positions in straight vertical lines that are 16 inches long -- the height of your shelf -- and parallel. Connect the top and bottom of these lines with straight horizontal lines, so the box shape of the recessed shelf is visible on the wall.
Step 3
Hold a wallboard saw at 45 degrees to cut out a small hole in the middle of the shelf area. The angled cut will ensure the cutout piece of drywall falls outward, instead of into the wall.
Step 4
Look through the hole to ascertain if there are any electrical wires or plumbing to look out for while cutting the shelf shape out from the drywall.
Step 5
Cut out the drywall using the wallboard saw. Use a straightedge positioned over the pencil lines of the shelf shape to achieve straight cuts. Remove the cutout panel of drywall.
Making the Shelf Insert
Step 1
Form two planks of 16-inch 1-by-10 lumber and two planks of 14-inch 1-by-10 lumber into a rectangle. The ends of the 14-inch pieces should be positioned on the inside edge of the 16-inch pieces. This will make right-angled corners.
Step 2
Predrill a pilot hole every 2 inches along the 10-inch edges of the 16-inch planks into the abutting ends of the 14-inch planks. The pilot holes should be sized slightly smaller than the diameter of a 2-inch screw. Secure the rectangle together with 2-inch screws through the pilot holes.
Step 3
Place a sheet of 16-by-16-inch 1/2-inch plywood over one open side of the rectangle and secure it in place with 1-inch nails driven every 2 to 3 inches around the perimeter of the rectangle.
Step 4
Paint the box, which will be inserted into the drywall recess to make the shelf. Allow to dry as recommended by the paint manufacturer.
Installing the Shelf
Step 1
Push the shelf box, back panel first, into the drywall recess and adjust the placement so that the edges of the box are flush with the drywall, rather than with the edge of the wall studs.
Step 2
Drill four pilot holes sized for 2-inch screws through the sides of the shelf box into the wall stud. The placement should be one at the top and one at the bottom of each side of the shelf box and roughly an inch in from the sides of each wall stud. This will vary depending on if your wall studs are 2-by-4 or 2-by-6 lumber.
Step 3
Secure the shelf box to the wall studs with 2-inch screws driven through the pilot holes, then fill over the top of the screw holes with wood putty and let dry. Touch up the putty areas with paint to finish the recessed shelf.
Tip
If there is a slight gap between the drywall and the shelf box, fill it with caulk and paint over it.
Video of the Day