Things You'll Need
Shirt cardboard or thick poster board
Utility knife and replacement blades
Cutting mat
Wooden coffee stirrers
Unfinished wooden craft sticks
Wooden tongue depressors
Paint sticks or old yardsticks
Band saw with 24-raker blade
Clear craft glue or contact cement
1/4-inch, 1/2-inch, 1-inch and 2-inch paintbrushes
Utility knife
Stain (optional)
Bricks or concrete pavers

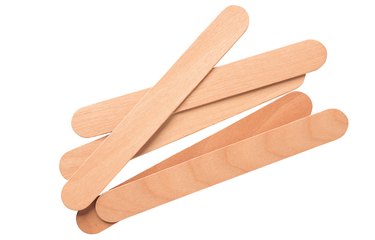
The scale of your dollhouse matters when selecting materials to make clapboard siding for your dollhouse. Wooden coffee stirrers, craft sticks and tongue depressors all make good clapboard, once you trim the round ends and decide whether or not to stain, weather or paint them. The soft wood used to make these sticks cuts with a utility knife or razor blade, using just a little pressure, but you need a cutting mat to avoid damaging your work surface.
Step 1
Make templates for each wall of your dollhouse from sheets of shirt cardboard or thick poster board. Cut the poster board or shirt cardboard to the length and width of each wall.
Video of the Day
Step 2
Sketch the positions and correct dimensions of any doors or windows onto the templates. Use a utility blade to cut away the cardboard covering the door and window openings.
Step 3
Select the material whose width and thickness best match the scale of your dollhouse. Use craft sticks, for example, on a 1:12 or 1-inch scale dollhouse. According to DollhousesGalore.com, 1-inch scale means that every inch in the dollhouse represents 12 inches in real life.
Step 4
Use tongue depressors, paint sticks or lengths of yardstick for playscale dollhouses, where 2 dollhouse inches equal 12 inches in real life. Use coffee stirrers for 1:24 -- also known as 1/2-scale -- dollhouses.
Step 5
Create 90-degree angles at the ends of each coffee stirrer, craft stick, tongue depressor or paint stick by cutting off rounded portions using a band saw with a 24-raker blade.
Step 6
Lay your dollhouse wall template on your work surface in front of you, with the "foundation" edge facing you and the "roof line" edge facing away from you.
Step 7
Brush a line of clear craft glue or contact cement along the foundation edge of your dollhouse template, using whichever paint brush best matches the width of your clapboard material. Use a 1/4-inch-wide paint brush, for example, if you are using craft sticks, a 1/2-inch brush for tongue depressors and a 1-inch brush for paint sticks or yardstick sections.
Step 8
Press the first clapboard into position, with the foundation edge of the clapboard flush -- which means even -- with the foundation edge of the template.
Step 9
Dip your brush in glue and place it so that half its width falls on the template and half its width falls on the first clapboard. Brush glue the full length of the top half of the first clapboard and half a clapboard's width above it on the template.
Step 10
Press the second clapboard into position on top of the first one, overlapping the top half of the first clapboard by half its width.
Step 11
Repeat applying glue and pressing additional clapboards into place until you reach the roof line, ignoring the window and door openings for now. Adjust the final clapboard so that its edge falls flush with the roof line.
Step 12
Allow the glue to dry overnight.
Step 13
Turn the clapboard walls template-side-up. Score around the inside edge of each door and window opening with a sharp utility knife, just enough to leave a visible line.
Step 14
Repeat scoring around the openings, making the cut a little deeper each time, until you cut all the way through the clapboards.
Step 15
Turn the clapboard wall over and reapply glue to any clapboards that loosened while you cut the door and window openings.
Step 16
Apply stain to the clapboard side of each wall, if desired. Brush the template side with water to ensure that the walls will not warp due to the uneven moisture level on the clapboard side.
Step 17
Lay bricks or concrete pavers on top of the wall sections while they dry, to prevent warping.
Tip
This method allows you to make clapboard "walls" that can be applied to the exterior of an existing dollhouse in one single sheet. The cardboard template provides a surface for each clapboard to adhere to. It's easier to trim the window and door openings while the wall is flat on the table, and all the clapboard goes up at once when everything has been stained, trimmed and dried.
Video of the Day