Things You'll Need
6-inch glass bowls
Spray-on rubber molding release agenReplica stst 101 Liquid Rubber
Ceramic silica casting powder and activator
Sharp knife
Granular silicon carbide or 1/2-inch ceramic fiber board
Ceramic or china plate
China teacup

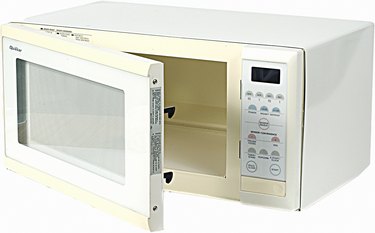
A microwave kiln is a refractory appliance used inside a microwave oven to focus the microwaves into its interior space. The space is typically occupied by an elevated pedestal upon which the piece or pieces to be melted or fused are placed. Its construction is critical to its proper usage in firing and melting operations. The key to building an effective, safe and controllable microwave kiln operation is in the production of a kiln that focus microwaves while simultaneously absorbing reflected microwave energy.
Step 1
Locate two glass bowls of identical size, not to exceed 6 inches across and 3 inches deep. Clear glass is essential to the molding process. Clean them thoroughly.
Video of the Day
Step 2
Spray the interior surfaces of one bowl and the outer surface of the other bowl with spray-on rubber molding release agent. Turn them upside down and wait for 30 minutes.
Step 3
Pour several ounces of liquid ceramic molding rubber into the bowl with its interior sprayed with release agent. Carefully place the other bowl into the first bowl and allow it to descend to 1/2-inch from the bottom. Note: this is an iterative process, and it depends on the size and shape of the bowls and the amount of liquid rubber used. Remove and add more liquid rubber as needed. Observe the material through the glass and ensure that no bubbles exist. If there are bubbles, move and twist the upper bowl and recheck. Too much liquid rubber is not a problem; let it overflow.
Step 4
Remove contact and see if the upper bowl maintains its place in the lower bowl. If it begins to rise, place a light weight, such as a small book, on or across the upper bowl to hold it down. Allow the rubber ceramic mold to set for 24 hours.
Step 5
Remove the upper bowl from the lower bowl. Clean and respray release agent on the outer surface of the upper bowl. Mix 2 cups of ceramic casting powder and its activator, per manufacturer's instructions, into a thick and moldable dough-like paste. Press it into the rubber-lined bowl with fingers and work it into corners and edges. Press the second bowl back down into the pasted surface and press it firmly, until the paste overflows the edges. Remove the inner bowl and use a sharp knife to cut a flat upper surface on the edge of the material. Cover the ceramic-lined mold and allow it to cure for 24 hours.
Step 6
Remove the ceramic dish from the rubber mold and scrape or brush any rubber traces from its exterior. Bake the ceramic dish for two hours in a 250-degree Fahrenheit oven. Allow it to cool and bake the ceramic dish a second time at 500 degrees Fahrenheit for four hours.
Step 7
Use any ceramic plate as the base for the kiln and the cast ceramic dish as the shroud or cover. Place a 1/2-inch mat of ceramic fiber board or a 1/4-inch bed of granular silicon carbide as the absorption base onto the ceramic plate. These materials are dissimilar in price and availability, but their function, which is to absorb reflected microwaves, is identical.
Tip
For small-target firings, use an inverted china teacup as the pedestal. Larger items do not require pedestal.
When melting glass or ceramics, it is critical to expect variances in melting time. Testing is the key.
It is preferable to buy a microwave specifically for your crafting needs and not use the same one that you prepare food in.
Although microwave kilns don’t get hot enough for high-temperature glazes and clay bodies, they are effective for low-fire applications like Egyptian paste, china paints and over-glaze enamels.
Warning
Use caution when working with high-temperature materials.
Video of the Day