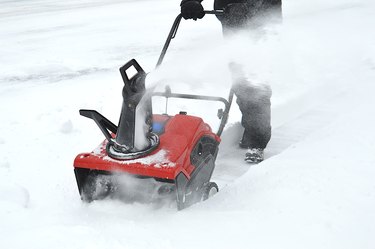
Flooded engines on Toro snow blowers may result from over priming, a leaking carburetor nut, a build-up within the carburetor bowl or a general excess of oil within the snow blower's oil reservoir. You can fix potential engine flooding problems without the use of any special tools. Previous knowledge of operating on flooded engines and Toro snowblowers in general is not a requirement to fix your machine and can help you avoid costly manufacturer repairs.
Things You'll Need
Gloves
Safety goggles
Mask or respirator
Socket wrench
Cloth
Carburetor cleaning solution
Pan
Video of the Day
Clear the Excess Fuel
Step 1: Give the Machine Time
Wait for an hour or two if you've accidentally flooded the engine by pumping the prime button too many times. The fuel needs a little time to evaporate before you try to start the engine again.
Video of the Day
Step 2: Try to Start the Engine
Close the choke, then fully open the throttle, if possible. Start the engine. It make take several tries before the engine kicks over and starts. If it still won't start, you may need to clean the carburetor bowl and/or air cleaner and check the oil.
Clean the Carburetor Bowl
Step 1: Put On Safety Gear
Put on gloves, safety goggles and a mask to protect your skin, eyes and lungs. Gas, oil, carburetor cleaner and other cleaning solutions are highly irritating. Work in a well ventilated area. Wash your hands with soap and water and flush your eyes with water for 15 minutes if accidentally exposed to any of these products.
Step 2: Locate the Carburetor
Find the Toro snow blower's carburetor. The carburetor is located along the left side of the Toro's Briggs & Stratton engine assembly.
Step 3: Find the Carburetor Nut
Locate the nut on the underside of the distinctive bowl of the carburetor. Place a pan or dish under the nut.
Step 4: Loosen the Carburetor Bowl Nut
Loosen the Toro snow blower's carburetor bowl nut and wait as fuel and liquid finish leaking out into the pan.
Step 5: Remove the Bolts
Remove the visible bolts securing the carburetor bowl to the rest of the engine with your socket wrench, then twist off the bowl with your hands.
Step 6: Clean the Carburetor Bowl
Clean out the liquid and build up within the snow blower's carburetor bowl using a cloth and some carburetor cleaning mixture.
Step 7: Reinstall the Carburetor Bowl
Set and twist the carburetor bowl back into place and tighten the nut into its underside with your socket wrench.
Check the Air Filter
Step 1: Check the Air Filter for Contamination
Check the air filter on the end of the snow blower's carburetor. It may have become flooded with oil. Disconnect the air filter from the carburetor if this is the case by removing the bolts and screws that hold it to the engine using the wrench and a Phillips screwdriver, respectively.
Step 2: Clean the Air Filter
Use a cloth to wipe off the end of the air filter after cleaning it with your solution and blasting it with warm water. Allow it to dry and then reattach it to the motor with the removed screws and bolts.
Measure the Oil Level
Step 1: Check the Oil Dipstick
Survey the amount of oil in your oil reservoir by measuring with the dipstick on the middle rear of the machine. Excess oil in your Toro snow blower may have caused your flooding problems in relation to the air filter and carburetor. Ensure the oil line does not come up beyond the "high" hash mark on the dipstick.
Step 2: Prepare to Drain the Oil
Place a pan under the oil drain plug on the bottom of the rear of the Toro snow blower if the oil level was too high.
Step 3: Unplug the Oil Drain Plug
Unplug the oil drain plug to drain excess oil. Plug the drain back up when you are finished. Remeasure the oil level with the dipstick as required to check your progress. The oil level must be between the "low" and "high" marks.