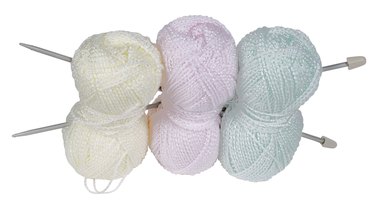
Things You'll Need
Knitting needles
Matching or complementary yarn
Darning needle

Often blanket edges are crocheted onto a finished knit or crocheted blanket because it is easier to crochet along long rows than it is to knit along long rows. Crocheted edges also can be worked all the way around a blanket, while knit edges typically must be worked across each row separately. If you prefer to knit edging on a finished baby blanket, a ruffled edge is one choice. A ruffled edge gives a knitted baby blanket a delicate, finished look, and ruffles are easy to knit once you master the technique of picking up stitches along the edges. You can even add a ruffled edge to a fabric blanket by creating a setup row of stitches along the edges using a darning needle.
Step 1
Create a base row of stitches if your blanket is not knitted or crocheted. Thread a long length of yarn on a darning needle and create a spiral of closely spaced loops along each edge. Push the darning needle through the fabric about 1/4 inch from the edge and space the loops about 1/4 to 1/2 inch apart. Tie off the ends. (If your blanket is crocheted or knitted, you will pick up stitches directly in the edge stitches.)
Video of the Day
Step 2
Pick up one stitch in each stitch or loop along one edge. Start at a corner with the right side of the blanket facing you and work from right to left. To pick up stitches, insert the knitting needle from front to back into the first stitch or loop. Wrap the edging yarn around the tip of the needle behind the work. Pull a loop through the stitch using the tip of the needle. Insert the needle into the next stitch or loop, bring the yarn between the needle and the back of the blanket and wrap it over the needle. Pull a loop through the stitch. Continue in this manner until you have picked up one stitch in each stitch across one edge.
Step 3
Turn your work and purl in each stitch across the row.
Step 4
Turn your work again and increase in each stitch across the row by knitting into the front and back of each stitch. To knit front and back, knit into the first stitch as you normally would to create a knit stitch but do not drop the stitch off the left needle. Insert the right needle from front to back into the back loop of the stitch and knit the stitch. Drop the stitch off the left needle. Continue knitting front and back into each stitch across the row. This will double the number of stitches on your needle.
Step 5
Turn you work and purl across the next row.
Step 6
Turn your work and knit front and back in each stitch across the next row.
Step 7
Turn your work and purl across the next row.
Step 8
Bind off all stitches. To bind off, knit two stitches from the left needle onto the right needle. Lift the first stitch over the second stitch and off the needle using the tip of the left needle. Knit one more stitch from the left needle to the right needle, and lift the first stitch over the second stitch and off the needle. Continue in this manner until one stitch remains on the right needle. Cut the yarn and pull the end through the loop. Tighten the knot.
Step 9
Create ruffled edges on each remaining edge in the same manner.
Step 10
Thread a 12-inch length of yarn onto a yarn needle. Join one of the corners together with a whip stitch. Repeat on the remaining corners.
Step 11
Hide any loose ends by weaving them into stitches on the wrong side of the blanket. Trim any excess yarn.
Tip
If you want a looser ruffle, knit only one row of increases, or knit extra rows between each increase row. For a delicate embellishment, make one row of increases with yarn overs rather than knit front and back stitches. This will leave eyelets that you can weave a ribbon through. Tie the two ends of the ribbon in a bow at one corner. If you prefer not to pick up stitches, you instead can knit a length of edging to match the measurements of your blanket edges and then sew the knitted edging on.
Video of the Day