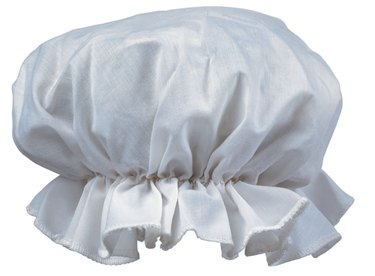
Young women in the colonial era often donned mob caps, which were bonnets that tastefully covered their hair. Cap construction typically uses thin fabric, but you can replicate the look using sturdy paper. Adults leading girls through this activity can use it to introduce lessons on colonial living, as well. As they work on the hats, kids can learn about how children of the bygone era lived.

Video of the Day
Things You'll Need
Pencil
Ruler
Paint Brushes
Markers
Construction Paper, 20 Inches By 20 Inches
Kid-Safe Paint
1/4-Inch-Wide Ribbon
Stickers
Hole Punch
Step 1
Fold a piece of construction paper both vertically and horizontally to find the center point of the paper.
Video of the Day
Step 2
Measure 9 inches away from the center of the paper along one crease and mark the spot with the pencil. Return to the center and measure out another 9 inches, this time making a mark 2 inches away from the previous one.
Step 3
Repeat this process until you have made a circle of marks around the paper's center. Connect the marks to finish the circle and cut it out.
Step 4
Make a mark 7 inches away from the center on the newly cut circle. Continue this process using the same technique making marks every 2 inches until you have enough marks to form a circle. Do not cut out a new circle, though.
Step 5
Punch a hole into each mark on the new circle. String a length of ribbon through the holes.
Step 6
Evaluate the fit of the paper mob cap. Place it on the head of the person who will wear it. Adjust the tightness of the ribbon to the shape of the wearer's head.
Step 7
Cut the ribbon when you have determined the final length needed. Leave enough to tie a bow at the front of the cap. Decorate the cap with paint, drawings, stickers and other accessories.