Things You'll Need
Bucket
Pipe cutter
Rag
Tape measure
Pencil
Emery cloth
Copper pipe
Flux brush
Flux
Soldering torch
Spark starter
Solder

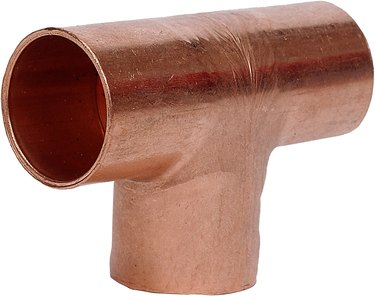
Copper tees are slip fittings. Tees' have smooth-faced openings that slide over copper pipes and join the pipes via soldering. Inserting a copper tee into an existing plumbing line requires precise measurements, accurate cuts and a little stretching. If you are working with long pieces of pipe, bend the pipes to fit the tee over the pipe's ends. If you are working with short, inflexible lengths of pipe, add a coupling and extra piece of pipe to complete the tee installation.
Step 1
Turn off the water supply to the pipes that you are working on. Open plumbing fixtures, such as faucet and hose bibs, to drain water from the pipes. Place a bucket beneath the tee's installation location. Attach a pipe cutter to the pipe at the tee's installation location. Tighten the cutter's blade against the pipe and twist the cutter around the pipe's circumference to cut the pipe. Allow water to drain into the bucket.
Video of the Day
Step 2
Draw a tape measure between the tee's parallel openings and note the measurement. Measure from one of the parallel openings to the edge of the tee's perpendicular leg. This measurement is the maximum distance that pipe protrudes into the tee. Multiply this measurement by 2 and subtract the result from the total distance between the tee's parallel openings. The result of the calculation is the overall length you must cut from the pipe.
Step 3
Latch a tape measure onto the edge of the cut in the existing pipe. Stretch the tape measure to the overall length of the cut and use a pencil to mark the cut's location. Align a pipe cutter's blade with the cut mark, tighten the blade against the mark and twist the cutter around the pipe to sever the pipe.
Step 4
Rub the exterior ends of the cut pipes with emery cloth to abrade and clean them. Rub the interior of the tee's openings with emery cloth. Rub the exterior end of a length of copper pipe with emery cloth; this pipe connects to the tee's perpendicular leg. Dip a flux brush into the flux and spread a thick coat of flux on all the clean portions of pipe and inside the tee's openings.
Step 5
Bend one of the sections of pipes outward. Slip one of the tee's parallel openings onto the pipe. Pull the remaining pipe outward and slip the tee's opposite parallel opening onto the remaining pipe. Insert the copper pipe into the tee's perpendicular leg.
Step 6
Light a soldering torch with a spark starter. Direct the torch's flame toward the joint between one of the tee's parallel openings and the pipe. Evenly heat the joint. Touch solder to the joint. If the solder beads and falls from the pipe, continue to heat the joint. If the solder "sucks" into joint, remove the flame and press the solder into the joint.
Step 7
Apply the torch to the opposite parallel opening immediately after soldering the first. Evenly heat the joint until it accepts solder. Immediately apply the flame to the tee's perpendicular opening. Heat the joint and insert solder. Turn off the torch. Wipe drips of solder from the pipes' and tee's surface with a soaking wet rag.
Tip
Protect flammable materials, such as studs or insulation, with a soldering flame protector.
If you must add extra pipe to insert a tee, use a repair coupling to join the new length of pipe to the existing line. Repair couplings fully slide over pipes, eliminating the need for bending.
Video of the Day