Things You'll Need
Shovel
Gravel aggregate
Lumber, 1-by-12-inch
Lumber, 2-by-4-inch
Stakes
Hammer
Rebar
Rebar stools
Wire ties
Wire mesh
Screeding lumber
Bull float

A monolithic concrete pour does the slab and the footings together, and it saves time and money. Pouring a monolithic slab, also called "slab-on-grade," works well where ground frosts are not severe, because it does without a cold joint between the footing and the slab. All site preparations, including excavation, gravel underlayment and forms, must be in place before the pour. The result will be slab and footings that function together, making a monolithic pour suitable for foundations where the ground might be unstable.
Step 1
Prepare the area, clearing out all grass and weeds and other debris to make enough room for the forms.
Video of the Day
Step 2
Dig the footings section about 1 1/2 feet wide and to the same depth. This will be the perimeter of your slab and your excavation will slope up the inside edge to the slab proper.
Step 3
Lay the forms for the footings with 1-by-12 inch boards, filling the bottom of both the footings and slab with gravel to a depth of 6 inches. Use narrower 2-by-4-inch boards for the slab. Stake the boards to secure them, about every 12 inches.
Step 4
Place rebar in the footings and raise it off the gravel using rebar stools, securing it with metals ties. Spread wire mesh on the slab area to reduce its chances of cracking. Now both sections are reinforced.
Step 5
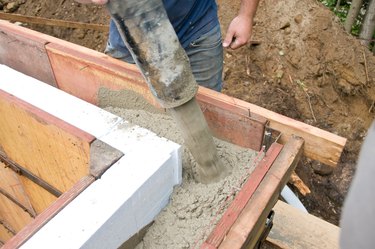
Pour both areas together and at once, using a pumper as part of a monolithic pouring system.
Step 6
Screed the poured concrete with a perfectly flat-edged board, usually a 2-by-4- inch piece. Smooth the surface with a bull float.
Tip
After pouring the concrete, tap the outside of the footings (thicker) part with a rubber mallet to eliminate any air bubbles.
Warning
Monolithic pours require more concrete, up to two more cubic yards for a standard 10-by-20-feet garage, for example, according to the website All Concrete Cement.
Video of the Day