Things You'll Need
Utility knife
Putty knife
Phillips head screwdriver
Flat head screwdriver
Silicone caulk
Plumber’s tape
Expanding foam caulk

A loose shower fixture is more than an annoyance when turning the shower handles off or on. When loosened, a shower fixture vibrates in place, growing looser with ever use and damaging its settings in the process. This damage can lead to noise issues when in use, as well as structural damage that can be costly to repair. To prevent this, tightening the loose fixture as soon as possible is necessary. Fortunately, there are few areas a shower fixture can become loose, and each is repairable by a homeowner with the right tools.
Step 1
Wiggle the escutcheon plate, the metal plate covering the hole that your show handle extends from, to determine if the caulking has loosened from the rear of the plate against the surface to which your faucet connects. When the caulking is dislodged, the plate can vibrate as water flows through the pipes, causing noise and possible damage to the mounting surface.
Video of the Day
Step 2
Cut the caulking surrounding a loosened escutcheon plate with the utility knife into strips of about 3 inches in length. Pull the caulk from around the plate with a putty knife.
Step 3
Remove the faucet handles from the wall by unscrewing the small screw in the center of the handles that hold them in place, using a Phillips-head screwdriver. A small plate may cover the screw. Pop the plate off the handle using a small flat head screwdriver, to gain access to the screw beneath.
Step 4
Pull the handle from the pipe that it's connected to, and then pull the escutcheon plate from the wall slightly, not taking it completely from around the faucet's wall pipe. If a screw holds the plate I place, unscrew it before pulling the plate away. Scrape any residue of caulking from the wall and the base of the plate.
Step 5
Place a new bead of caulking around the base of the escutcheon plate along the edge. Press the plate back against the wall with the caulk forming a seal and holding the plate in place. Screw any retaining screw removed from the plate back into place.
Step 6
Remove any existing plumbers tape from the faucet handle. Wrap three courses of new tape around the handle to prevent leakage and tighten the handle onto the threads of the faucet's valve stem. Remount the faucet handle.
Step 7
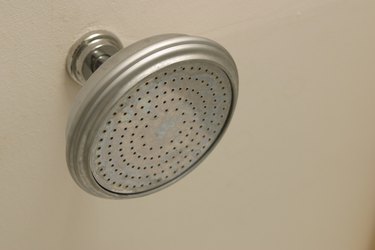
Examine the showerhead for looseness by wiggling it in place. If the showerhead moves on the threaded pipe extending from the wall, then remove the loose showerhead by unscrewing it from the pipe threads. If you cannot move the showerhead in place, then check along its base for a retaining screw holding it in position. Unscrew the retaining screw and the remove the showerhead.
Step 8
Pull lightly back and forth on the shower head pipe and listen for a rattle within the wall. If the pipe rattles then it's become loosened slightly within the wall cavity. Unscrew and remove the escutcheon plate around the base of the shower head pipe against the wall and pull the plate away, exposing the opening into the wall around the pipe's base. Spray a bead of expanding foam caulk around the base of the pipe, and then press the escutcheon plate back into place and screw it onto the wall again. The caulk will expand around the pipe inside the wall, holding it in place and removing the looseness.
Step 9
Remove any existing plumber's tape from the pipe threads the showerhead was screwed onto by unwrapping the tape from the mount.
Step 10
Tape the threaded pipe with a new wrap of plumber's tape to reduce the possibility of leakage. Wrap the tape around the threads for about three revolutions, molding the tape tightly against the threads with your hands. Screw the showerhead back in place, and restore any retaining screws that were present. Check the fit of the showerhead by wiggling it in place. The showerhead should not move on the threaded pipe, but only on the mobile joint that helps direct the shower spray. Allow the caulk to dry overnight before using the shower.
Video of the Day