Things You'll Need
Tape
Utility knife
1/4-inch cork sheets
Contact cement
Newspaper
Marker
Band saw
Circular saw

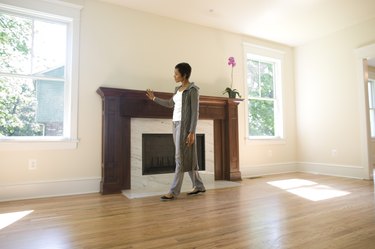
The idea of installing hardwood flooring in a room with a fireplace is one that many homeowners find appealing --- until it's time to install the flooring around the fireplace mantel and hearth area. Suddenly, the idea can seem complicated. But don't let that deter you. Installing hardwood around a fireplace is not that complicated. Measure carefully, take your time and use the right tools and materials to create a warm and cozy fireplace setting that looks like the hardwood floors were installed by a professional.
Step 1
Remove the existing floor covering, such as carpeting or tile, so that you strip the floor down to the plywood or cement subfloor base.
Video of the Day
Step 2
Measure, cut and lay the proper type of underlayment material recommended by the hardwood flooring manufacturer on top of the subfloor.
Step 3
Cut a 1-inch strip of cork with a utility knife and glue it with contact cement onto the subfloor around the perimeter of the fireplace hearth. The cork will camouflage the expansion gap that you will need at the edges of the hardwood floorboards. Expansion gaps are typically 3/8- to 5/8-inch; however, follow the hardwood flooring manufacturer's directions and use the recommended expansion gap measurement. The expansion gap allows the hardwood flooring to naturally expand and contract during warm, cold or humid weather to prevent the flooring from swelling or buckling if it is too close to the mantel, hearth or baseboards.
Step 4
Create a template of the mantel and hearth area. Take sheets of newspaper and fit them around the area. Use a marker to draw lines for the template, according to the shapes and cut-in spaces of the fireplace mantel and hearth area. You will use the template to make special cuts to accommodate the edges of the mantel or an irregular hearth shape, such as a circle, so the flooring matches every curve and angle of the mantel and hearth area.
Step 5
Cut the edges of the hardwood boards with the template and a band saw. A band saw makes it easy to follow curves and unusual lines. Mark the back of each board so you will remember its position.
Step 6
Lay the hardwood boards, starting at the outermost edges of the mantel. Leave boards that will lead to entryways behind the fireplace for installation last. Your goal is to focus on establishing the position and laying the boards that lead to the mantel and hearth area.
Step 7
Measure and cut the boards with a circular saw, as needed, to extend and reach the outer edges of the room that meet up with baseboards. Remember to leave the recommended expansion gap -- 3/8- to 5/8-inch -- between the edge of the boards and baseboards.
Step 8
Use the appropriate technique to install the boards. For example, if you are laying interlocking tongue and groove boards, then fit, snap and lock each board into position. If you are installing boards that require adhesive, follow the manufacturer's recommendations to "butter" the back of the hardwood board and/or the cement or plywood subfloor.
Step 9
Continue laying boards until you reach the entryways. Make a template for each door entryway and cut the final boards according to the template measurement. However, remember to reduce the board length to accommodate expansion gaps. Use the appropriate transition piece, such as a T-molding, to transition from hardwood to carpeting or flush reducer transition pieces to go from hardwood to tile.
Tip
If there is any electrical wiring around the mantel or hearth, use a dado blade to cut grooves in the boards to accommodate the wires.
Video of the Day
- Hardwood Flooring Talk: How to Install Around a Fireplace?
- Hardwood Installer: Trim Options At Fireplace Hearths
- The Family Handyman: How to Lay Hardwood Floor With a Contrasting Border
- Find Any Floor: Installing Hardwood Flooring Around Trims & Transitions
- Facelift Floors: Frame Around Fireplace Q&A